Look, bathrooms are slippery. Add in some wet floors, smooth surfaces, and the fact that you're often moving between sitting and standing, and you've got a recipe for falls. That's where safety rails come in, they're not just for people recovering from surgery or dealing with mobility issues. They're smart additions for anyone who wants to stay safe and independent in their own home.
Let's walk through everything you need to know about bathroom safety rails, from picking the right type to getting them installed properly.
Understanding Different Types of Safety Rails
Not all rails are created equal, and choosing the right one depends on where you're installing it and what you need it for.
Wall-Mounted Straight Rails
These are your bread-and-butter option. They mount permanently to the wall and work just about anywhere, next to the toilet, along shower walls, or anywhere you need a stable grip. They come in different lengths, so you can customize them to fit your space.
The best part? They're versatile. You can position them horizontally for pushing up from a seated position or vertically for steadying yourself during transitions.
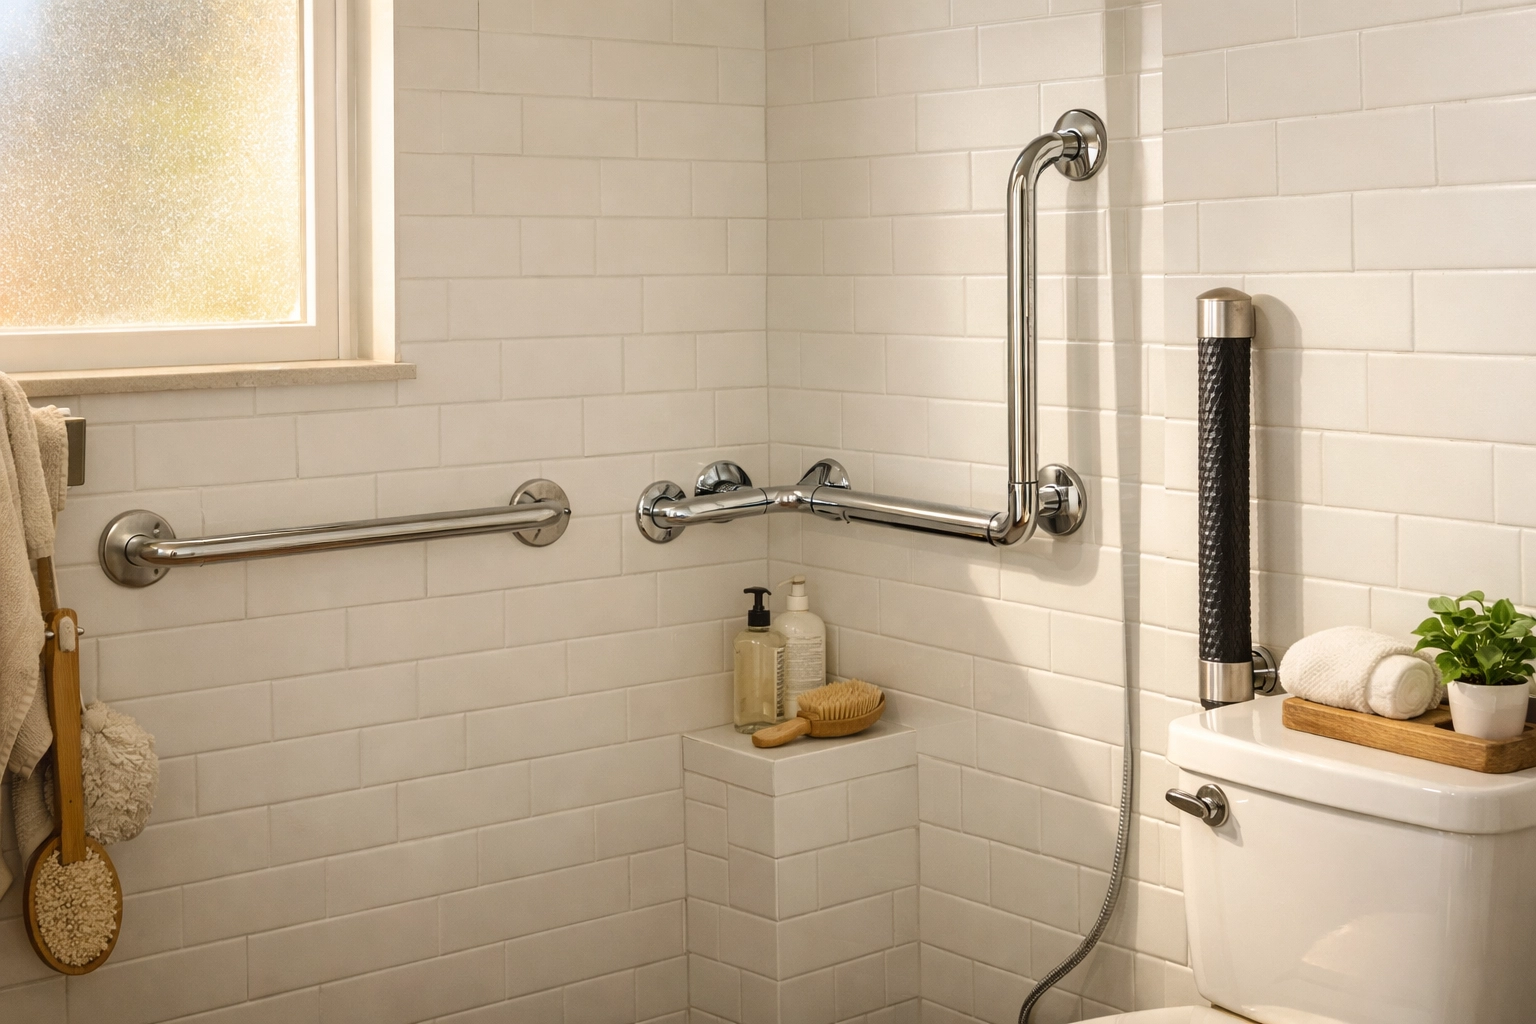
L-Shaped Rails
Think of these as the corner specialists. They combine horizontal and vertical support in one unit, making them perfect for tight spaces like shower corners or beside bathtubs. The dual orientation gives you multiple grab points, which can be a lifesaver when you're maneuvering in a cramped area.
Textured and Anti-Slip Rails
These rails feature specially designed surfaces that maintain grip even when wet or soapy. If your bathroom gets particularly steamy or you have mobility challenges that affect your grip strength, these are worth considering. The textured surface provides extra security when standard smooth rails might feel slippery.
A Word About Suction Cup Rails
You'll see these advertised as easy, drill-free options. Here's the truth: suction cup rails are only appropriate for temporary use, maybe during recovery from surgery or when traveling. Never rely on them as a permanent safety solution. They can't consistently support your full body weight, and the consequences of a failed suction cup don't bear thinking about.
Getting the Height and Position Right
Installing a rail at the wrong height is like having no rail at all. Here's where they should go.
Around the Toilet
For toilet safety rails, aim for about 27 inches from the floor when mounting on the wall opposite your transfer side. This height lets you use both hands effectively, one on the wall rail and one on a drop-down rail if you have one.
For general support rails in the toilet area, position them between 30 to 40 inches from the floor. This range works for most adults and provides good leverage whether you're sitting down or standing up.

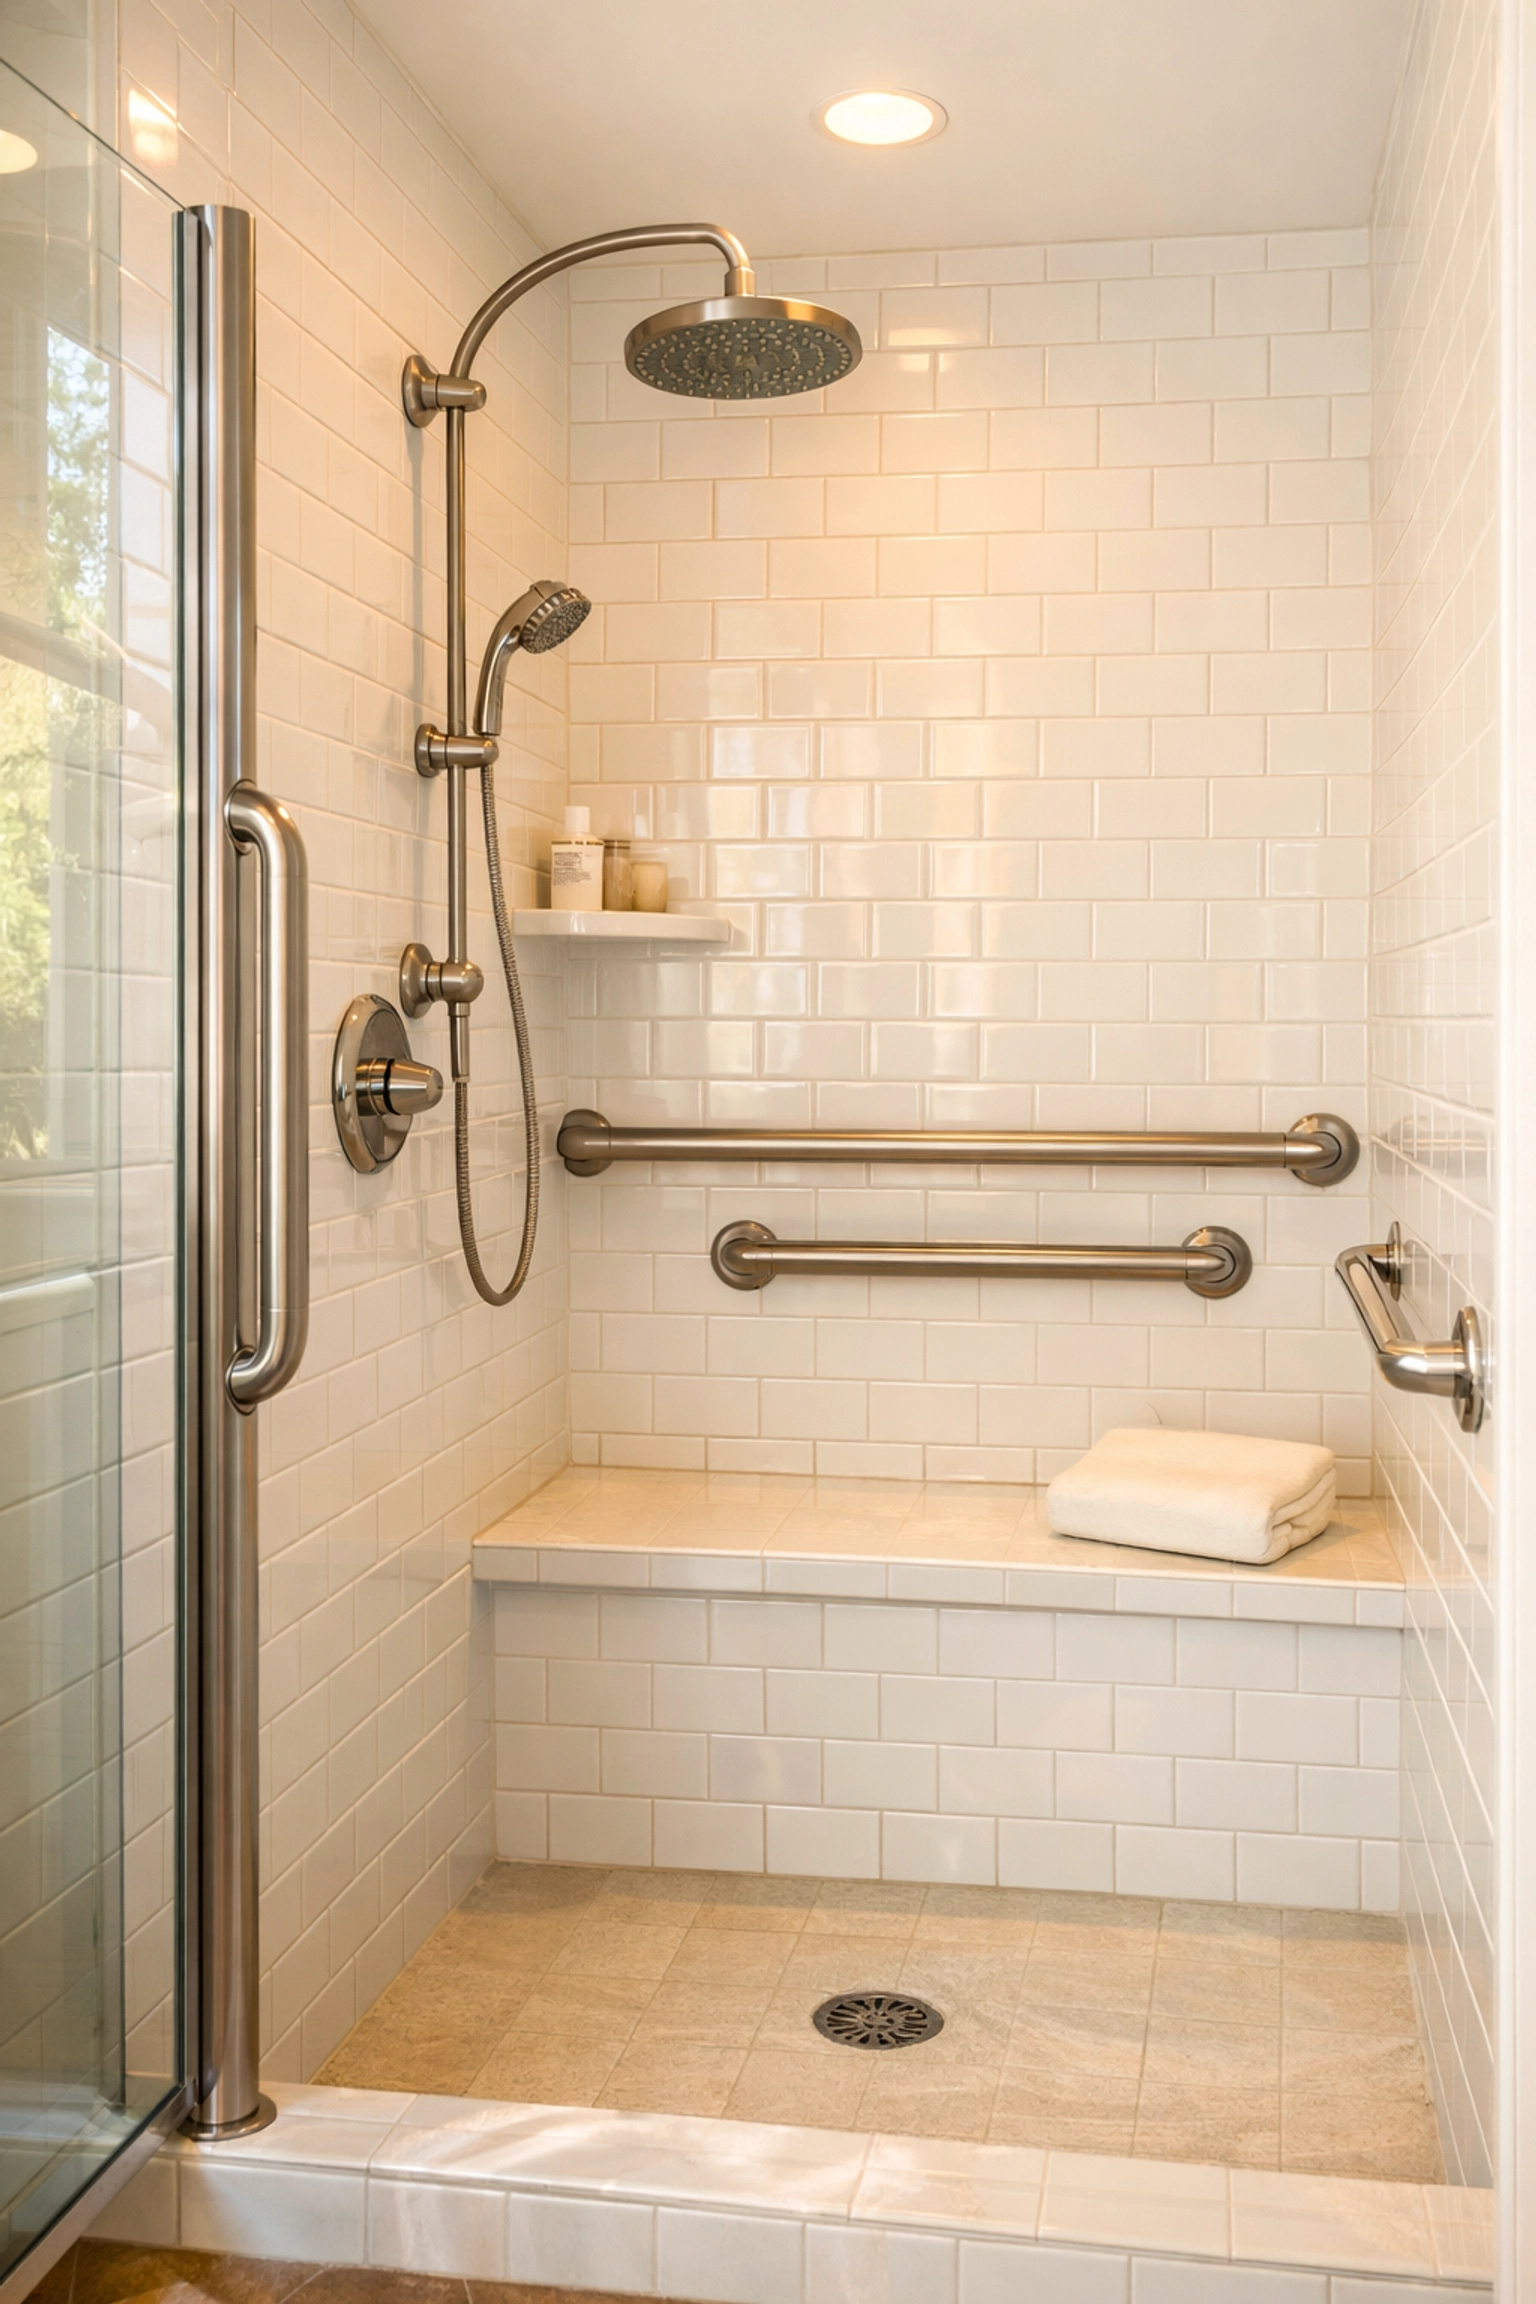
In the Shower
Showers need what professionals call a "system of support", multiple rails working together to keep you safe through different movements.
Start with an entry rail positioned vertically at the entrance. It should span about 31 to 47 inches in height, giving you something to hold while transitioning from dry floor to wet shower tray.
Along the long wall, install a horizontal washing rail at roughly waist height. This gives you something to lean against while washing your feet or shampooing your hair, times when your balance might be compromised.
Side wall rails should sit about 34 to 36 inches above the shower floor. This height works well whether you're stepping in and out or maintaining balance while standing.
If you use a shower seat, add a horizontal rail about 8 inches above the seat. This positioning makes it easier to push yourself up to standing.
For Bathtubs
Bathtubs present unique challenges because you're stepping over a rim and transitioning between standing and sitting in a confined space.
Install a horizontal sit-to-stand rail on the wall above the tub rim, positioned about 4 inches above the rim itself. This gives you leverage when pushing up from a seated position in the tub.
Add a vertical entry handle on the outer wall at roughly 24 inches high. This provides stability while you're stepping over the rim, arguably the riskiest moment of using a bathtub.
Horizontal, Vertical, or Diagonal?
The orientation of your rail matters more than you might think.
Horizontal rails excel when you need to push up or lean. They're your go-to choice next to toilets, beside seats, or anywhere you'll be transitioning from sitting to standing.
Vertical rails shine during transitions and entries. They help you steady yourself while stepping into showers or over tub rims.
Diagonal rails might seem like they offer the best of both worlds, but avoid them unless an occupational therapist specifically recommends one. When your hands are wet, they can easily slip down a diagonal surface. Stick with horizontal or vertical orientations for reliability.
Installation Requirements That Actually Matter
Here's where people often cut corners, and it's where things can go seriously wrong.
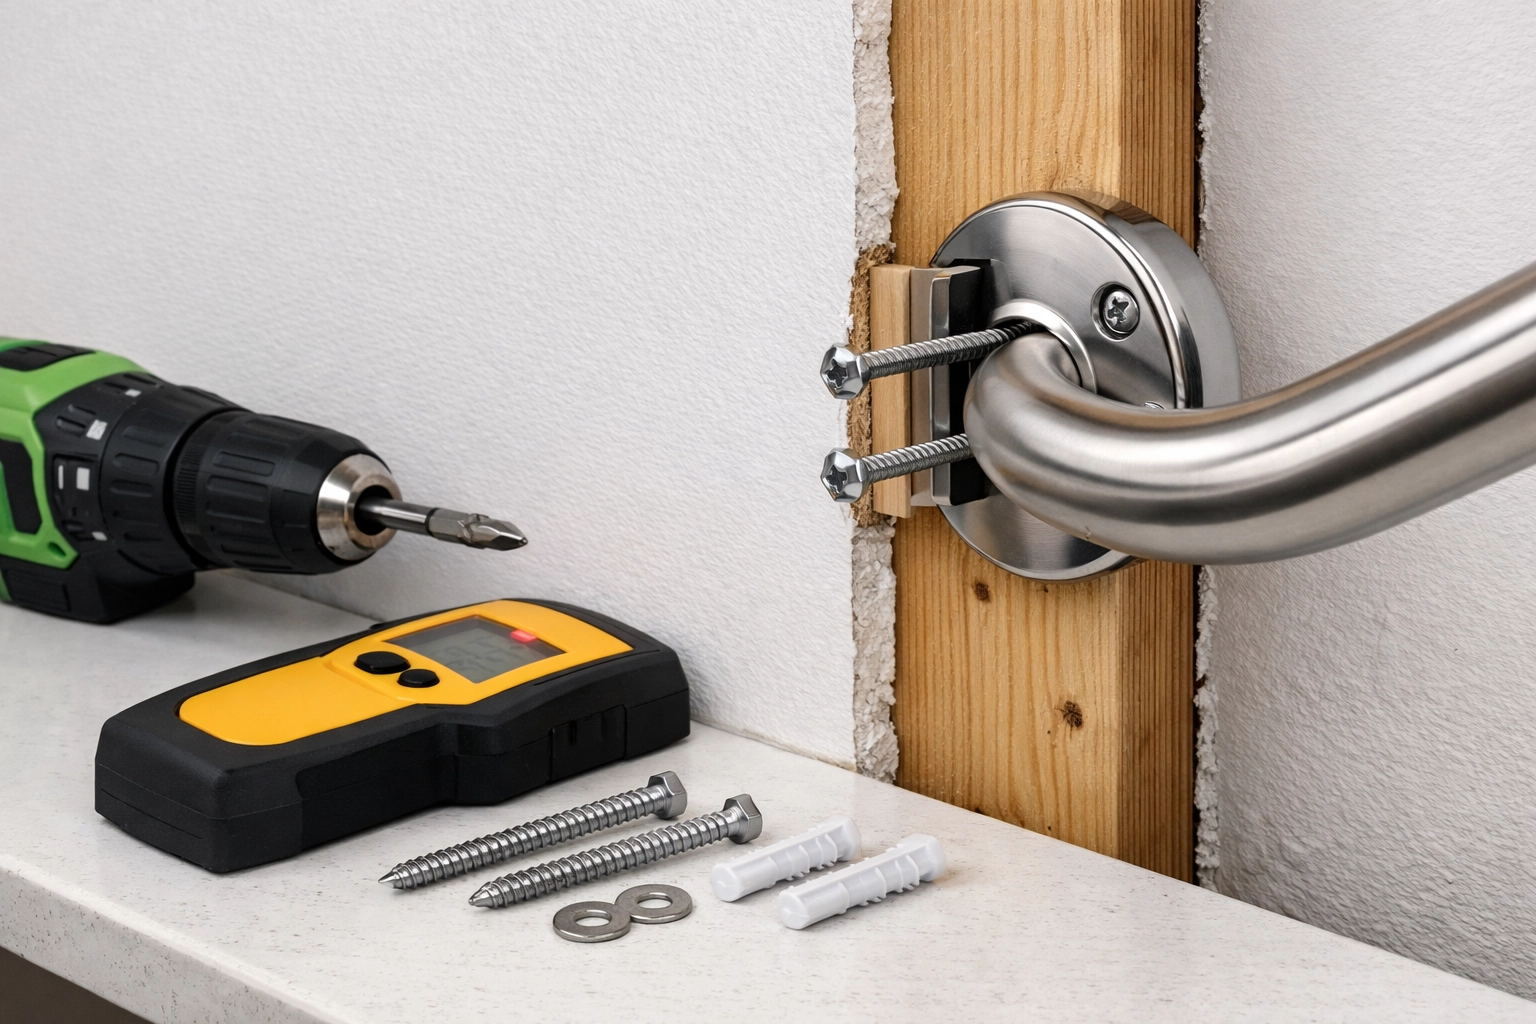
Anchoring to Solid Surfaces
Your rail must attach to something solid. We're talking studs in your wall or solid masonry, not just drywall. The rail needs to support at least 250 pounds of force, and that requires proper anchoring.
For brick or block walls, heavy-duty wall plugs and stainless steel screws will do the job. For walls with studs, you need to find those studs and drill directly into them.
If the stud isn't in the ideal position (which happens more often than you'd think), you have options. You can remove a section of tile, install a marine-grade plywood reinforcement board behind the drywall, then re-tile. Yes, it's more work, but it's the safe approach.
Always: and I mean always: use a stud finder or detector before drilling. You don't want to hit water pipes or electrical cables. Trust me on this one.
Clearance and Spacing
Leave about 1.5 inches of space between the wall and the grab bar. This clearance gives your hand room to wrap around the bar properly and get a secure grip.
Make sure the rail isn't blocked by towel racks, toilet paper holders, or other bathroom fixtures. It needs to be easily reachable from whatever position you'll be in when using it.
What Never to Do
Never use toggle bolts as your primary anchoring method. While heavy-duty toggle bolts can work in a pinch when studs aren't available, they're not ideal for permanent installations supporting body weight.
And I'll say it again: don't rely on suction cups for anything other than temporary, short-term use. They're fine for a week of recovery after surgery, but not as a permanent solution.
Making Rails Work for Specific Needs
Some situations call for extra consideration.
If you're installing rails for someone with dementia or vision impairment, color contrast matters. Blue or red rails against white tiles provide much better visibility than stainless steel rails that blend into chrome fixtures.
For anyone who needs multiple rails just to safely enter a bathtub, consider whether a walk-in tub might be a better long-term solution. There's no shame in acknowledging that sometimes removing the obstacle (that high tub rim) makes more sense than adding more supports.
Keeping Your Rails Safe Over Time
Installation isn't the end of the story. Regular maintenance keeps your rails reliable.
Check your rails monthly. Look for loose screws, cracks in the mounting hardware, or any movement when you pull on them. If you find any issues, address them immediately. A loose rail is more dangerous than no rail because it gives false confidence.
For textured rails, keep an eye on the surface. Over time, the texture can wear down, reducing grip. Clean them regularly with non-abrasive cleaners to remove soap buildup without damaging the surface.
Professional Installation vs. DIY
Let's be honest: if you're comfortable with home improvement projects, have the right tools, and can confidently locate studs and avoid pipes, you might be able to install safety rails yourself.
But if you're uncertain about any part of the process, get a professional. The cost of professional installation is minimal compared to the cost of a fall caused by improperly installed equipment. Many home healthcare equipment companies offer installation services, and some insurance plans may cover part or all of the cost.
Planning Your Bathroom Safety System
Think of bathroom safety rails as part of a complete system, not isolated additions.
Walk through your bathroom routine and identify every moment where you change position or move from a dry surface to a wet one. Each of these transitions is a potential installation point.
Consider how you move through the space. Do you steady yourself on the counter while reaching for towels? That's a spot where a rail might help. Do you feel unsteady while drying off after a shower? A rail positioned for that specific movement could prevent a fall.
The goal isn't to turn your bathroom into a jungle gym of rails. It's to provide strategic support at the moments when you're most vulnerable to losing your balance.
The Bottom Line
Bathroom safety rails aren't complicated, but they do require thought and proper installation. Choose the right type for each location, install them at appropriate heights, anchor them securely to solid surfaces, and maintain them regularly.
Most importantly, don't wait until after a fall to install them. Prevention beats recovery every single time. A bathroom with well-placed safety rails lets you maintain your independence and confidence: and that's what this is really all about.

