If you've ever experienced a fall, you know that moment of shock that follows. Your heart races, and the immediate question becomes: "How do I get back up?" For adults over 65, knowing how to safely rise after a fall isn't just useful information, it's an essential skill that can prevent further injury and build confidence.
The reality is that falls happen. Even with the best prevention strategies in place, nearly one in four older adults falls each year. What makes the difference between a minor incident and a serious injury often comes down to what happens next. Can you get up safely on your own? Do you know the right sequence of movements? Or will panic and improper technique lead to additional harm?
Let's walk through seven techniques that physical therapists recommend for getting up after a fall. These aren't just theoretical steps, they're practical, tested methods that you can practice ahead of time so your body knows what to do if you ever need it.
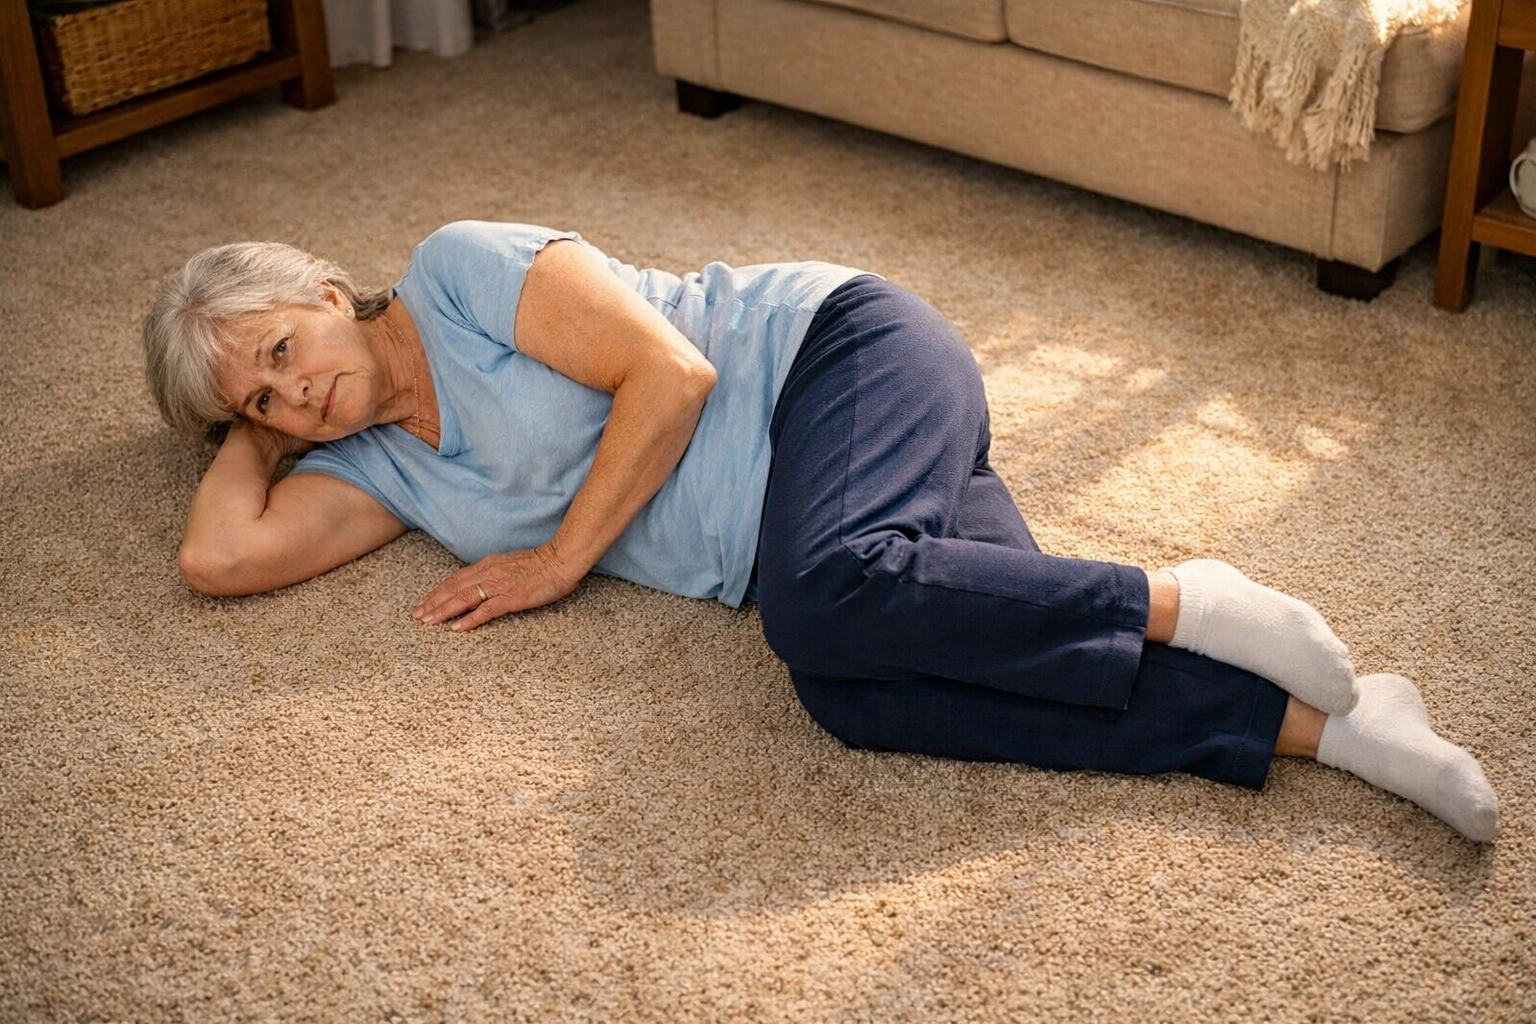
Technique 1: Pause and Assess Your Condition
Before you make any attempt to move, take a breath and check yourself over. This initial assessment is arguably the most important step in the entire process.
Lie still for at least 30 seconds. Ask yourself these questions:
- Do I feel sharp pain anywhere?
- Can I move my arms and legs without severe discomfort?
- Did I hit my head?
- Am I bleeding?
- Do I feel dizzy or disoriented?
If you experience severe pain, suspect a fracture, or feel that something is seriously wrong, don't attempt to get up. Call for help instead. It's better to wait for assistance than to cause further injury by moving incorrectly.
If you feel relatively okay but shaken, that's normal. Give yourself permission to rest on the floor for a minute or two. Rushing the process when you're stressed increases your risk of falling again.
Technique 2: Roll Onto Your Side
Once you've determined it's safe to move, the next step is rolling from your back onto your side. This position gives you more control and makes the subsequent movements easier.
Choose whichever side feels more comfortable or is closer to a piece of furniture. Bend the knee on the side you'll roll toward. This creates momentum and makes the roll smoother.
Turn your head in the direction you're rolling, and let your body follow. Use your arms to help guide the movement, reaching across your body with the upper arm provides additional leverage.
You should end up lying on your side with both knees bent and your body slightly curled. This is called the side-lying position, and it's your launching point for everything that comes next.
Take another moment here. Make sure you still feel stable and pain-free before continuing.
Technique 3: Push Up to Side-Sitting
From the side-lying position, you'll transition to sitting. This is where your upper body strength comes into play, but the technique matters more than raw power.
Place your lower arm flat on the floor in front of your chest, elbow bent. Your upper hand should be positioned on the floor near your lower shoulder. Push down with both arms while swinging your legs slightly away from your body.
As you press into the floor, your upper body will lift. Your legs act as a counterbalance, as they lower toward the floor, your torso rises. You'll end up in a seated position with both legs pointing in the same direction and your knees bent.
This side-sitting position allows you to rest again if needed. You're making progress, and there's no prize for speed. If you need to catch your breath or steady yourself, do it now.
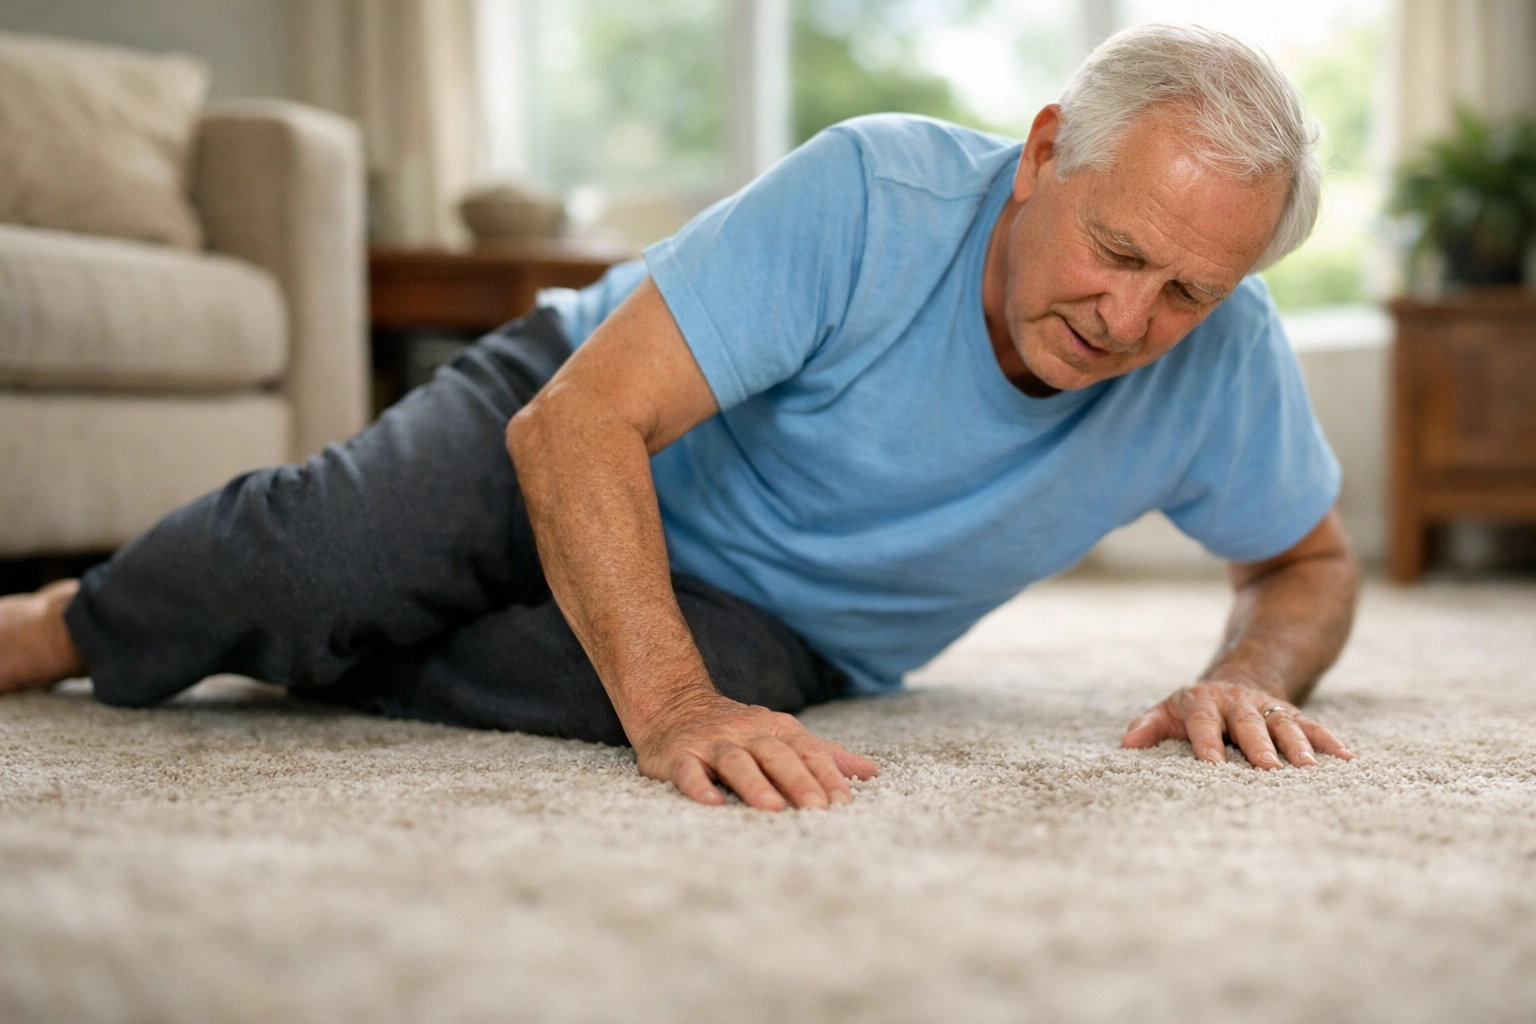
Technique 4: Move to Hands and Knees
The hands-and-knees position, sometimes called the quadruped position, is remarkably stable. It distributes your weight across four points and gives you a solid base to work from.
From side-sitting, lean forward and place both hands on the floor in front of you, shoulder-width apart. Shift your weight onto your hands and carefully bring one knee underneath you, then the other.
You'll end up on all fours with your hands directly under your shoulders and your knees under your hips. Keep your back relatively flat, not arched or rounded.
This position might feel vulnerable at first, especially if you're on a hard floor. If your knees are sensitive, try to position yourself on a rug or carpet if possible. If you practiced this ahead of time on your bed or a padded mat, the floor version will feel more familiar.
Take your time here. The hands-and-knees position is where many people rest the longest because it feels stable and secure.
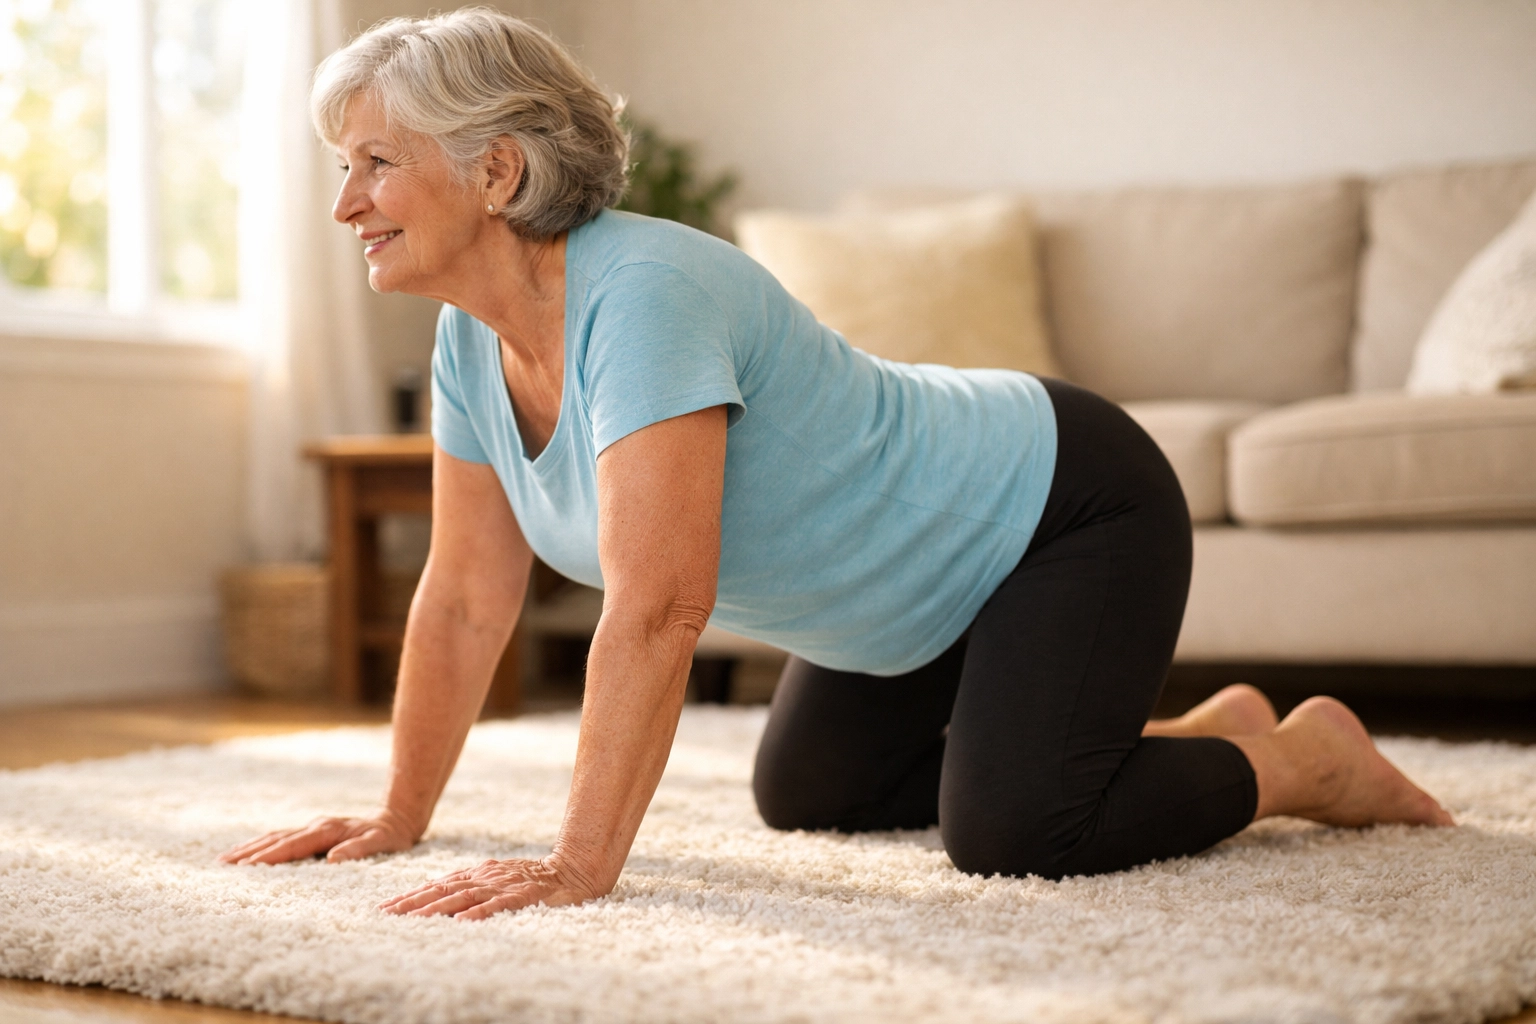
Technique 5: Crawl to the Nearest Support
Now comes an important decision: where will you stand up? You need something sturdy to hold onto, a heavy chair, a couch, a bed frame, or a solid piece of furniture.
From your hands-and-knees position, look around and identify the closest reliable support. Then crawl toward it. Yes, crawling might feel undignified, but it's the safest way to move across the floor while maintaining a low center of gravity.
Crawl slowly and deliberately. Move one hand forward, then the opposite knee. Then the other hand and knee. This cross-pattern movement is stable and natural.
When you reach your chosen support, position yourself so the furniture is directly in front of you. Place both hands on the seat of a chair or the edge of a bed. Make sure whatever you're holding is heavy enough that it won't slide or tip.
Technique 6: Progress Through Kneeling Positions
Now you'll move through two intermediate positions before standing: high kneeling and half-kneeling. These transitions are crucial because they gradually raise your center of gravity.
Start with high kneeling. From hands and knees, walk your hands up the furniture until you're kneeling upright with just your knees on the floor. Your shins should be flat against the floor, and you should be gripping the chair or bed firmly for support.
Rest here for a moment. High kneeling is surprisingly tiring for your core muscles, but it's preparing your body for standing.
Next comes half-kneeling. Choose your stronger leg: the one that feels more reliable. Bring that foot forward and plant it flat on the floor while keeping the other knee down. You'll look like you're proposing, with one knee up and one knee down.
This half-kneeling position is your final staging area before standing. Make sure your front foot is planted firmly and your hands have a solid grip on your support.
Technique 7: Stand Up Using Proper Form
The final push to standing requires technique and patience. This is not the time to rush.
From half-kneeling, shift your weight forward onto your front leg. Push down through your front foot while pulling up with your arms on the furniture. Your back leg will naturally straighten as you rise.
As you come up, keep your core engaged. Don't arch your back or lean too far forward. The movement should feel controlled, with your front leg doing most of the work.
Once you're standing, don't immediately let go of the furniture. Hold on and take several deep breaths. Stand still for at least 30 seconds to make sure you're not dizzy or lightheaded.
If you feel unsteady, sit down in the chair you just used to stand up. There's no shame in taking a break. You just accomplished something physically demanding.
Practicing Makes Perfect
Here's the crucial part that many people overlook: you should practice these techniques before you actually fall. Waiting until you're injured, scared, and lying on the floor is not the time to learn a new skill.
Consider practicing the full sequence once a week. You can start by doing it on your bed, which is softer and less intimidating than the floor. As you build confidence, try it on the floor with some cushions nearby.
Physical therapists often use a method called backward chaining to teach this skill. You start by practicing just the final step: standing up from half-kneeling. Once that feels easy, you add the previous step, and so on, working backward through the sequence.
This approach builds confidence because you master each position before adding complexity. It also helps your muscles learn the movement patterns so they become automatic.
Regular strength and balance exercises also make a significant difference. The CDC recommends strength and balance training three times per week to reduce fall risk and improve recovery ability. Activities like tai chi, yoga, or simple chair exercises can all help build the physical capacity you need to get up safely.

When to Call for Help
Sometimes getting up on your own isn't possible or advisable. If you've been on the floor for more than a few minutes and can't get up, or if you have any of these warning signs, call for help:
- Severe pain in your hip, leg, arm, or back
- Suspected fracture or broken bone
- Head injury or confusion
- Significant bleeding
- Dizziness that doesn't improve after resting
- Extreme weakness that prevents you from completing the sequence
There's no shame in asking for assistance. Emergency responders and family members would much rather help you up safely than have you injure yourself further trying to do it alone.
If you live alone and worry about falling, consider a personal emergency response system. These devices allow you to call for help even when you can't reach a phone.
Building Your Confidence
The fear of falling often becomes as limiting as falls themselves. Many older adults restrict their activities because they're afraid of ending up on the floor with no way to get up.
Knowing these seven techniques changes that equation. When you've practiced the sequence and know your body can do it, falls become less terrifying. You develop a kind of insurance policy: if it happens, you know what to do.
That confidence extends beyond fall recovery. People who feel capable of managing a fall often stay more active, maintain better balance, and ironically, fall less frequently.
Take the time to learn these techniques properly. Practice them regularly. Show them to family members or caregivers so they can practice too. The few minutes you invest in preparation could make all the difference when it matters most.
Remember, getting up after a fall is a skill, not a reflection of your strength or independence. With the right technique and practice, it's something nearly everyone can learn to do safely and effectively.

