Stairs are often the most intimidating part of a home as we get older. I’ve spoken with many families who view their second story almost like a restricted zone because the risk of a fall feels too high. At Fall Guys Products, we believe your home should remain your sanctuary, and that means being able to navigate every level of it with confidence.
Improving stair safety isn't just about one big renovation. It’s usually a combination of small, thoughtful changes that work together to create a secure environment. Whether you are living independently or caring for a loved one, these fifteen ideas are designed to help reduce the risk of slips and trips while making the daily climb much less stressful.
The Foundation of Visibility: Better Lighting
You can’t navigate what you can’t see. Many staircases, especially in older homes, are dim or have shadows that hide the "nose" of the step. Lighting is the first and most crucial step in fall prevention.
1. Install Dual Switches at Top and Bottom
One of the most common causes of nighttime falls is trying to navigate the stairs in the dark because the light switch is at the other end. Ensure your staircase has "three-way" switches. This allows you to turn the light on before you start your ascent or descent and turn it off once you’ve safely reached the other floor.
2. Upgrade to Bright, Even LED Bulbs
Shadows are a trip hazard. If your stairwell has a single, dim bulb, replace it with a high-lumen LED. LEDs provide a crisp, white light that mimics daylight, which is much easier on the eyes than the yellowish tint of older incandescent bulbs. Aim for even distribution so that the middle of the staircase isn't significantly darker than the ends.
3. Motion-Activated Night Lights
Middle-of-the-night trips to the kitchen or bathroom are prime times for accidents. Motion-activated plug-in lights are a low-cost, high-impact solution. Place them at the top landing and the bottom landing. Some modern versions are battery-operated and can be adhered directly to the wall at ankle level, illuminating the actual treads as you walk.
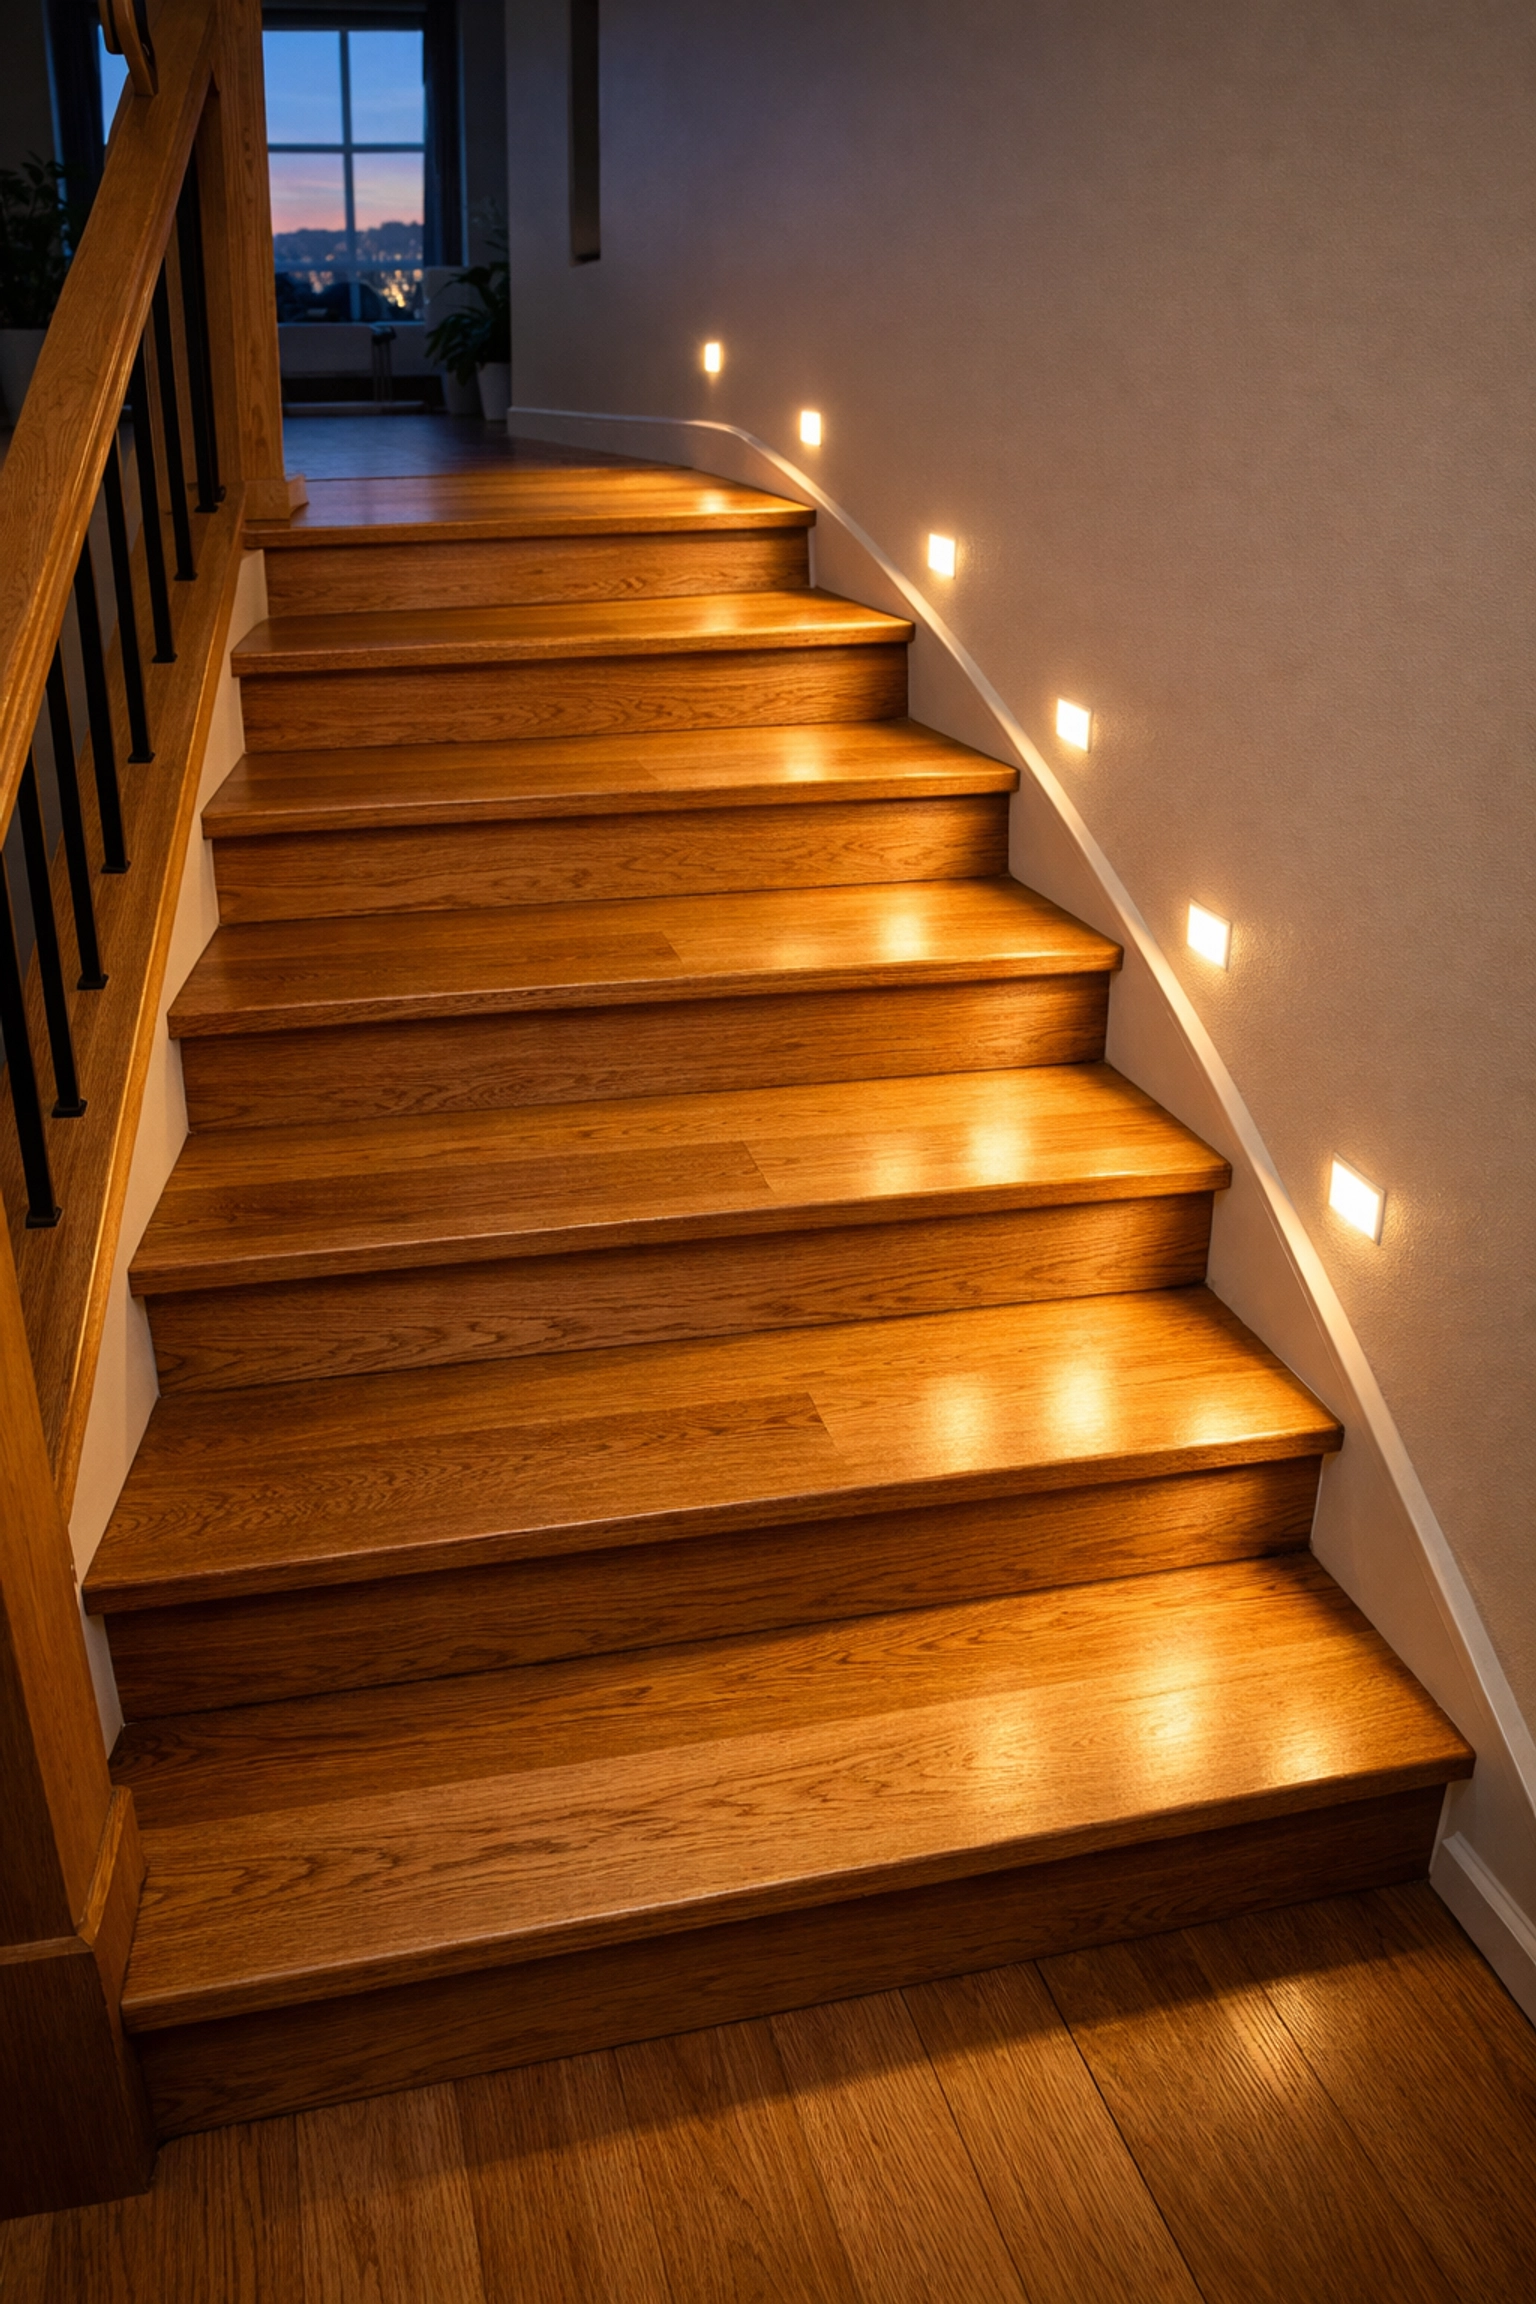
4. Recessed Step Lighting
If you’re looking for a more permanent solution, recessed lighting installed into the stringer (the side of the stairs) or the risers themselves can be a game-changer. By lighting the actual surface where your feet land, you remove the guesswork of where one step ends and the next begins.
Enhancing Traction: Non-Slip Surfaces
Most falls on stairs occur because of a slip, not a trip. Smooth wood, polished stone, or even worn-down carpet can become incredibly slick, especially if you’re wearing socks or smooth-soled slippers.
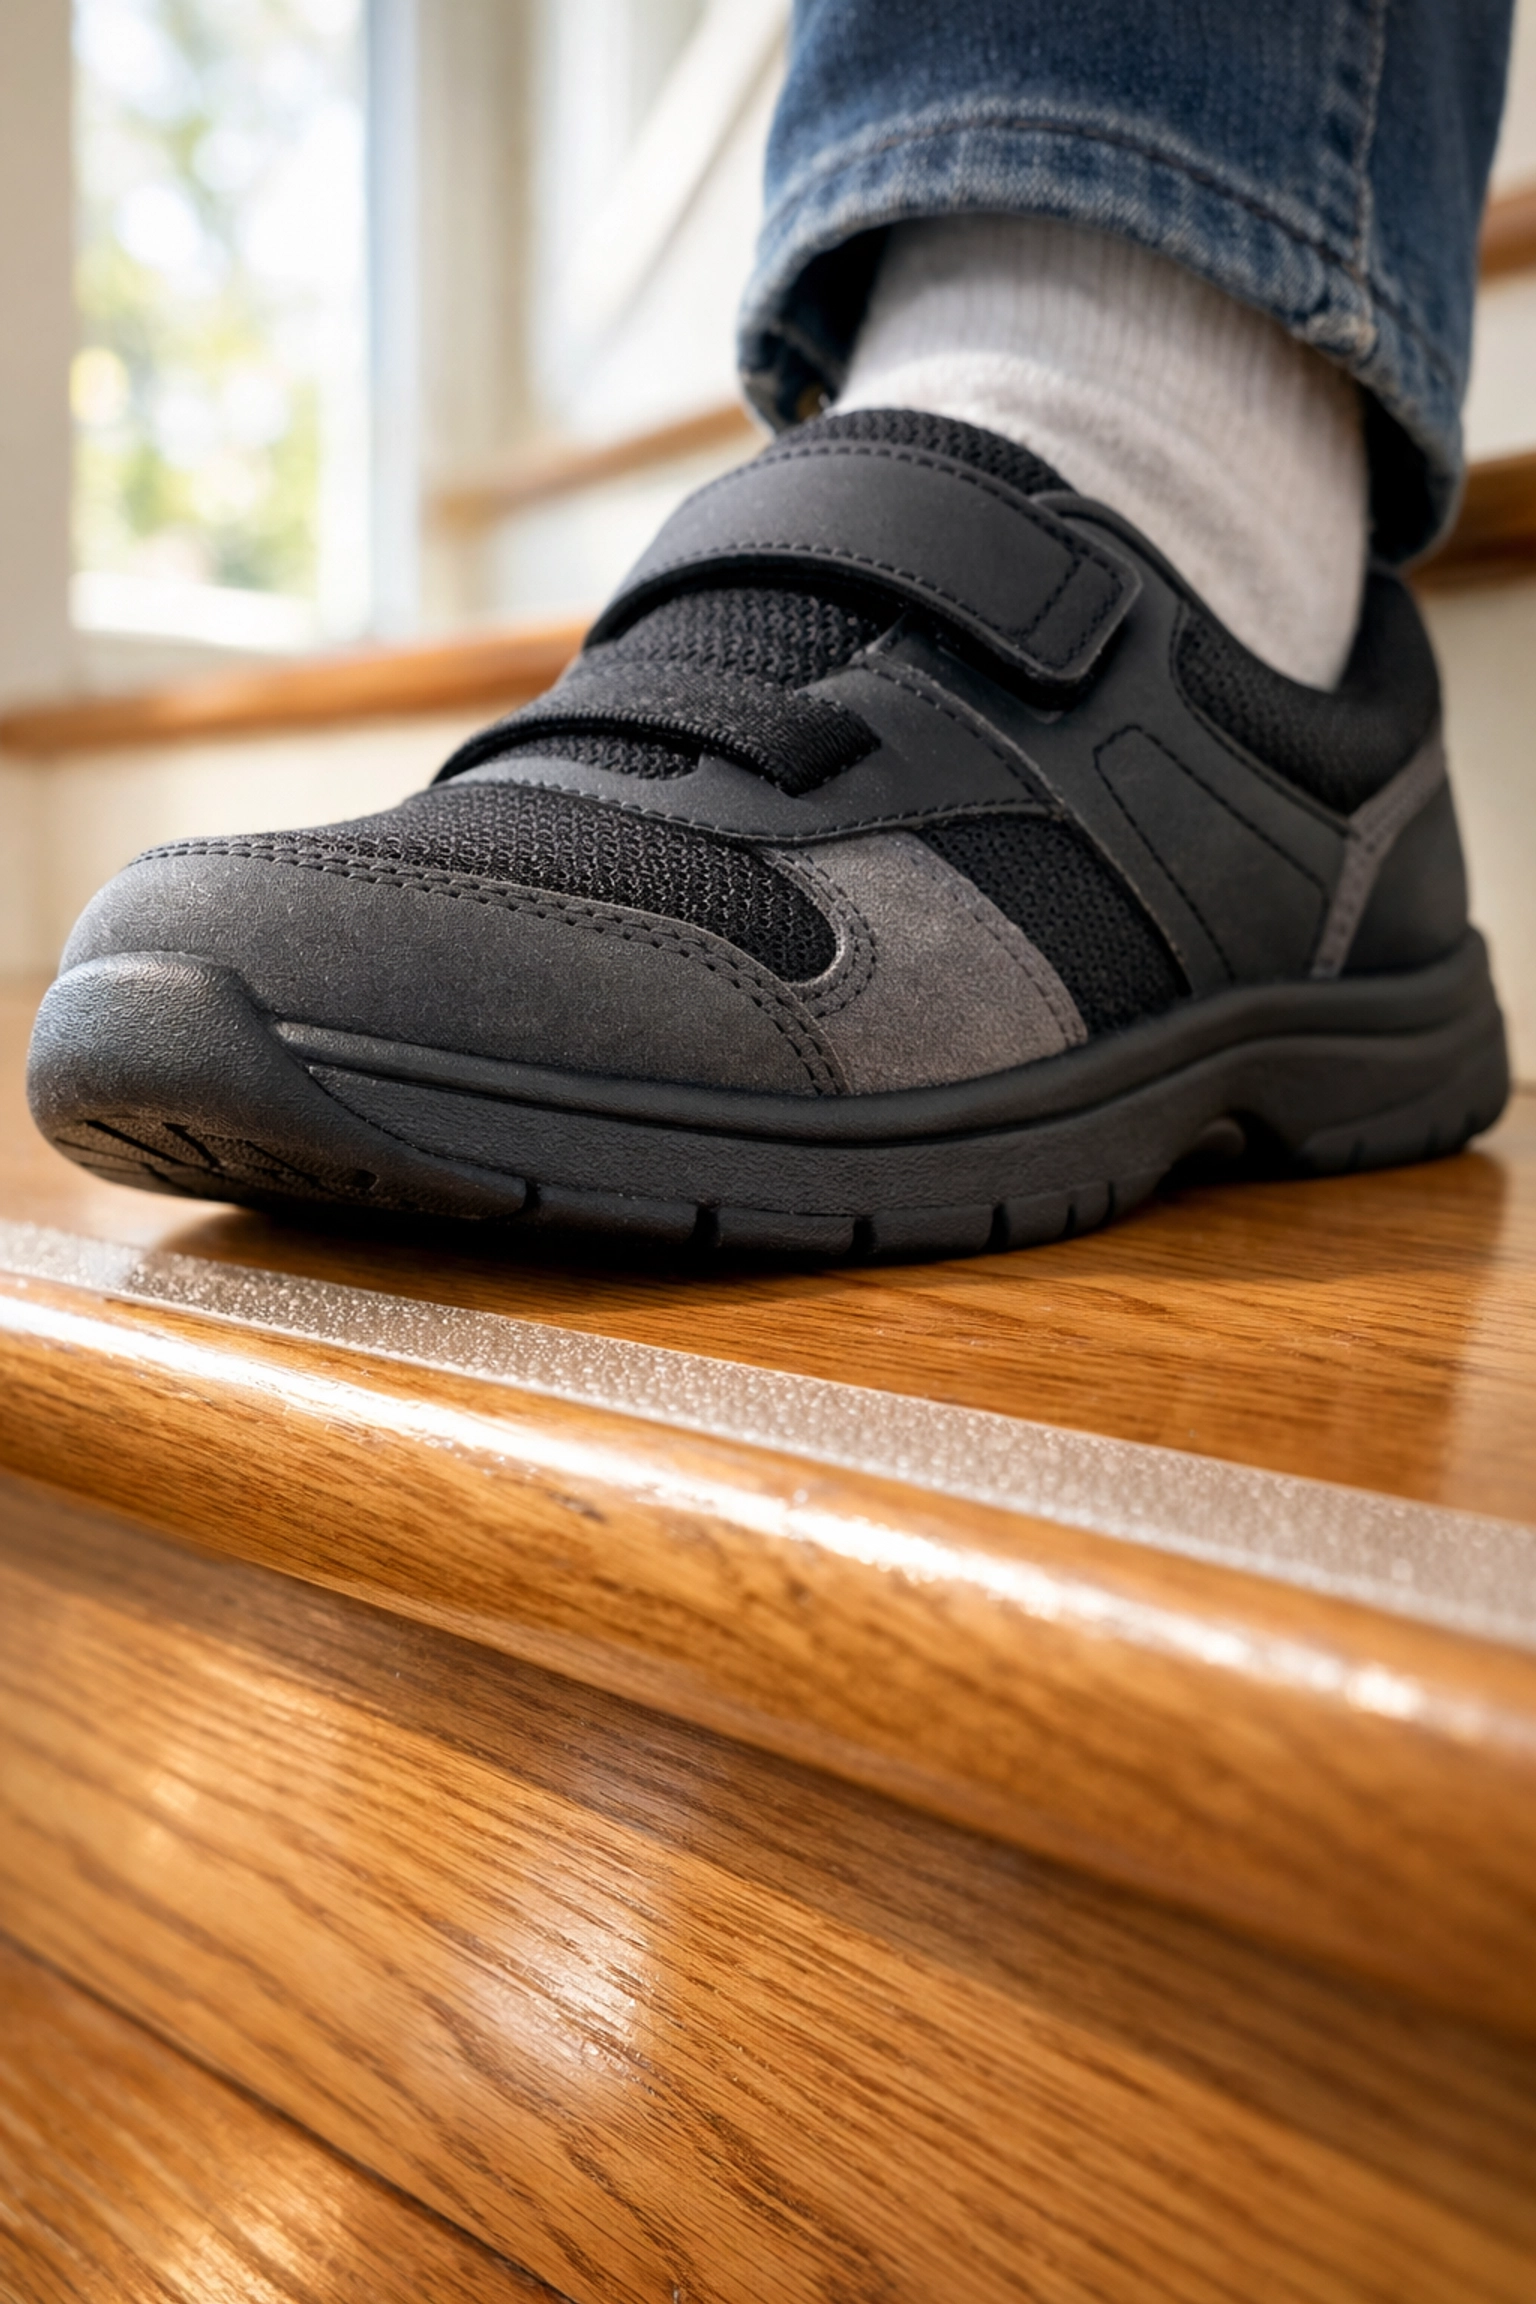
5. Clear Adhesive Anti-Slip Tapes
For those who love the look of their hardwood stairs but worry about the slickness, clear anti-slip tape is an excellent compromise. These are essentially textured strips that adhere to the edge of each step. They provide a "sandpaper" grip that catches your foot without hiding the beauty of the wood grain.
6. Rubber or Abrasive Treads
In areas like the garage or basement, or even for high-traffic indoor stairs, rubber treads offer the maximum amount of grip. They are durable, easy to clean, and provide a high-contrast edge that helps with depth perception.
7. Low-Pile, Securely Fastened Carpet
While bare wood is often slicker, loose carpet is also dangerous. If your stairs are carpeted, ensure it is a "low-pile" variety. Deep, shaggy carpets can actually hide the edge of the step and cause your foot to slide. Most importantly, check that the carpet is tightly tacked down. Any "bubbling" or sagging is a major trip hazard that needs immediate repair.
8. Skid-Resistant Floor Treatments
There are specialized transparent coatings available that can be painted or sprayed onto stairs. These treatments add a microscopic texture to the surface. While they don't change the look of the stairs much, they significantly increase the "coefficient of friction," making it much harder for a foot to slide out from under you.
Handrails: More Than Just Decorative
A handrail shouldn't just be a suggestion; it should be a rock-solid support system. Many homes only have one rail, but for someone with balance issues or weakness on one side, that isn't enough.
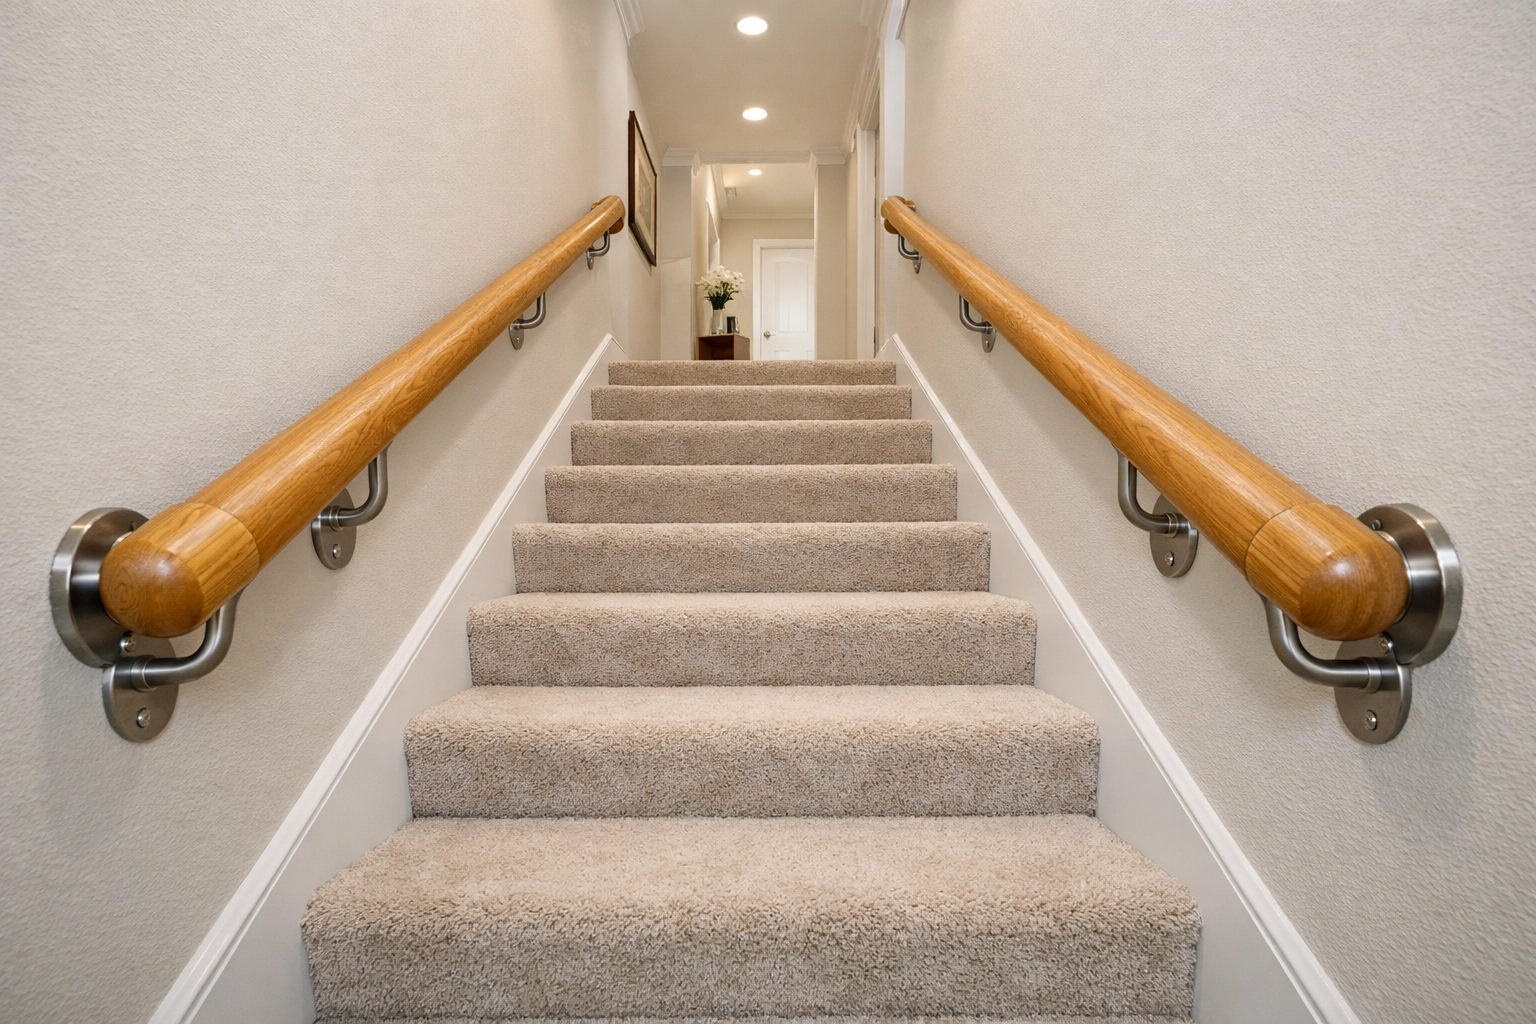
9. Install Double Handrails
This is one of the most effective modifications you can make. Having a rail on both sides of the staircase allows you to use both arms for stability. This is particularly helpful for those with arthritis or those who find they "pull" themselves up the stairs. It ensures that no matter which direction you are going, your strongest hand always has something to hold onto.
10. Ensure the Proper "Grip" Shape
A handrail is useless if you can’t wrap your hand around it. Many modern homes use wide, flat decorative boards as handrails. These are difficult to grasp during a stumble. A safe handrail should be "circumferential": meaning your fingers and thumb can almost meet when you grab it. This allows for a "power grip," which is much stronger than just resting your palm on a flat surface.
11. Extend Beyond the Last Step
Many rails end exactly where the last step ends. This is actually when you are most vulnerable. A safe handrail should extend about 12 inches past the top and bottom steps. This allows you to maintain your grip until your feet are firmly on level ground, providing a stable "anchor" as you transition from the slope to the flat floor.
12. Secure Mounting to Wall Studs
A handrail is only as strong as what it’s attached to. Over time, rails can become "wobbly" if they were only anchored into drywall. Periodically check your rails. If there is any give, they should be re-mounted into the wall studs using heavy-duty brackets. It should be able to support the full weight of an adult without moving an inch.
Visual Cues and Behavioral Safety
Sometimes, the way we perceive the stairs is just as important as the physical surface. As our vision changes, depth perception can become a challenge, making it hard to tell where one step ends and the next begins.
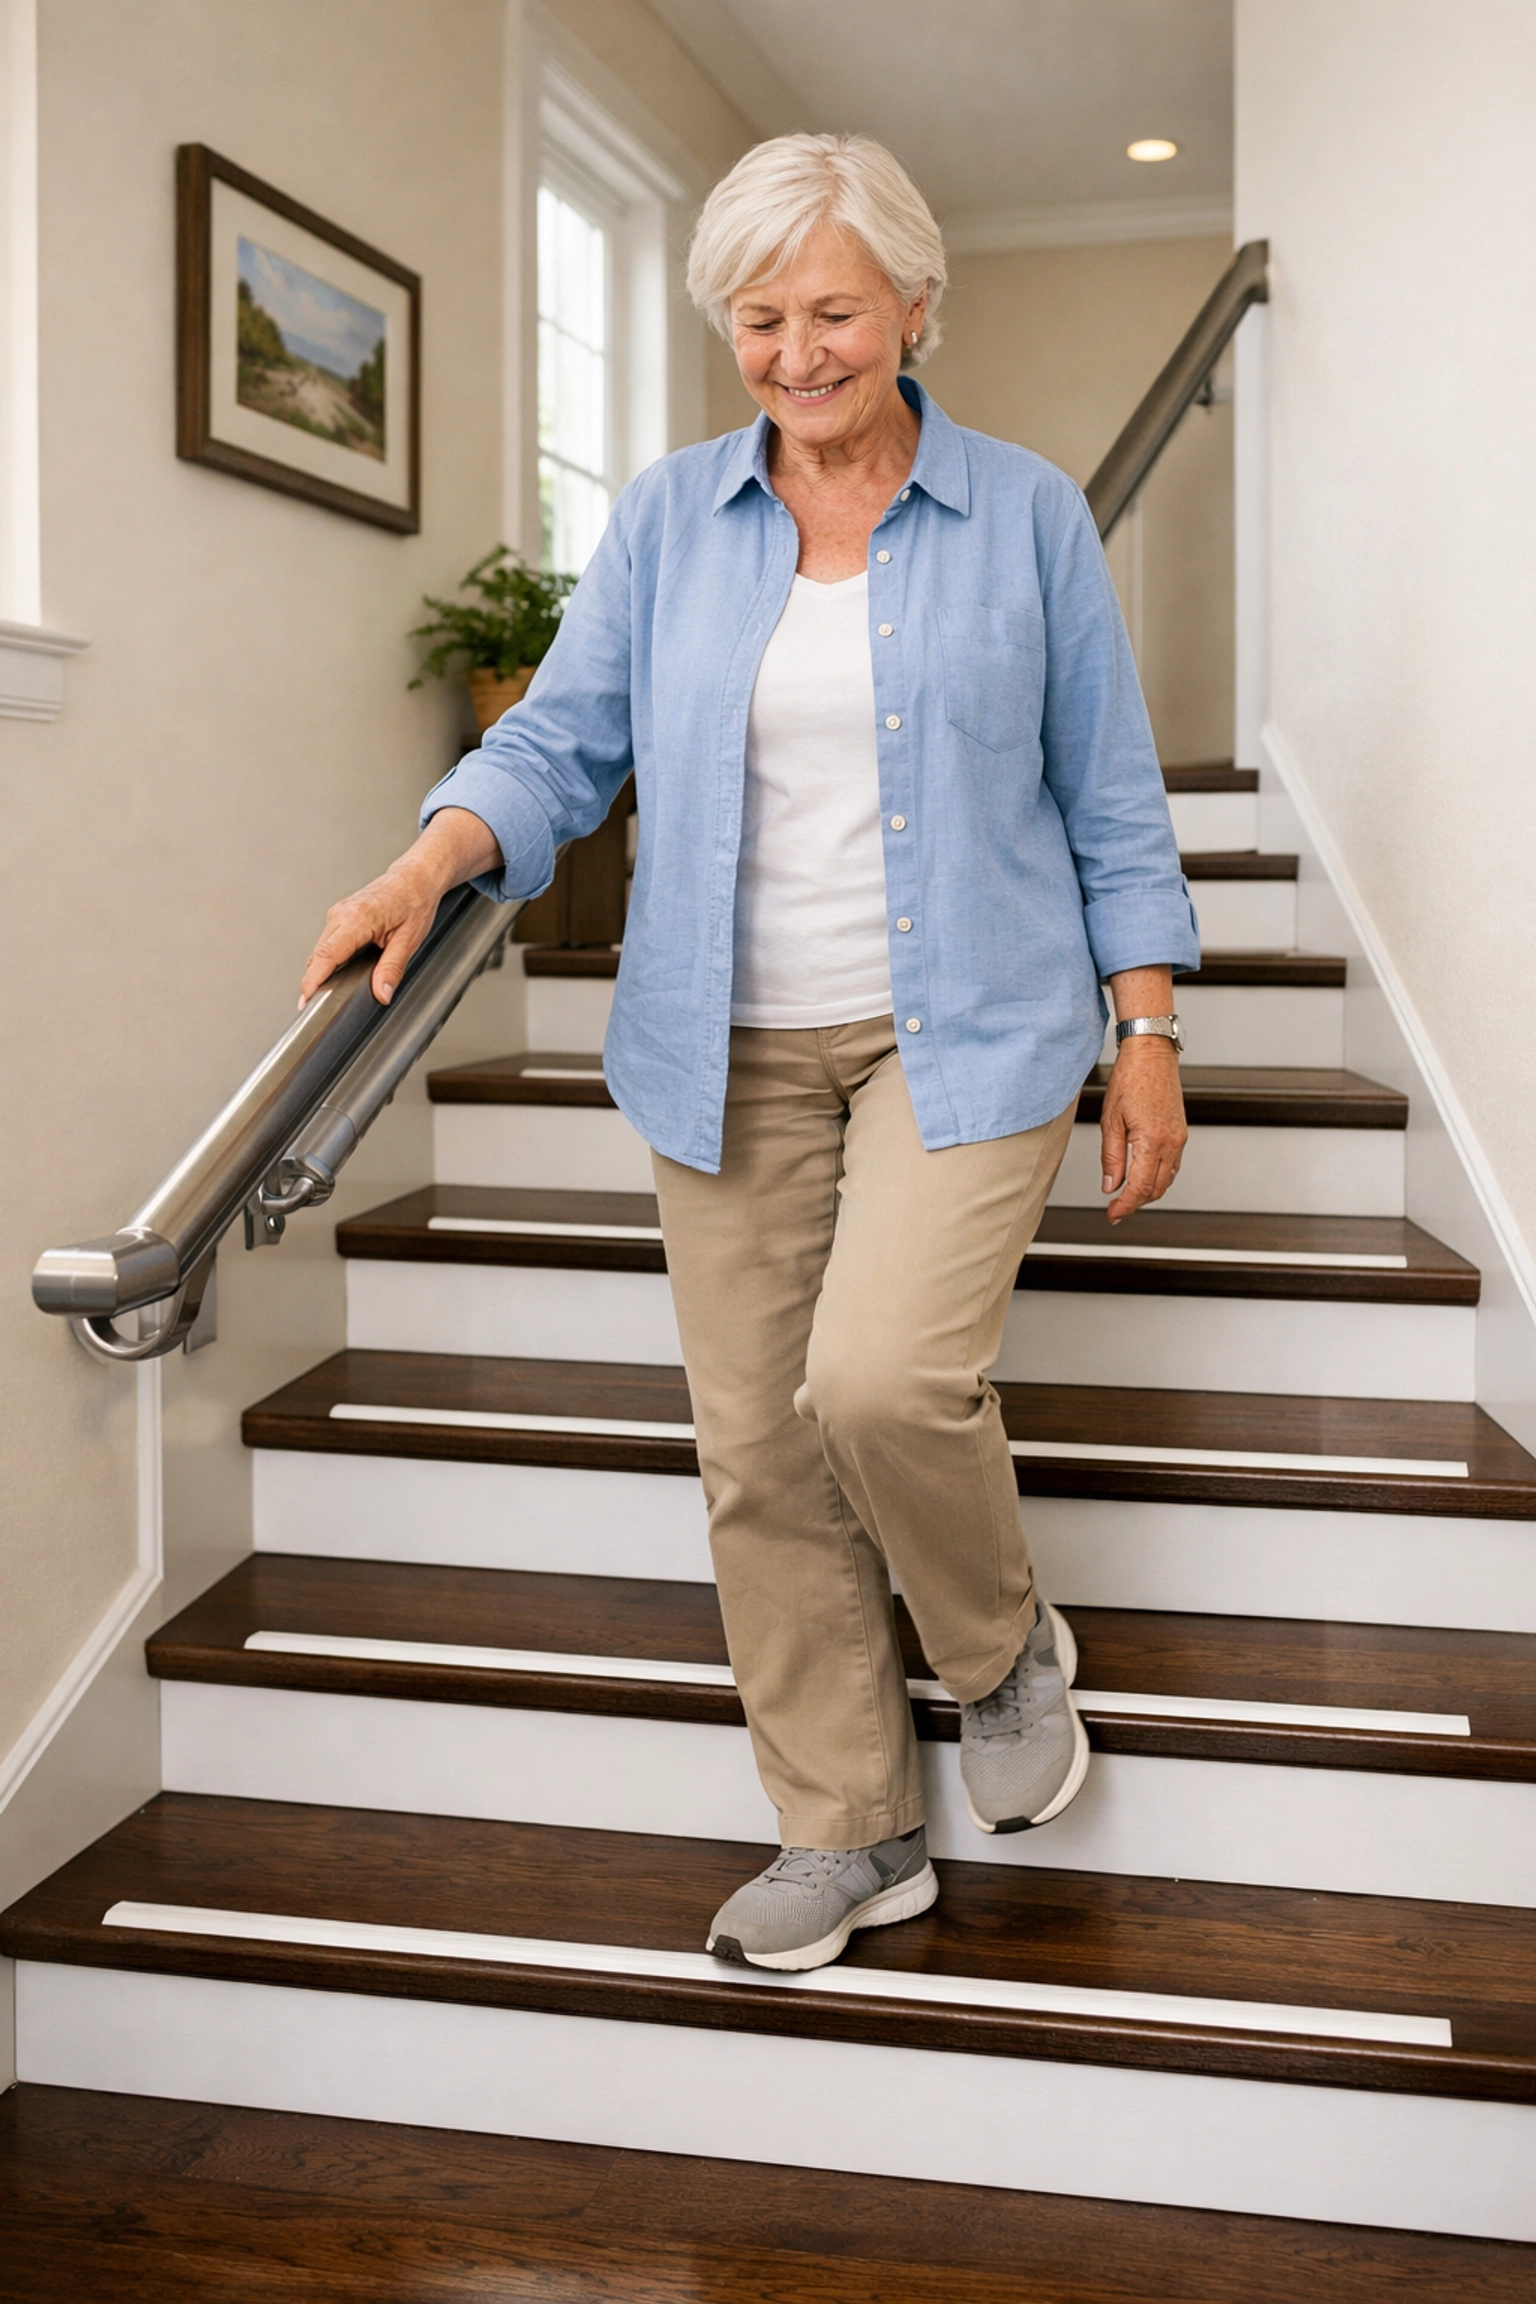
13. Use High-Contrast Edging
If your stairs are all one color (like dark wood or beige carpet), the steps can "melt" together into one long slope. By placing a strip of high-contrast tape or paint on the very edge (the nose) of each step, you provide a clear visual marker. For example, a white strip on a dark wood step makes the transition unmistakable.
14. Clear the Clutter (The "Single Item" Rule)
It’s a common habit to leave items on the bottom or top steps to be carried up or down later. This is a recipe for disaster. Keep stairs 100% clear of shoes, books, or decorations. Furthermore, try to follow the "single item" rule: never carry so much that you can't see your feet or that you have to let go of the handrail. If you have many things to move, consider using a sturdy backpack or asking for help.
15. Consistent Step Geometry
While this is a larger fix, it’s worth mentioning. In older homes, steps can sometimes be "irregular," where one step is slightly taller or shorter than the others. Our brains work on rhythm when climbing stairs; an unexpected change of even half an inch can cause a trip. If you have an irregular step, it should be addressed by a professional contractor to ensure a consistent rise and run throughout the flight.
Practical Steps Forward
Making these changes doesn't have to happen all at once. If you're looking for a place to start, I usually recommend lighting and a quick check of the handrails. Those two factors alone can prevent a significant percentage of household falls.
Remember, the goal is to feel confident in your own home. When you know the light will turn on, the rail will hold your weight, and your feet will find a firm grip, the stairs stop being a barrier and start being just another path in your house.
Take a walk over to your staircase today. Is it bright enough? Is the rail sturdy? These small observations are the first steps toward a safer, more independent life at home. We're here to help you navigate these choices with practical advice and a focus on long-term safety. Stay safe, and take it one step at a time.

