Stairs are often the most intimidating part of a home as we age. Whether it’s the flight leading up to the bedroom or just two steps down into a sunken living room, the way we navigate vertical transitions changes over time. Vision, balance, and leg strength all play a role in how safely we can climb or descend.
At Fall Guys Products, we believe that staying in the home you love shouldn't feel like a risk. Modifying stairs isn't just about big, expensive renovations; it is about a series of small, thoughtful adjustments that build a layer of protection.
In this guide, we will explore the biomechanics of stair safety and provide over 50 concrete examples of modifications you can implement today to make your home more accessible and secure.
Why Stairs Become Challenging
To fix a problem, we first have to understand why it’s happening. For many seniors, the challenge with stairs isn't just "weak knees." It involves:
- Depth Perception: As we age, our ability to distinguish between the edge of a step and the floor below can diminish, especially in low light.
- Proprioception: This is your body’s ability to sense its position in space. If this is reduced, you might not lift your foot quite high enough to clear the "riser" (the vertical part of the step).
- The "Descent" Risk: Most stair-related falls happen while going down. This is because descending requires more eccentric muscle control: the ability of your muscles to act as "brakes."
By addressing these physical changes with home modifications, we can significantly reduce the risk of a fall.
Lighting: The First Line of Defense
You cannot navigate what you cannot see. Standard overhead lighting often casts shadows that can hide the edge of a step, making it look like a flat surface.
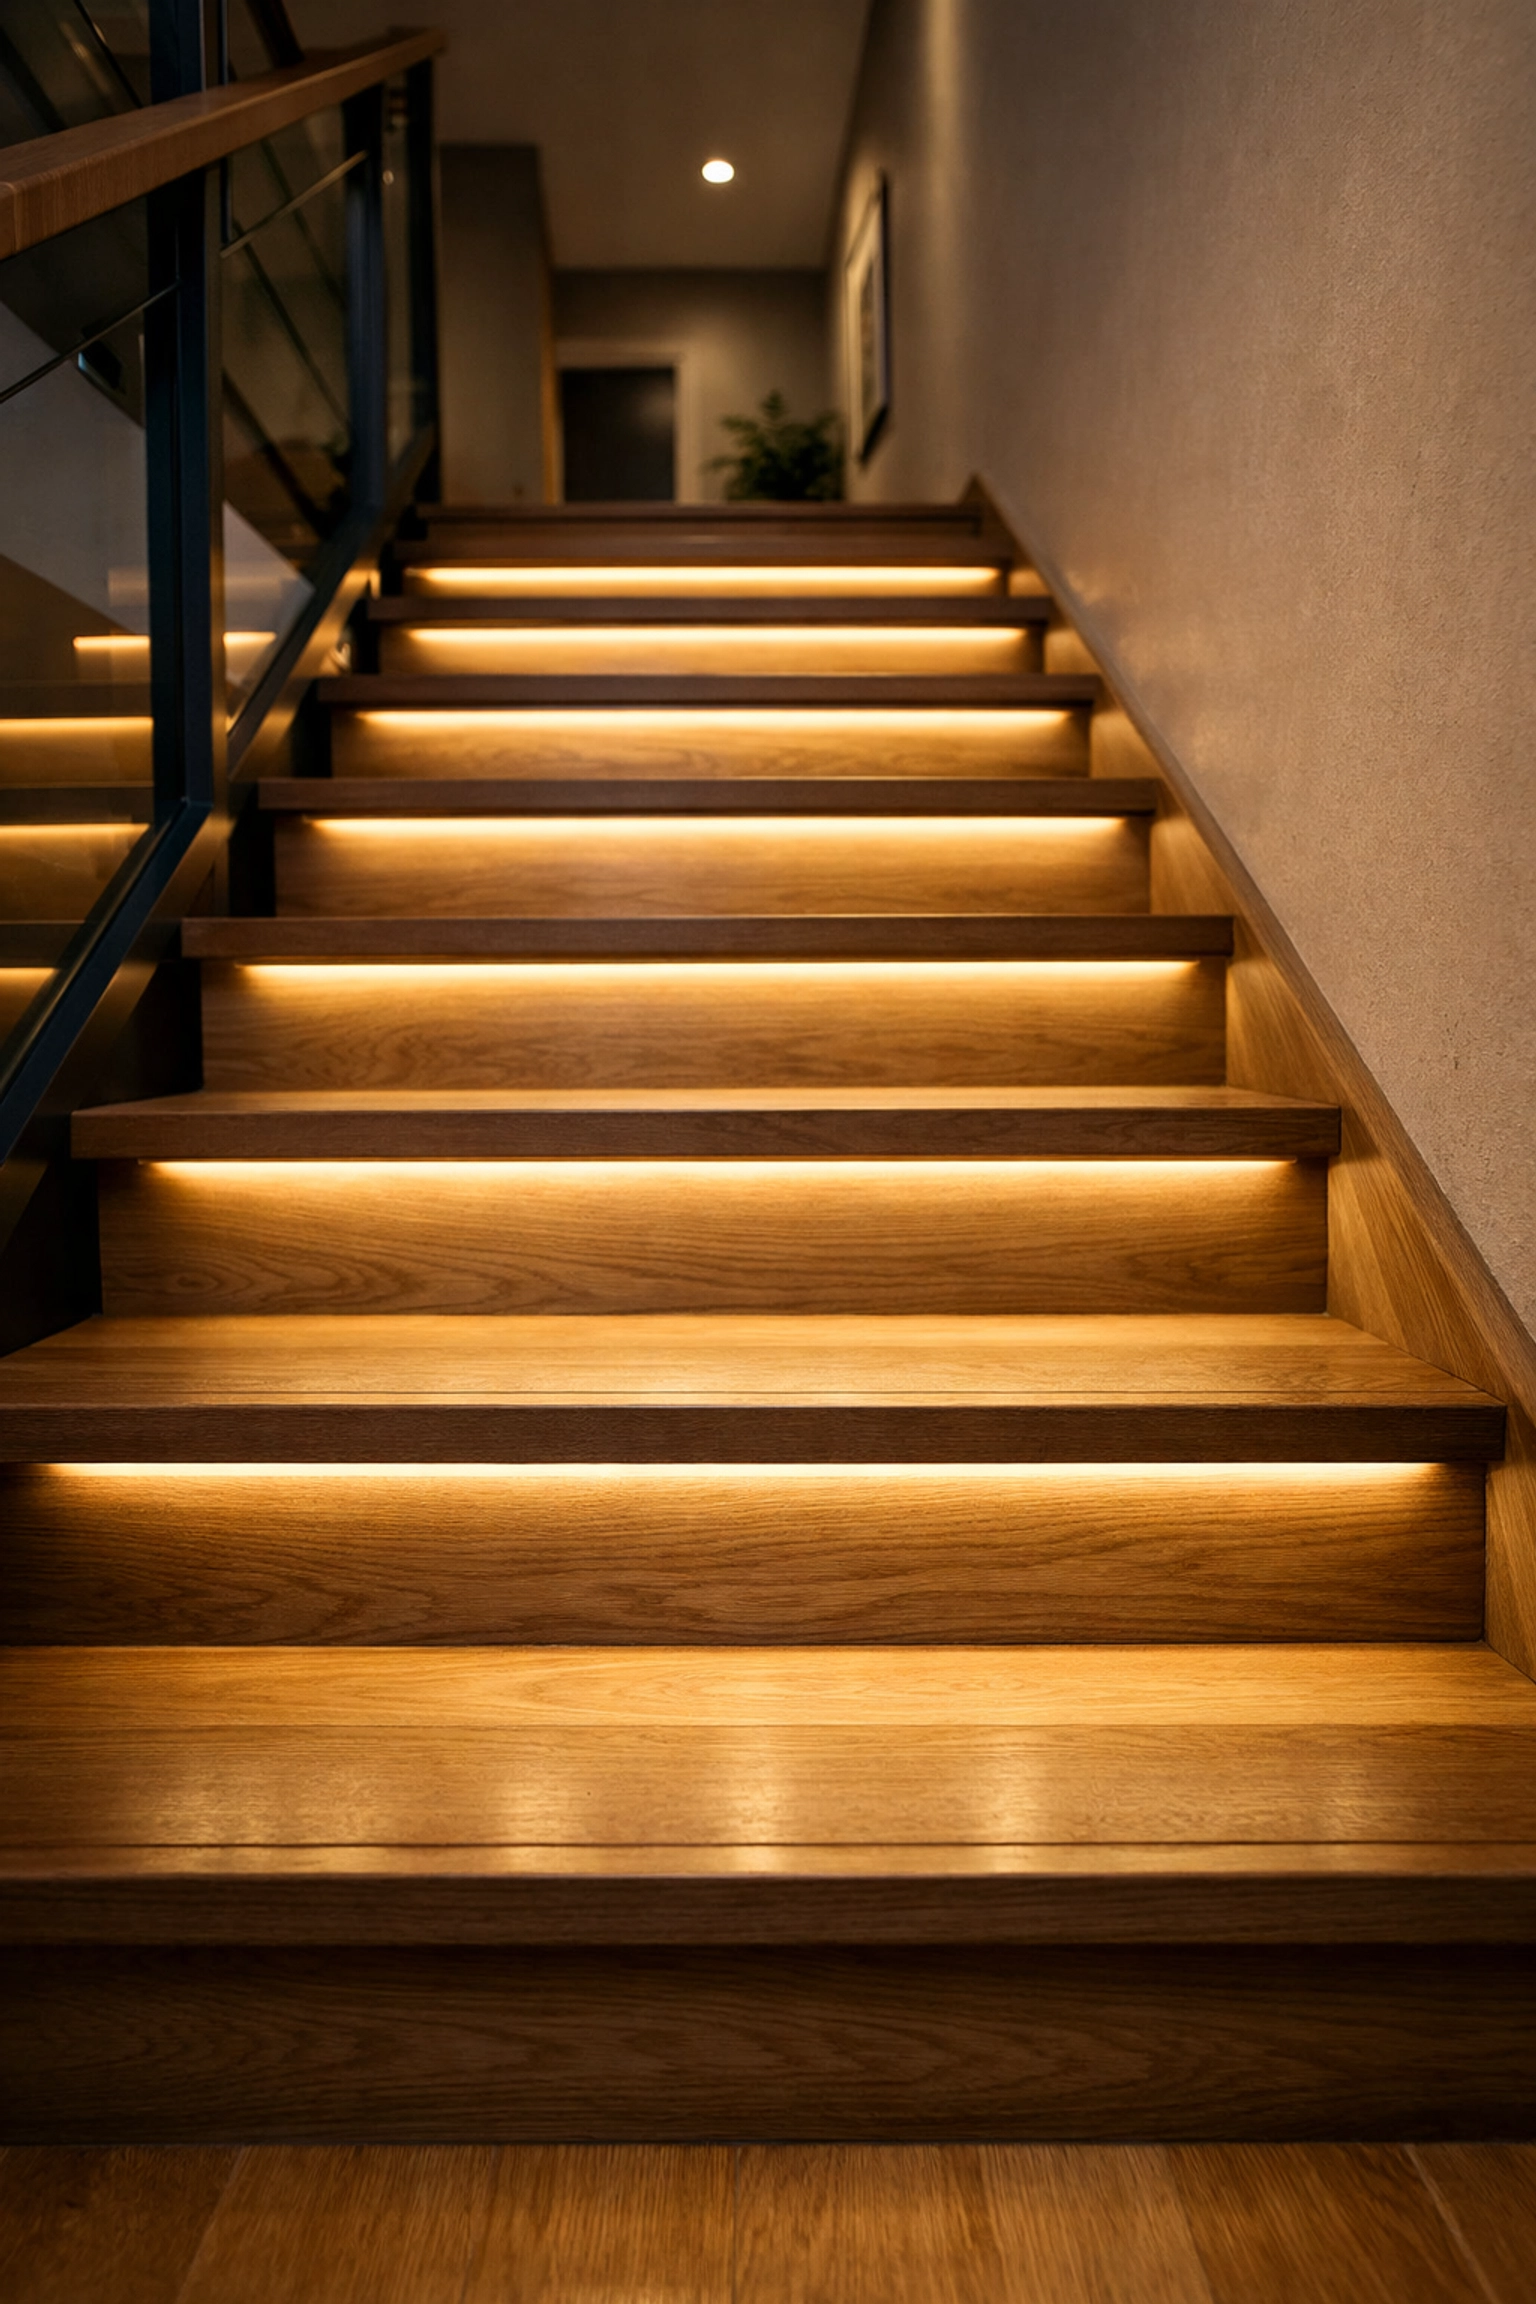
Lighting Modifications
- Motion-Activated LED Strips: Placing these under the lip of each step provides a clear glow that defines exactly where the tread ends.
- Dual-End Switches: Ensure there is a light switch at both the very top and the very bottom of the stairs. You should never have to walk up or down in the dark to reach a switch.
- Plug-in Motion Sensors: If you can't rewire the house, use battery-operated or plug-in motion lights along the baseboards of the staircase.
- Increased Wattage: Simply swapping out old bulbs for brighter, "daylight" balanced LEDs can improve clarity.
- Dawn-to-Dusk Sensors: These automatically turn on a dim nightlight when the sun goes down, ensuring the path is always visible.
Handrails: More Than Just a Guide
A single handrail is often not enough. For maximum safety, "continuous" support is the gold standard. A handrail should be something you can lean on, not just something you touch for balance.
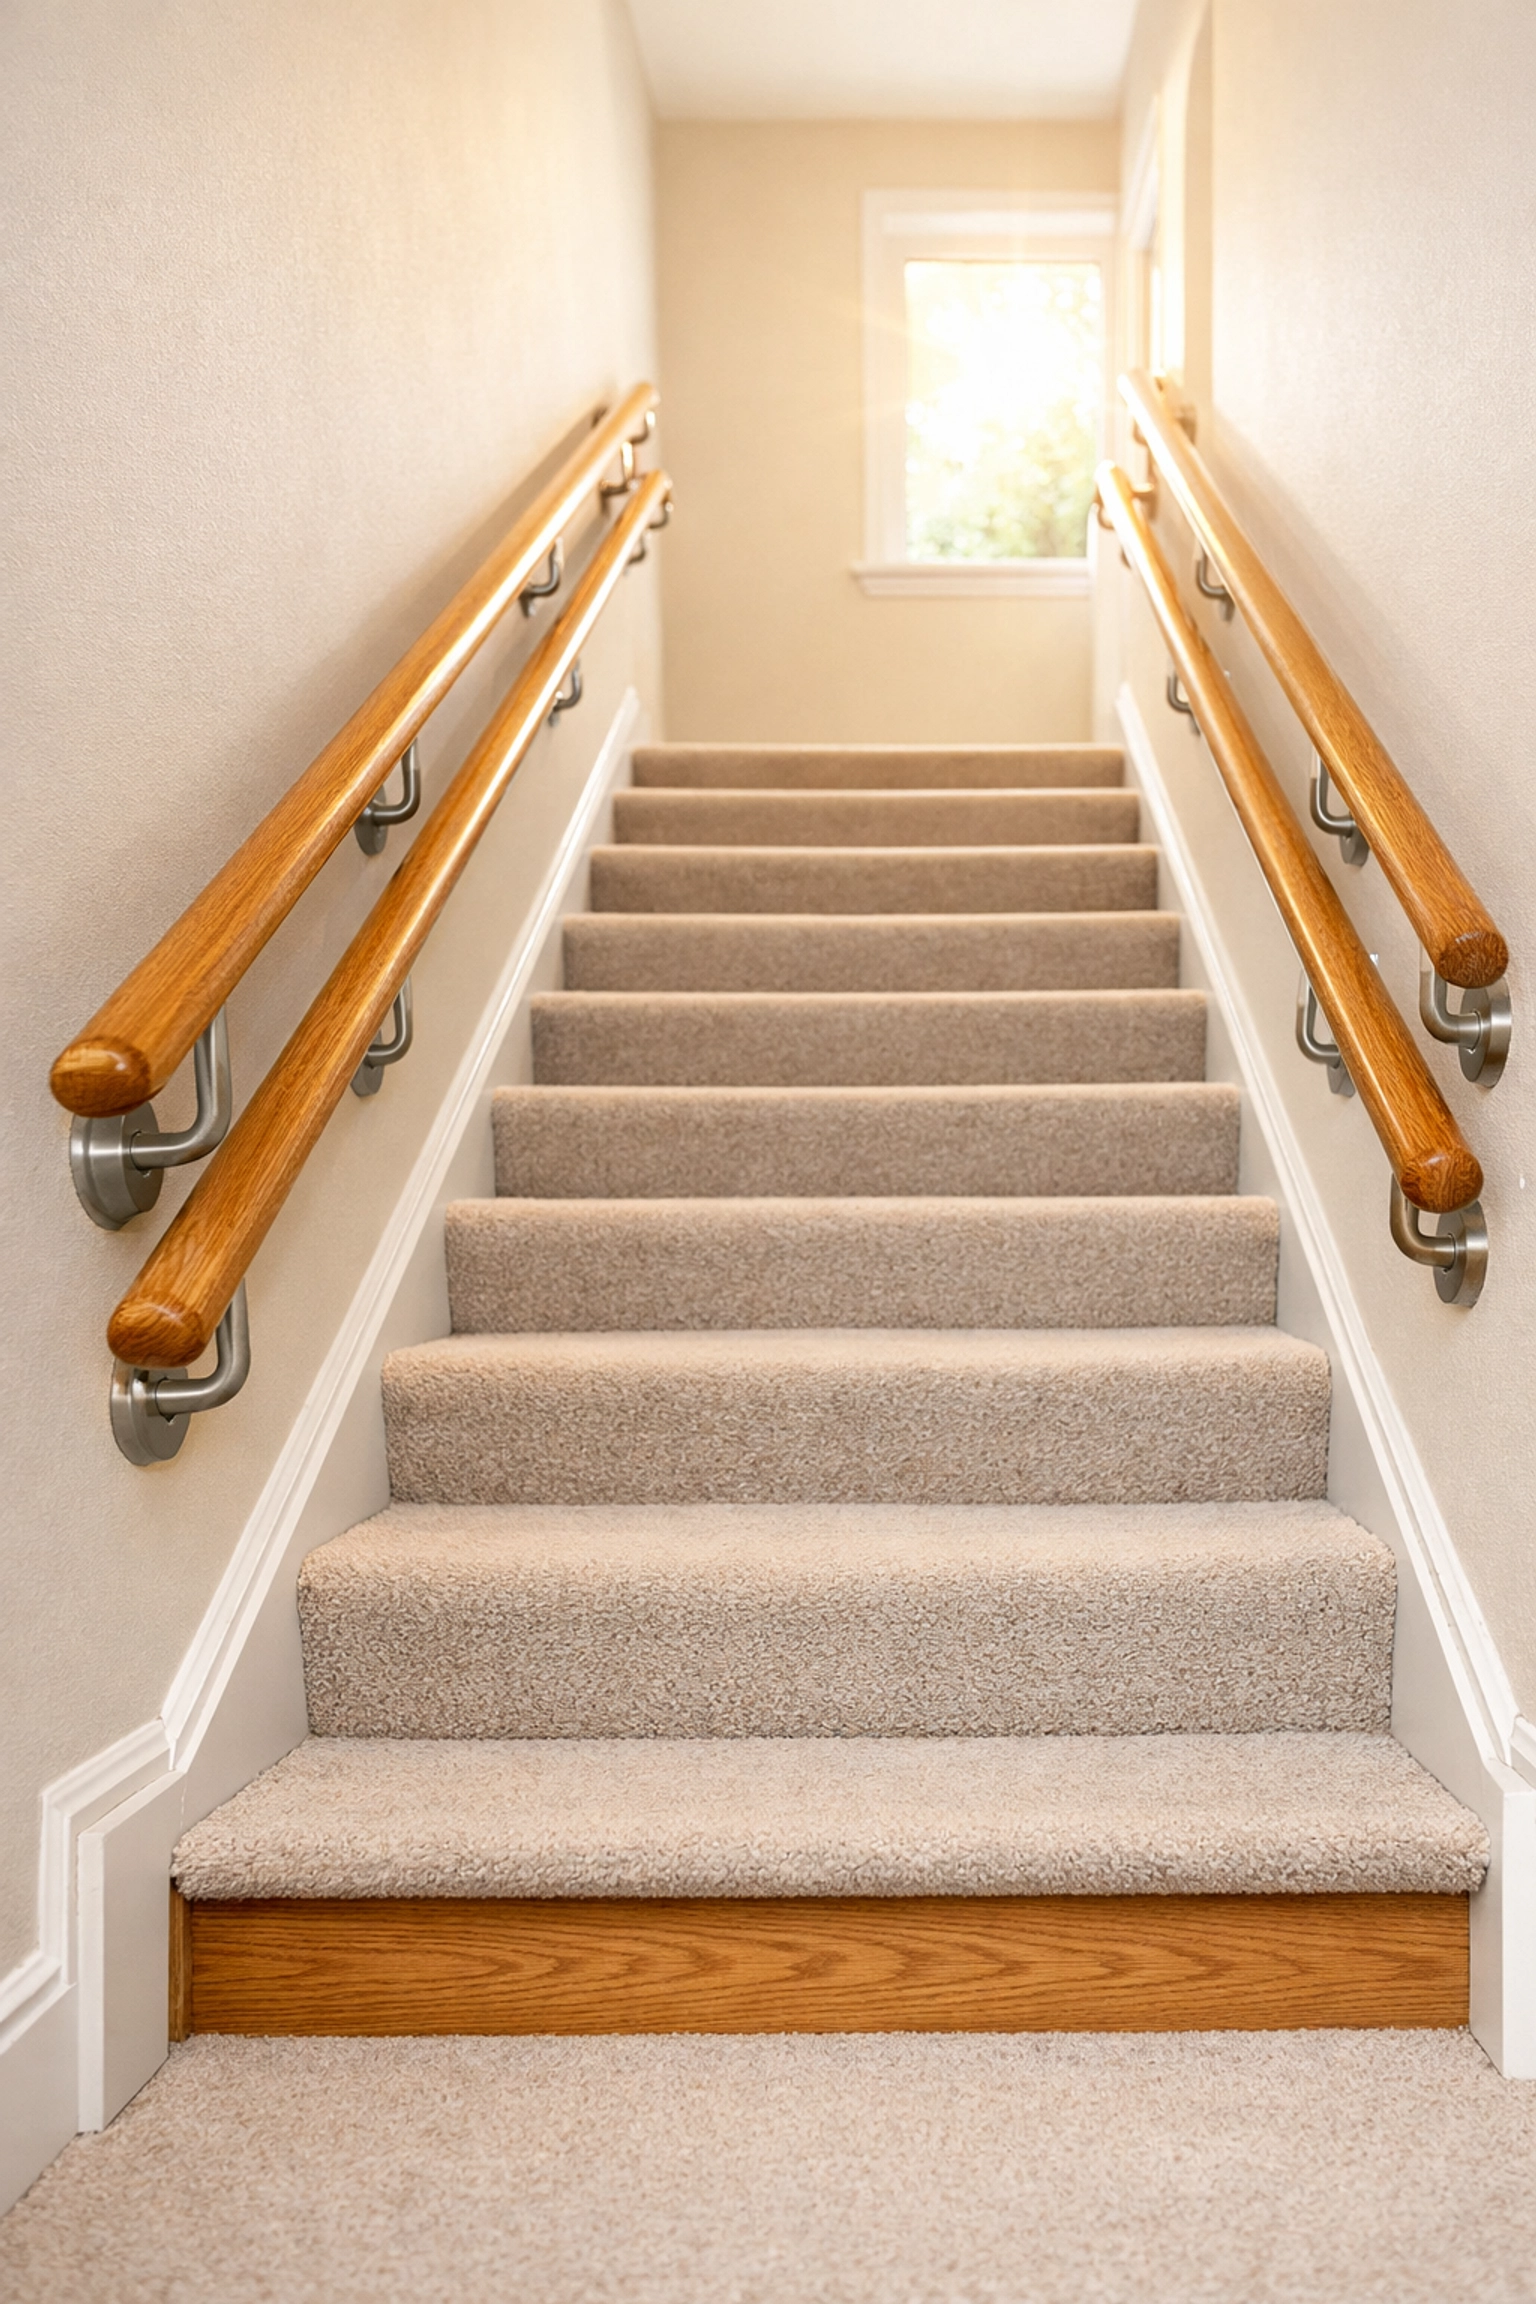
Railing Modifications
- Dual Handrails: Install a rail on both sides of the staircase. This allows you to use both arms for stability or choose the side that matches your "strong" side.
- Extended Ends: A safe handrail should extend about 12 inches beyond the top and bottom steps. This allows you to get a firm grip before you take your first step and maintain that grip until you are safely on level ground.
- Grip Diameter: Handrails that are too thick or too thin are hard to grasp. A diameter of 1.25 to 2 inches is generally ideal for most hands.
- Wall Clearance: There should be at least 1.5 inches of space between the wall and the rail so your fingers don't get pinched, but not so much space that your arm could fall through.
- Wrap-Around Rails: For stairs with a landing or a curve, the rail should be one continuous piece so you never have to let go.
Surface Traction: Preventing the Slip
The material of your stairs matters immensely. Polished wood and high-gloss tiles are beautiful, but they can be incredibly slippery, especially if you are wearing socks or slippers.
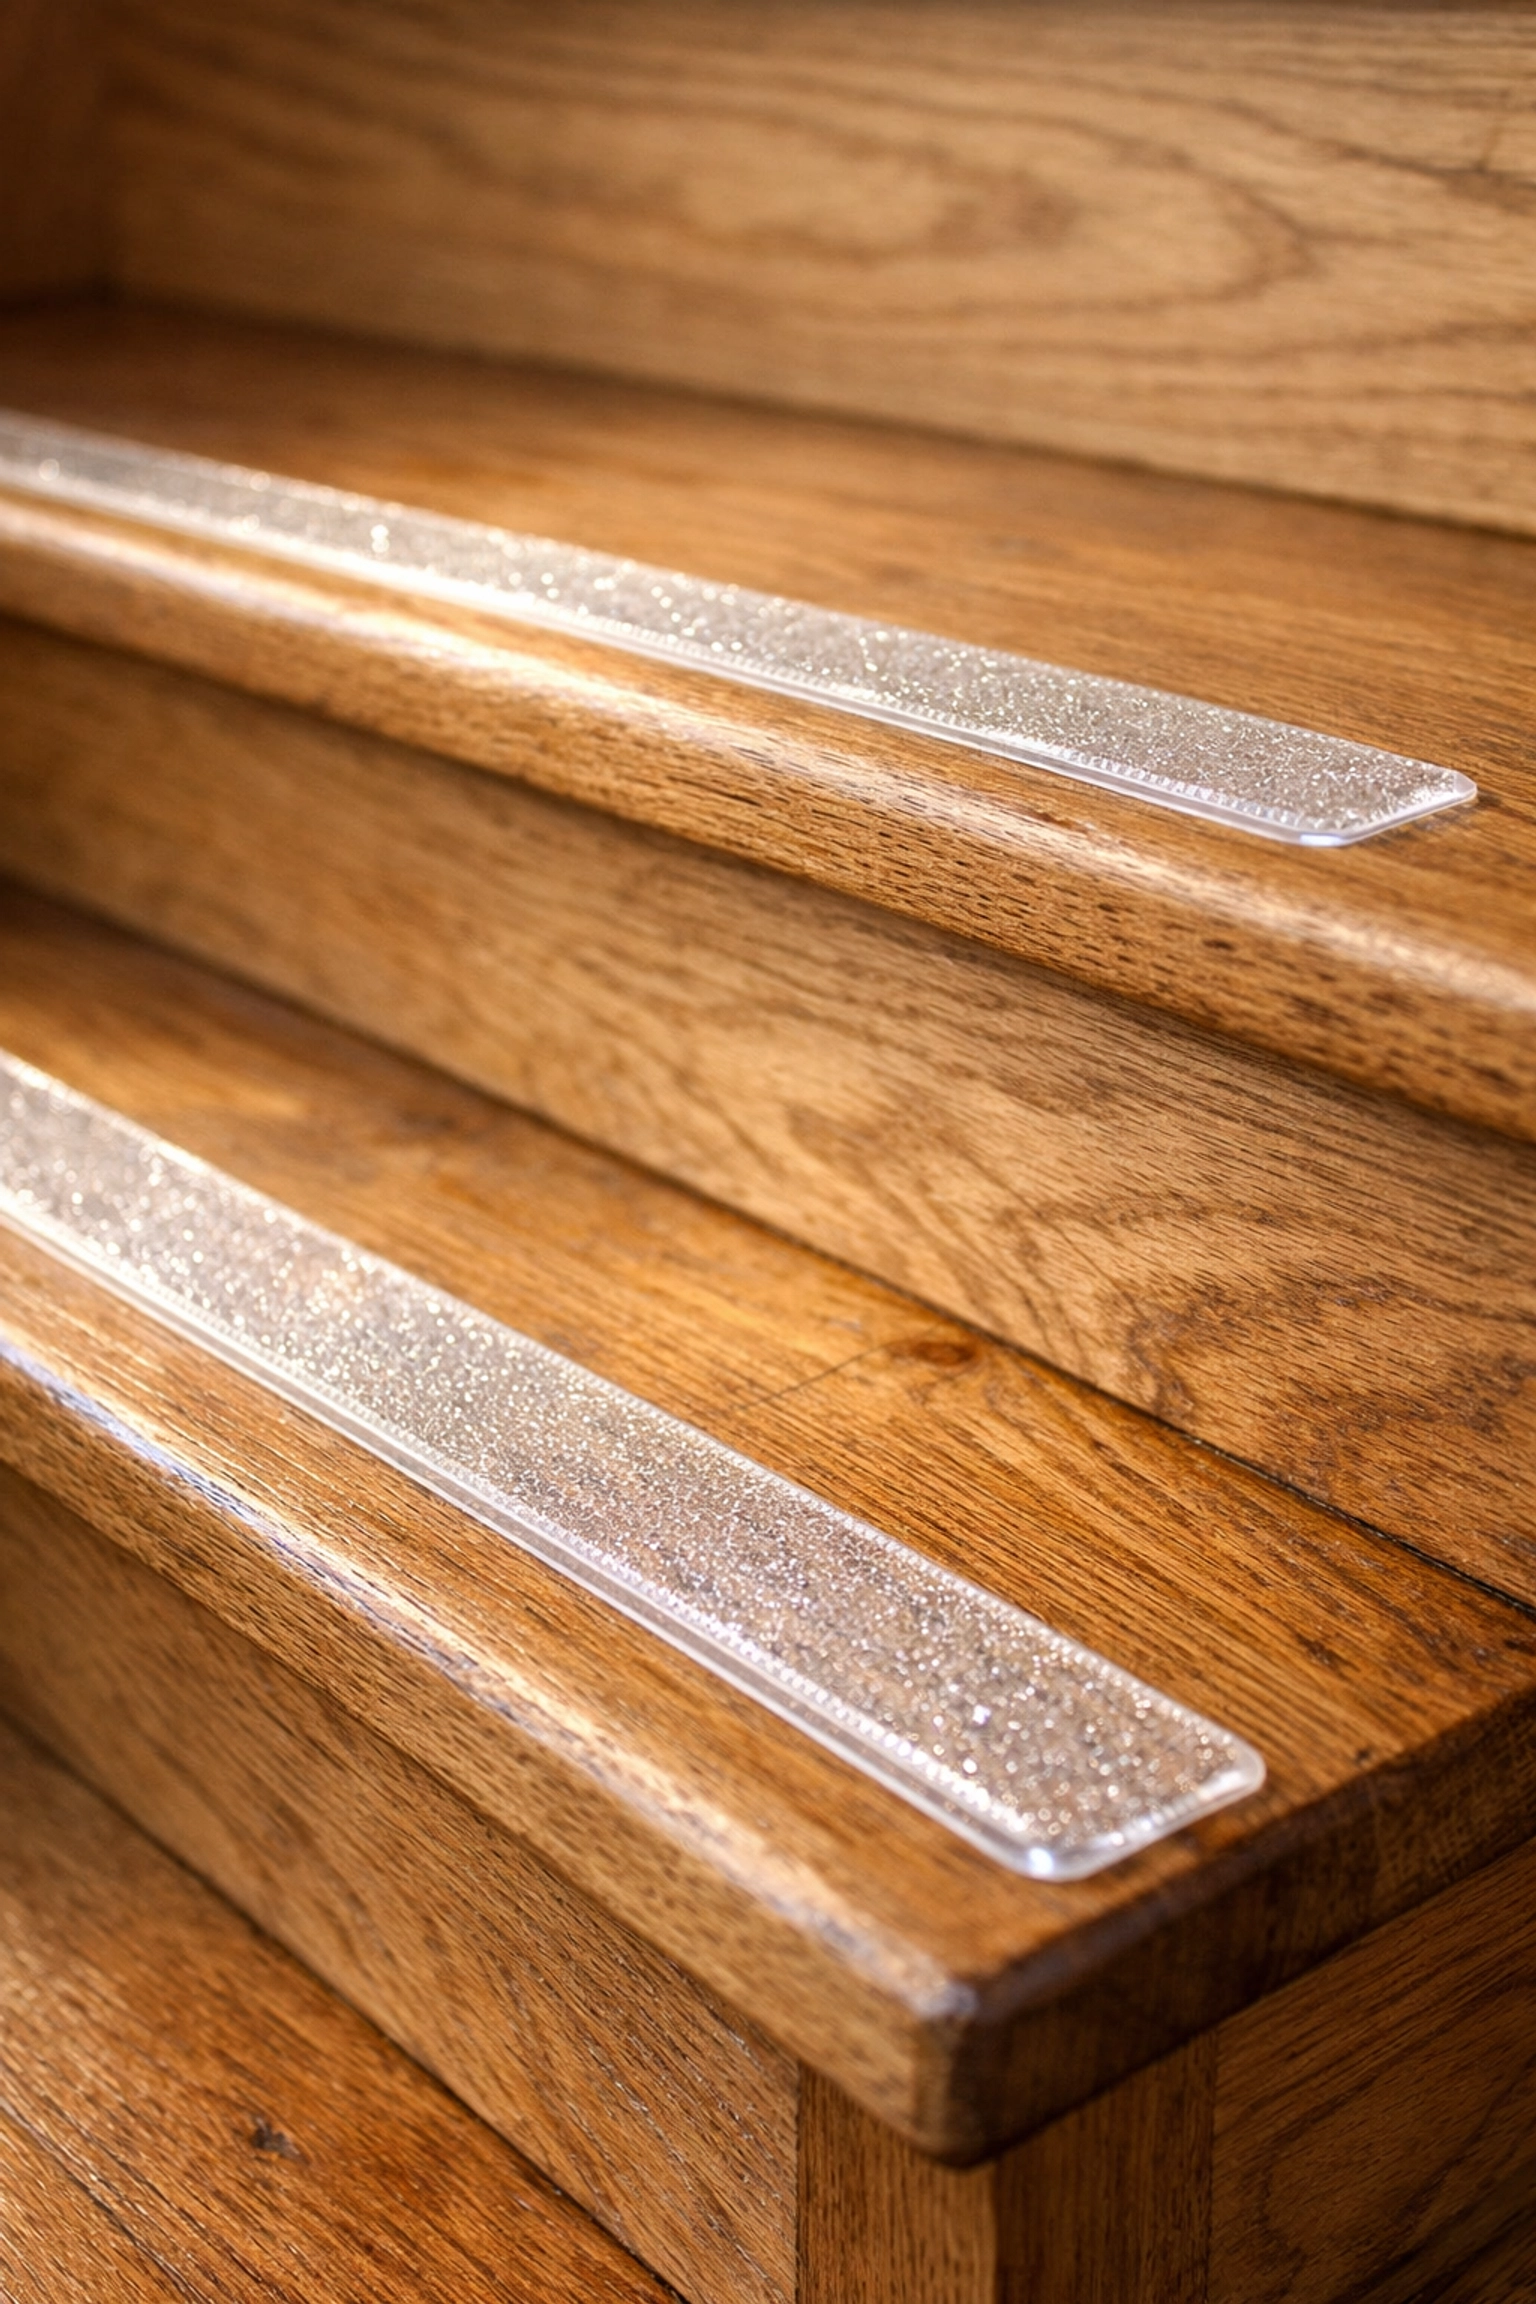
Traction Modifications
- Non-Slip Adhesive Strips: These clear or colored strips add a "sandpaper" grit to the edge of the step.
- Rubber Treads: These can be glued down over existing wood or concrete to provide a high-friction surface.
- Low-Pile Carpeting: If you prefer carpet, choose a very low pile (less than 1/4 inch). Shag or thick carpet can actually hide the edge of the step and cause your foot to slide.
- Carpet Rods: Ensure any runner is secured with metal rods or heavy-duty staples so it cannot bunch up.
- Anti-Slip Coatings: There are transparent paints and sprays that add a microscopic texture to wooden stairs without changing their look.
Visual Adaptations for Depth Perception
Sometimes, the best modification is a visual one. If the stairs and the floor are the same color, the eye can struggle to tell them apart.
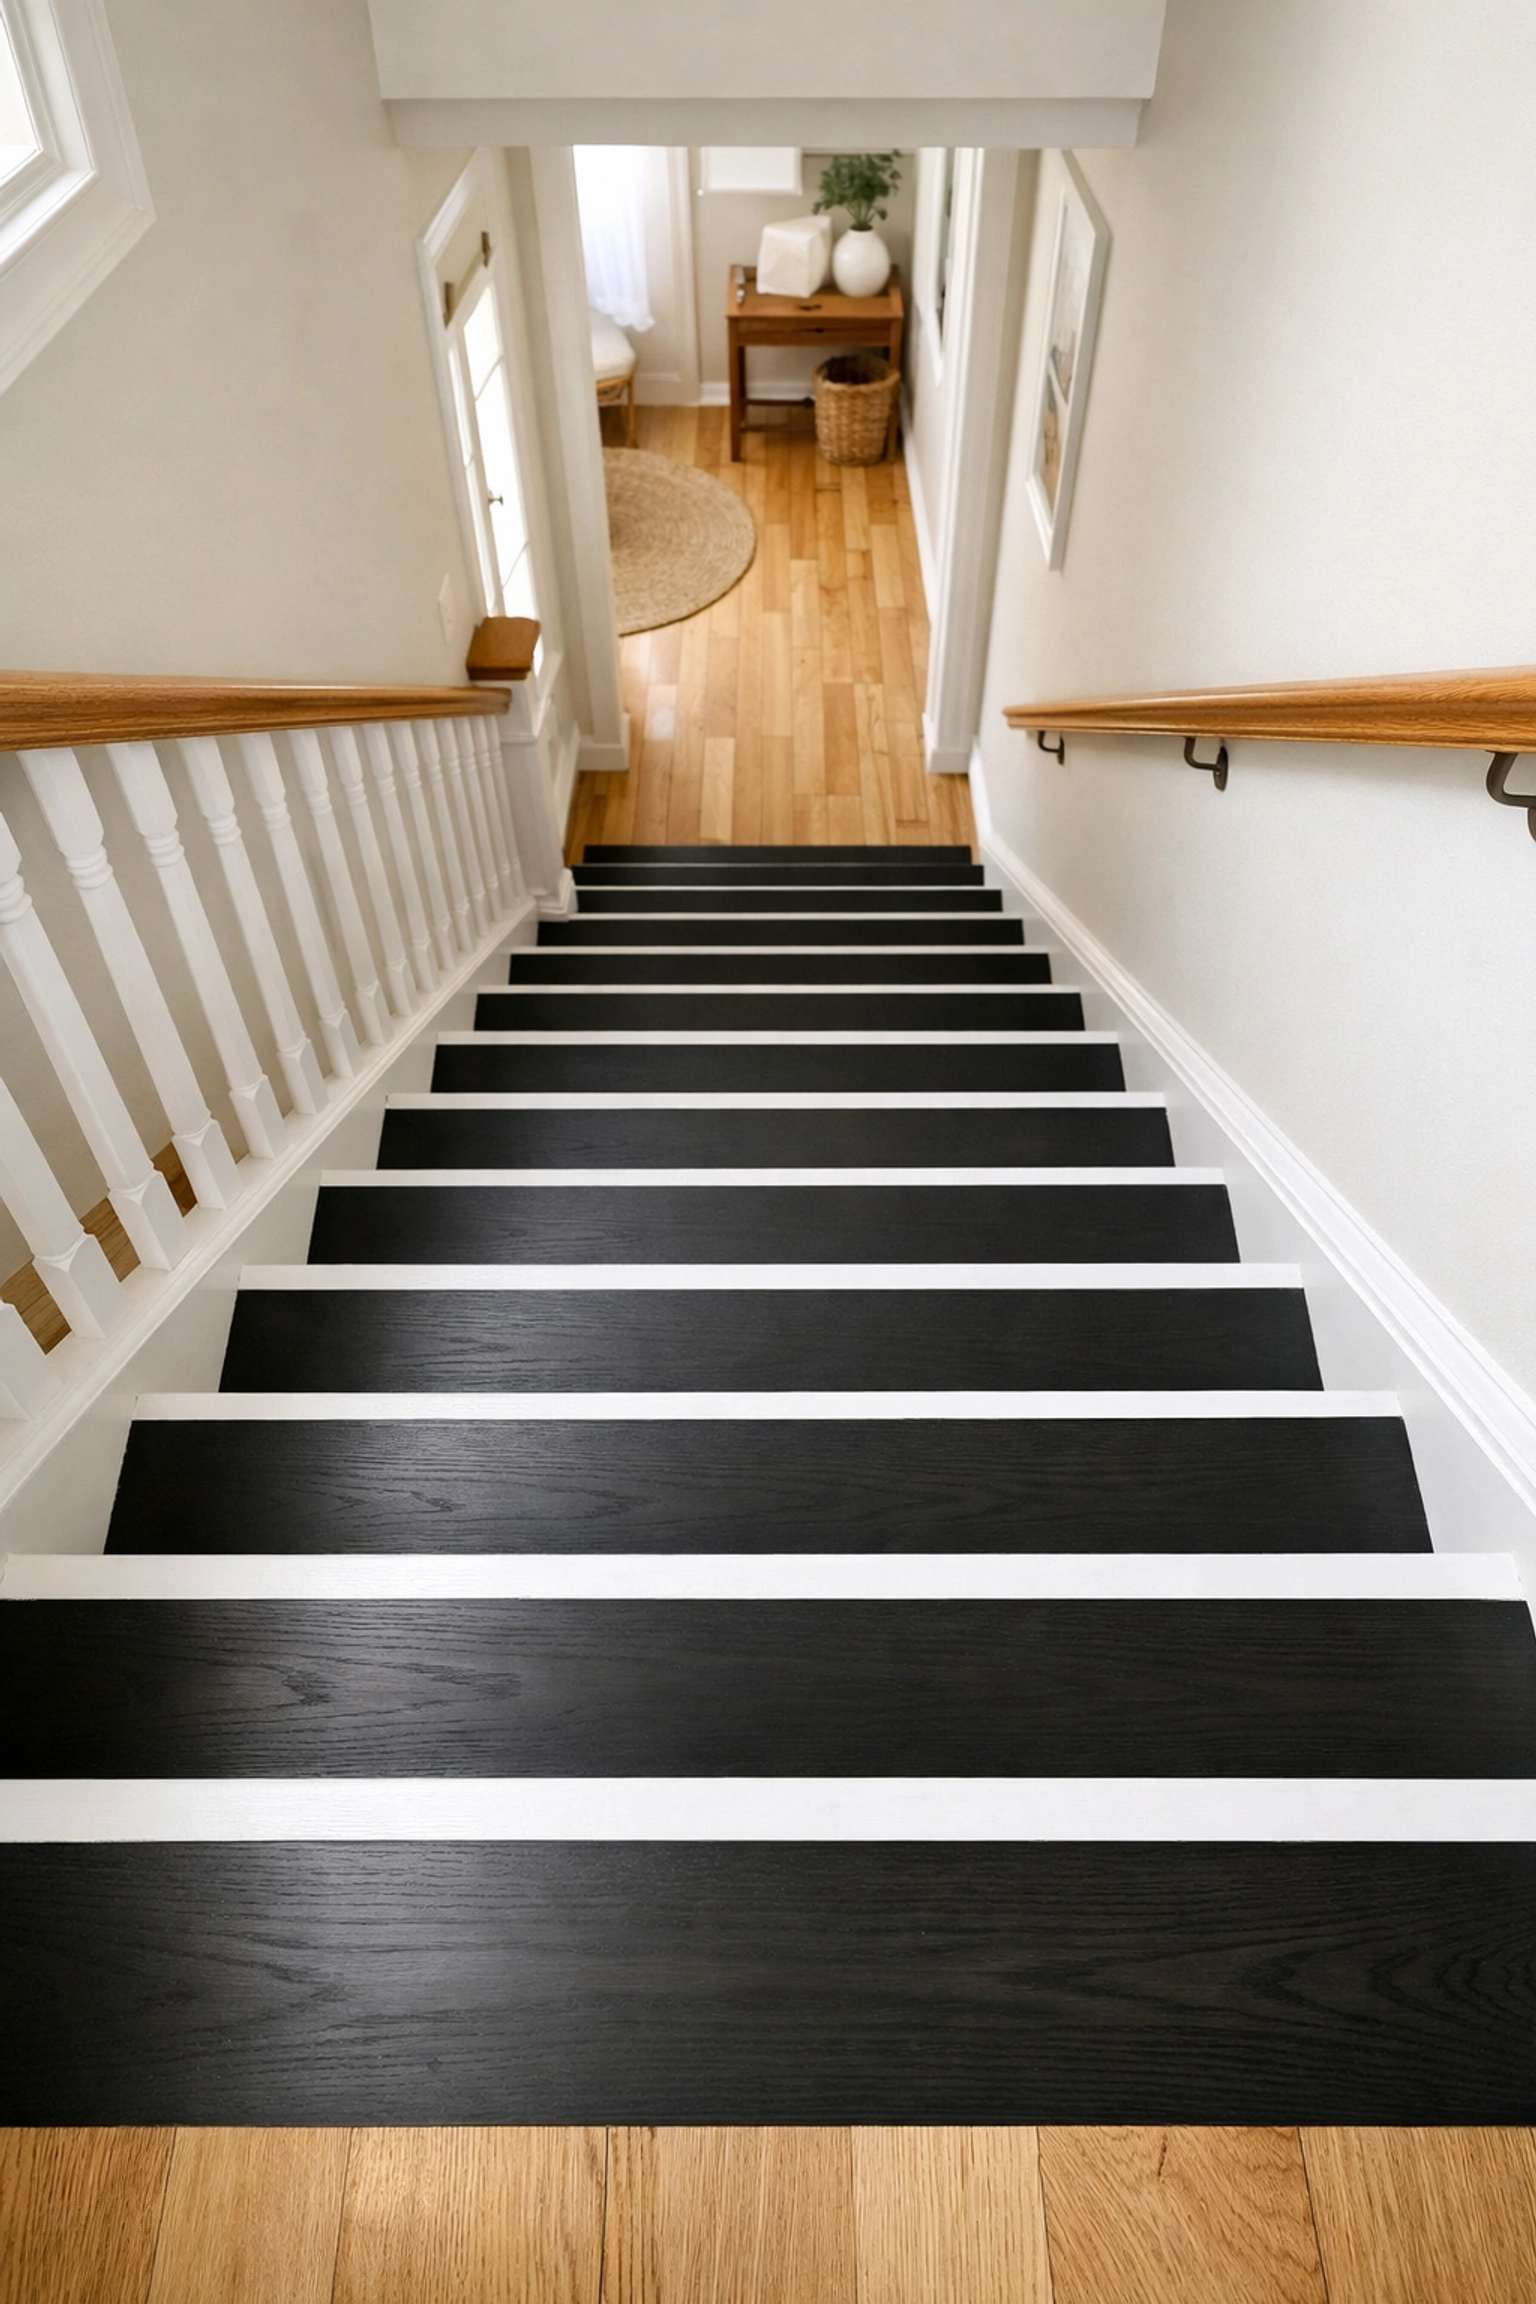
Visual Modifications
- Contrasting Tape: Place a strip of brightly colored tape (yellow or white) on the leading edge of every step.
- Two-Tone Painting: Paint the "risers" a different color than the "treads." For example, white risers with dark wood treads provide high contrast.
- Reflective Strips: Use reflective tape on the top and bottom steps to signal where the staircase begins and ends.
- Avoid Patterns: Busy patterns on carpet runners can create optical illusions that make steps look like they are moving or slanted. Stick to solid colors.
Major Structural Changes
If physical limitations make climbing stairs painful or dangerous, it may be time for more significant structural modifications.
- Stairlifts: A motorized chair that glides along a rail. This is the most common solution for those who can no longer safely walk the stairs.
- Half-Steps: These are small blocks placed on each tread that effectively cut the height of the step in half, making it easier for those with limited knee mobility.
- Residential Elevators: While expensive, these are the ultimate solution for aging in place in a multi-story home.
- Vertical Platform Lifts: Often used for porch entries, these act like a small open elevator for wheelchair users.
The Master List: 50+ Stair Safety Examples
To help you audit your home, here is a comprehensive list of modifications and habits to consider.
Lighting & Visibility
- Install overhead LED panels for shadow-free light.
- Add recessed "step lights" into the wall beside each tread.
- Place a lamp with a smart-bulb at the landing.
- Use "glow-in-the-dark" tape on the light switches.
- Remove any mirrors near the stairs that might cause disorienting glares.
- Ensure window treatments near stairs don't create "streaky" shadows.
- Install a motion-sensor light in the hallway leading to the stairs.
- Use a high-contrast rug at the landing to mark the "safe zone."
- Update old "yellowed" light covers with clear ones.
- Use smart-home voice commands (e.g., "Alexa, turn on stairs").
Handrails & Support
- Secure loose brackets on existing rails.
- Add a second rail if only one is present.
- Replace "square" rails with rounded ones for better grip.
- Install "Mopstick" handrails for a classic, easy-to-grab feel.
- Use heavy-duty toggle bolts to ensure rails can support 250+ lbs.
- Add a "grab bar" at the very top of the stairs for the final transition.
- Install a handrail on the basement stairs (often overlooked).
- Paint handrails in a color that contrasts with the wall.
- Sand down wooden rails to remove any splinters or rough spots.
- Check that the rail height is between 34 and 38 inches.
Surface & Traction
- Remove loose throw rugs at the top or bottom of the stairs.
- Apply clear "anti-skid" tape to outdoor wooden steps.
- Install rubber nosing on the edge of basement steps.
- Replace worn-out carpet that has lost its grip.
- Remove "carpet buttons" that have become loose.
- Use double-sided carpet tape to secure any edges.
- Treat outdoor stone steps with a stone-grip solution.
- Ensure outdoor steps are slightly sloped to prevent ice/water buildup.
- Replace "open riser" stairs with closed ones to prevent foot-slips.
- Add a "landing" if the staircase is longer than 12 steps.
Behavioral & Maintenance
- Clear all clutter (shoes, books, decor) from the stairs.
- Stop the habit of "staging" items on the steps to take up later.
- Wear "house shoes" with rubber soles, not just socks.
- Avoid carrying large items that block your view of your feet.
- Install a "dumbwaiter" or laundry chute to avoid carrying heavy baskets.
- Keep a "reacher" tool at the top and bottom of the stairs.
- Regularly check for loose floorboards or creaks that indicate instability.
- Sweep or vacuum stairs weekly to remove slippery dust or pet hair.
- If you use a cane, learn the "Up with the good, down with the bad" technique.
- Schedule a physical therapy assessment to check your "stair gait."
Advanced Modifications
- Install a "perch" or folding seat on the landing for resting.
- Use a "stair-climbing" cane for extra support.
- Replace steep "paddlestepped" stairs with a more gradual incline.
- Install a ramp for the 1-2 steps leading into the garage.
- Change the door swing at the top of the stairs so it doesn't open toward the steps.
- Create a "downstairs master suite" to minimize stair use at night.
- Use "smart" glass that reduces glare from nearby windows.
- Install a backup battery for any electric stairlifts.
- Add a "gate" at the top for those with dementia or balance issues.
- Consider "low-rise" stairs if building new (riser height under 6 inches).
- Replace "winders" (pie-shaped steps) with a flat landing.
Next Steps for Caregivers
If you are helping a loved one, the best way to start is with a "walk-through." Don't just look at the stairs: watch how your loved one uses them. Do they hesitate at the top? Do they white-knuckle the rail? These are cues for where a modification is needed most.
Safety is not a one-time project; it’s an ongoing conversation. By implementing these modifications, you are not just preventing a fall; you are preserving independence and peace of mind.

