Stairs are often the architectural centerpiece of a home. They connect our living spaces, add character to our hallways, and sometimes even serve as a design statement. But as we get older, or as we care for those who are aging, the way we look at stairs needs to shift. What used to be a simple transition from one floor to another can slowly become a source of anxiety.
In my time working with home safety at Fall Guys Products, I’ve seen a lot of staircases. Most of them were built with aesthetics or space-saving in mind, rather than the long-term mobility of the people living there. The good news is that most stair-related risks aren't caused by the stairs themselves, but by small, fixable mistakes in how they are maintained, designed, or used.
Safety doesn't have to mean turning your home into a clinical environment. It’s about making smart, subtle adjustments that give you confidence and keep you independent. Let’s walk through the seven most common mistakes homeowners make with their stairs and, more importantly, how you can fix them.
1. Prioritizing Aesthetics Over Traction
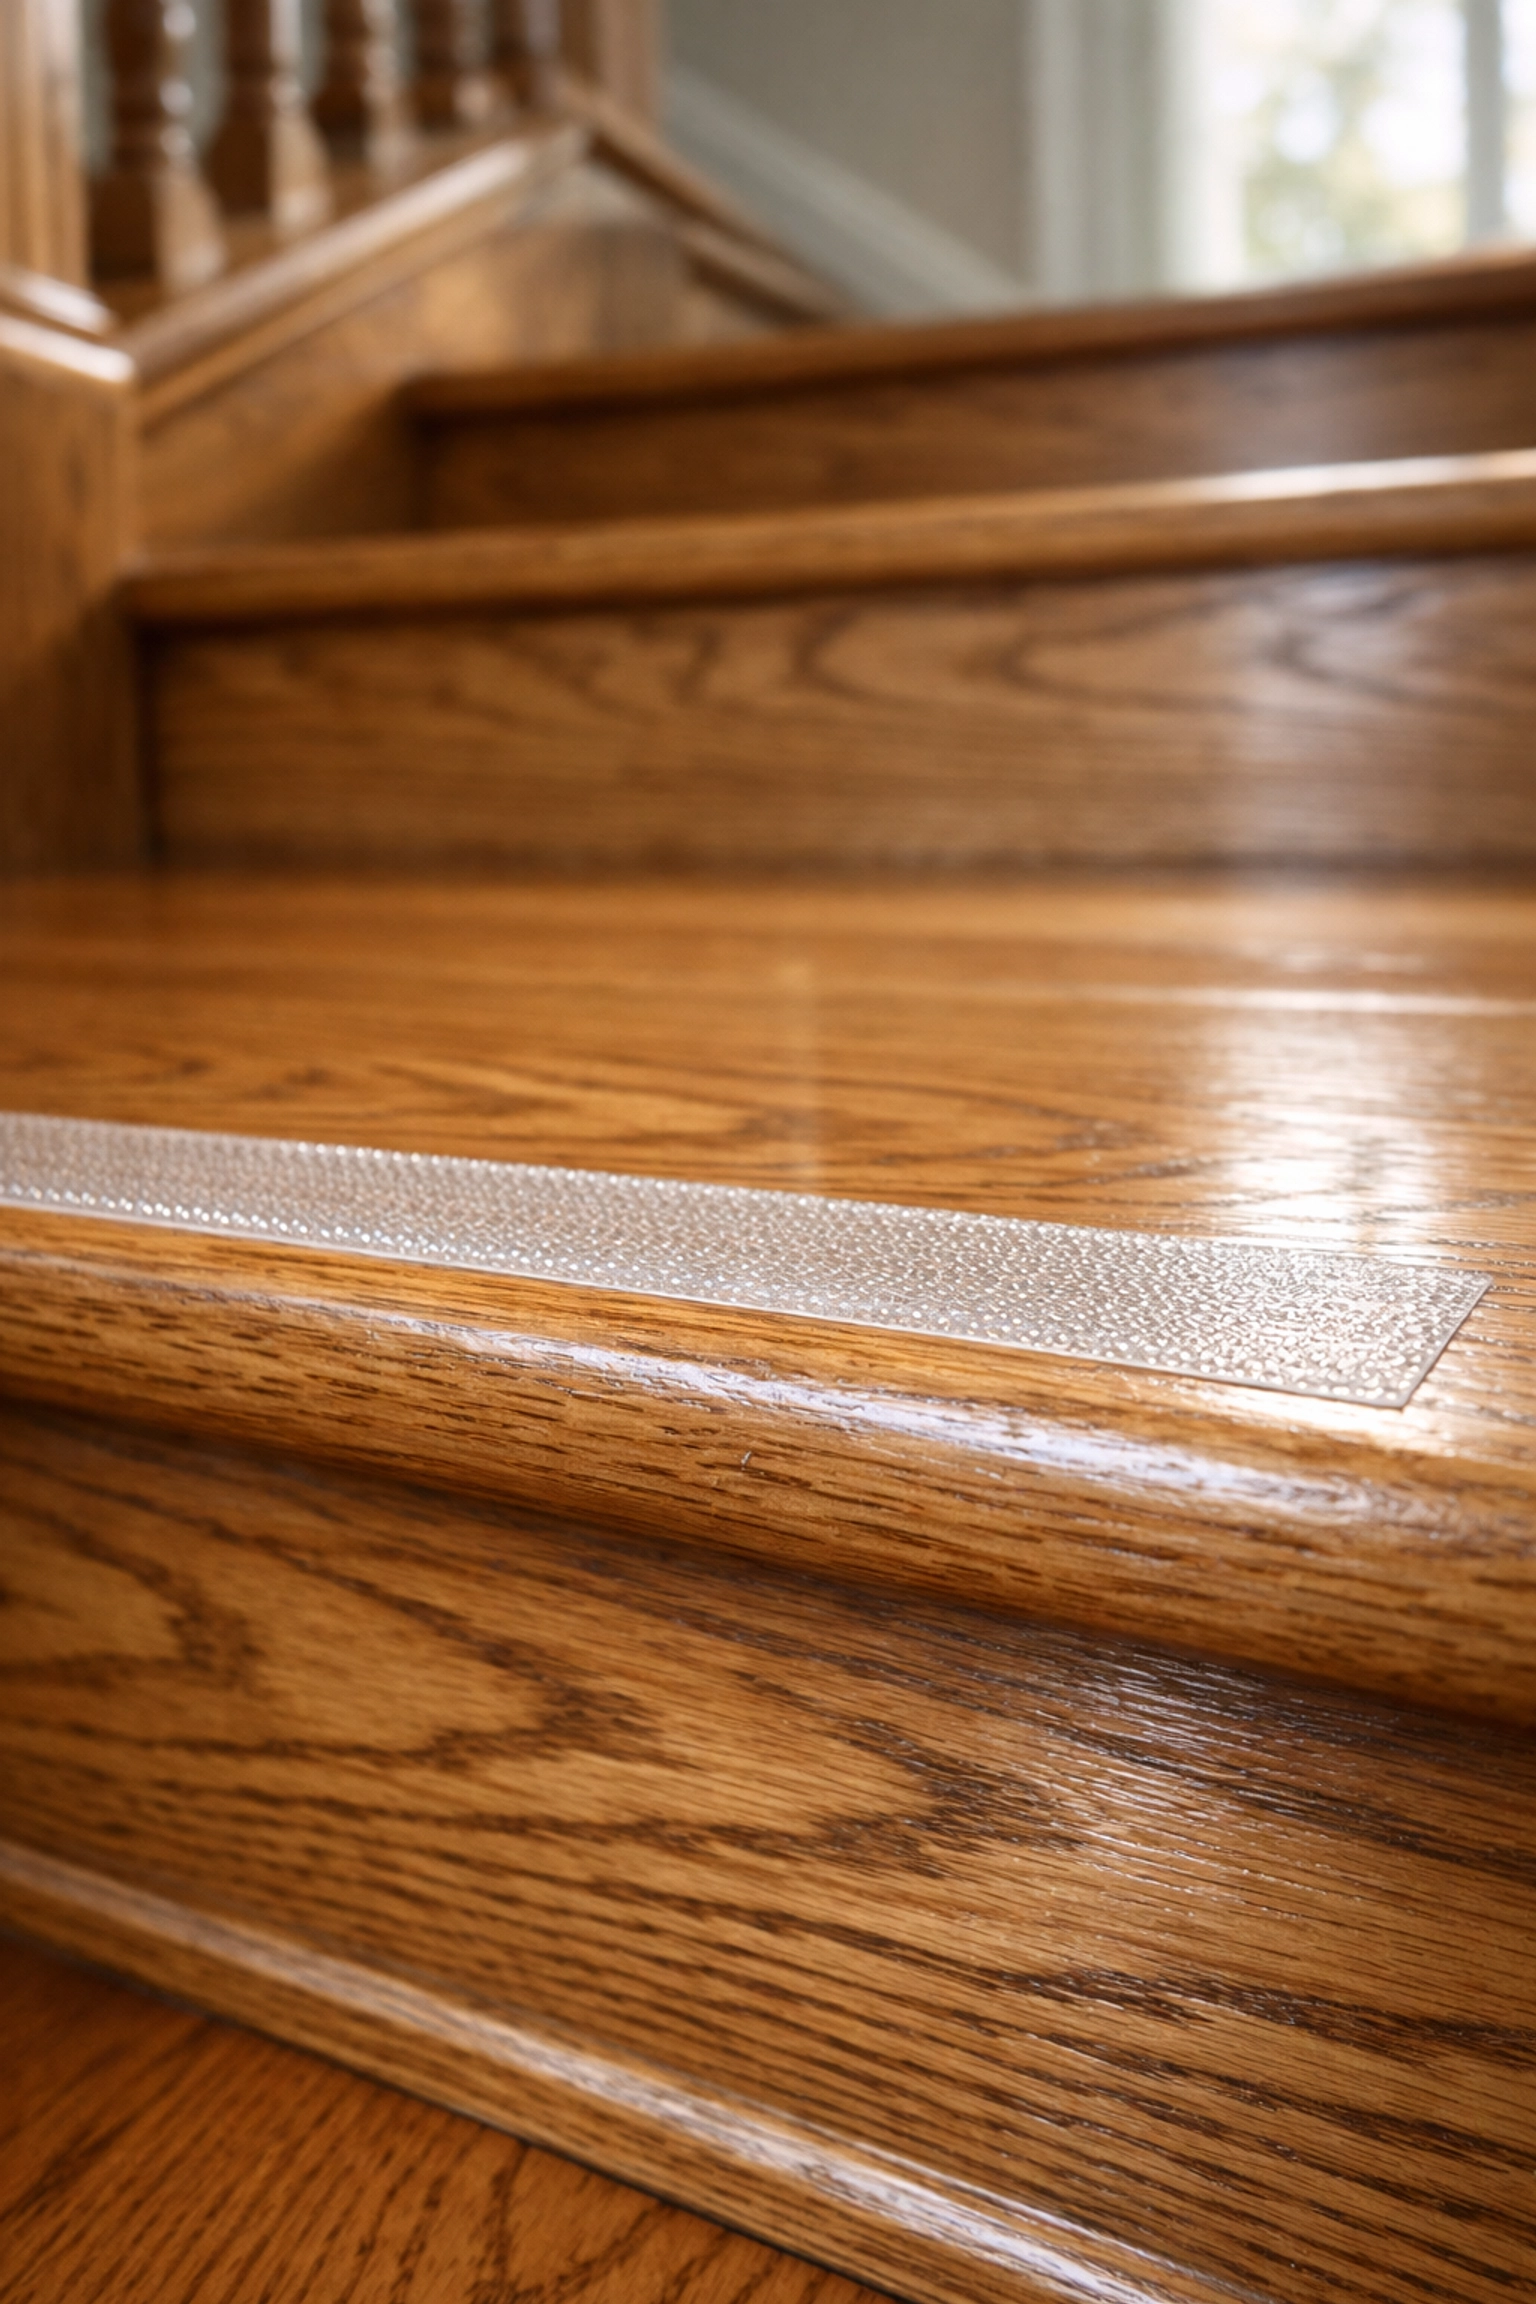
We all love the look of a polished hardwood staircase. They are timeless and elegant. However, "polished" is often just another word for "slippery." One of the biggest mistakes people make is choosing a stair finish based on a magazine photo rather than how it feels under a pair of socks or rubber-soled shoes.
Floating stairs, glass steps, and ultra-minimalist designs might look modern, but they often lack the visual cues and physical grip necessary for safe navigation. When a surface is perfectly smooth, there is very little friction to stop a foot from sliding forward as it lands on a tread.
The Fix: Increase Friction
You don’t have to tear out your beautiful wood stairs. The goal is to add traction without destroying the look.
- Transparent Anti-Slip Strips: These are adhesive strips that are nearly invisible but provide a gritty texture to ensure your foot stays put.
- Stair Treads: These are individual pieces of carpet or rubber that sit on each step. They provide excellent grip and can actually protect your wood from wear and tear.
- Non-Slip Coatings: There are specific clear-coat finishes that include a fine aggregate. It looks like a standard finish but feels slightly rough to the touch.
2. Ignoring the "Muscle Memory" of Riser Height
Have you ever walked up a flight of stairs and suddenly "tripped" on thin air? Usually, that happens because one step was a slightly different height than the others. Our brains are incredibly good at mapping out a rhythm. After the first two steps, your legs "calculate" exactly how high they need to lift to clear the next one.
When a staircase has uneven risers (the vertical part of the step), that rhythm is broken. Even a difference of a quarter-inch can be enough to cause a stumble. This often happens in older homes where the house has settled, or in DIY renovations where the math wasn't quite right.
The Fix: Standardize and Mark
If you are building or renovating, stick to the standard: risers should be about 7 inches high, and treads (the flat part) should be about 11 inches deep.
- The Uniformity Rule: Ensure there is no more than a 3/8-inch difference between the highest and lowest riser in the entire flight.
- Visual Contrast: If your stairs are uneven and a full reconstruction isn't in the budget, use "contrast strips." Placing a brightly colored or reflective strip on the edge (the "nose") of each step helps the eye identify exactly where the step ends, helping you adjust your gait manually rather than relying on muscle memory.
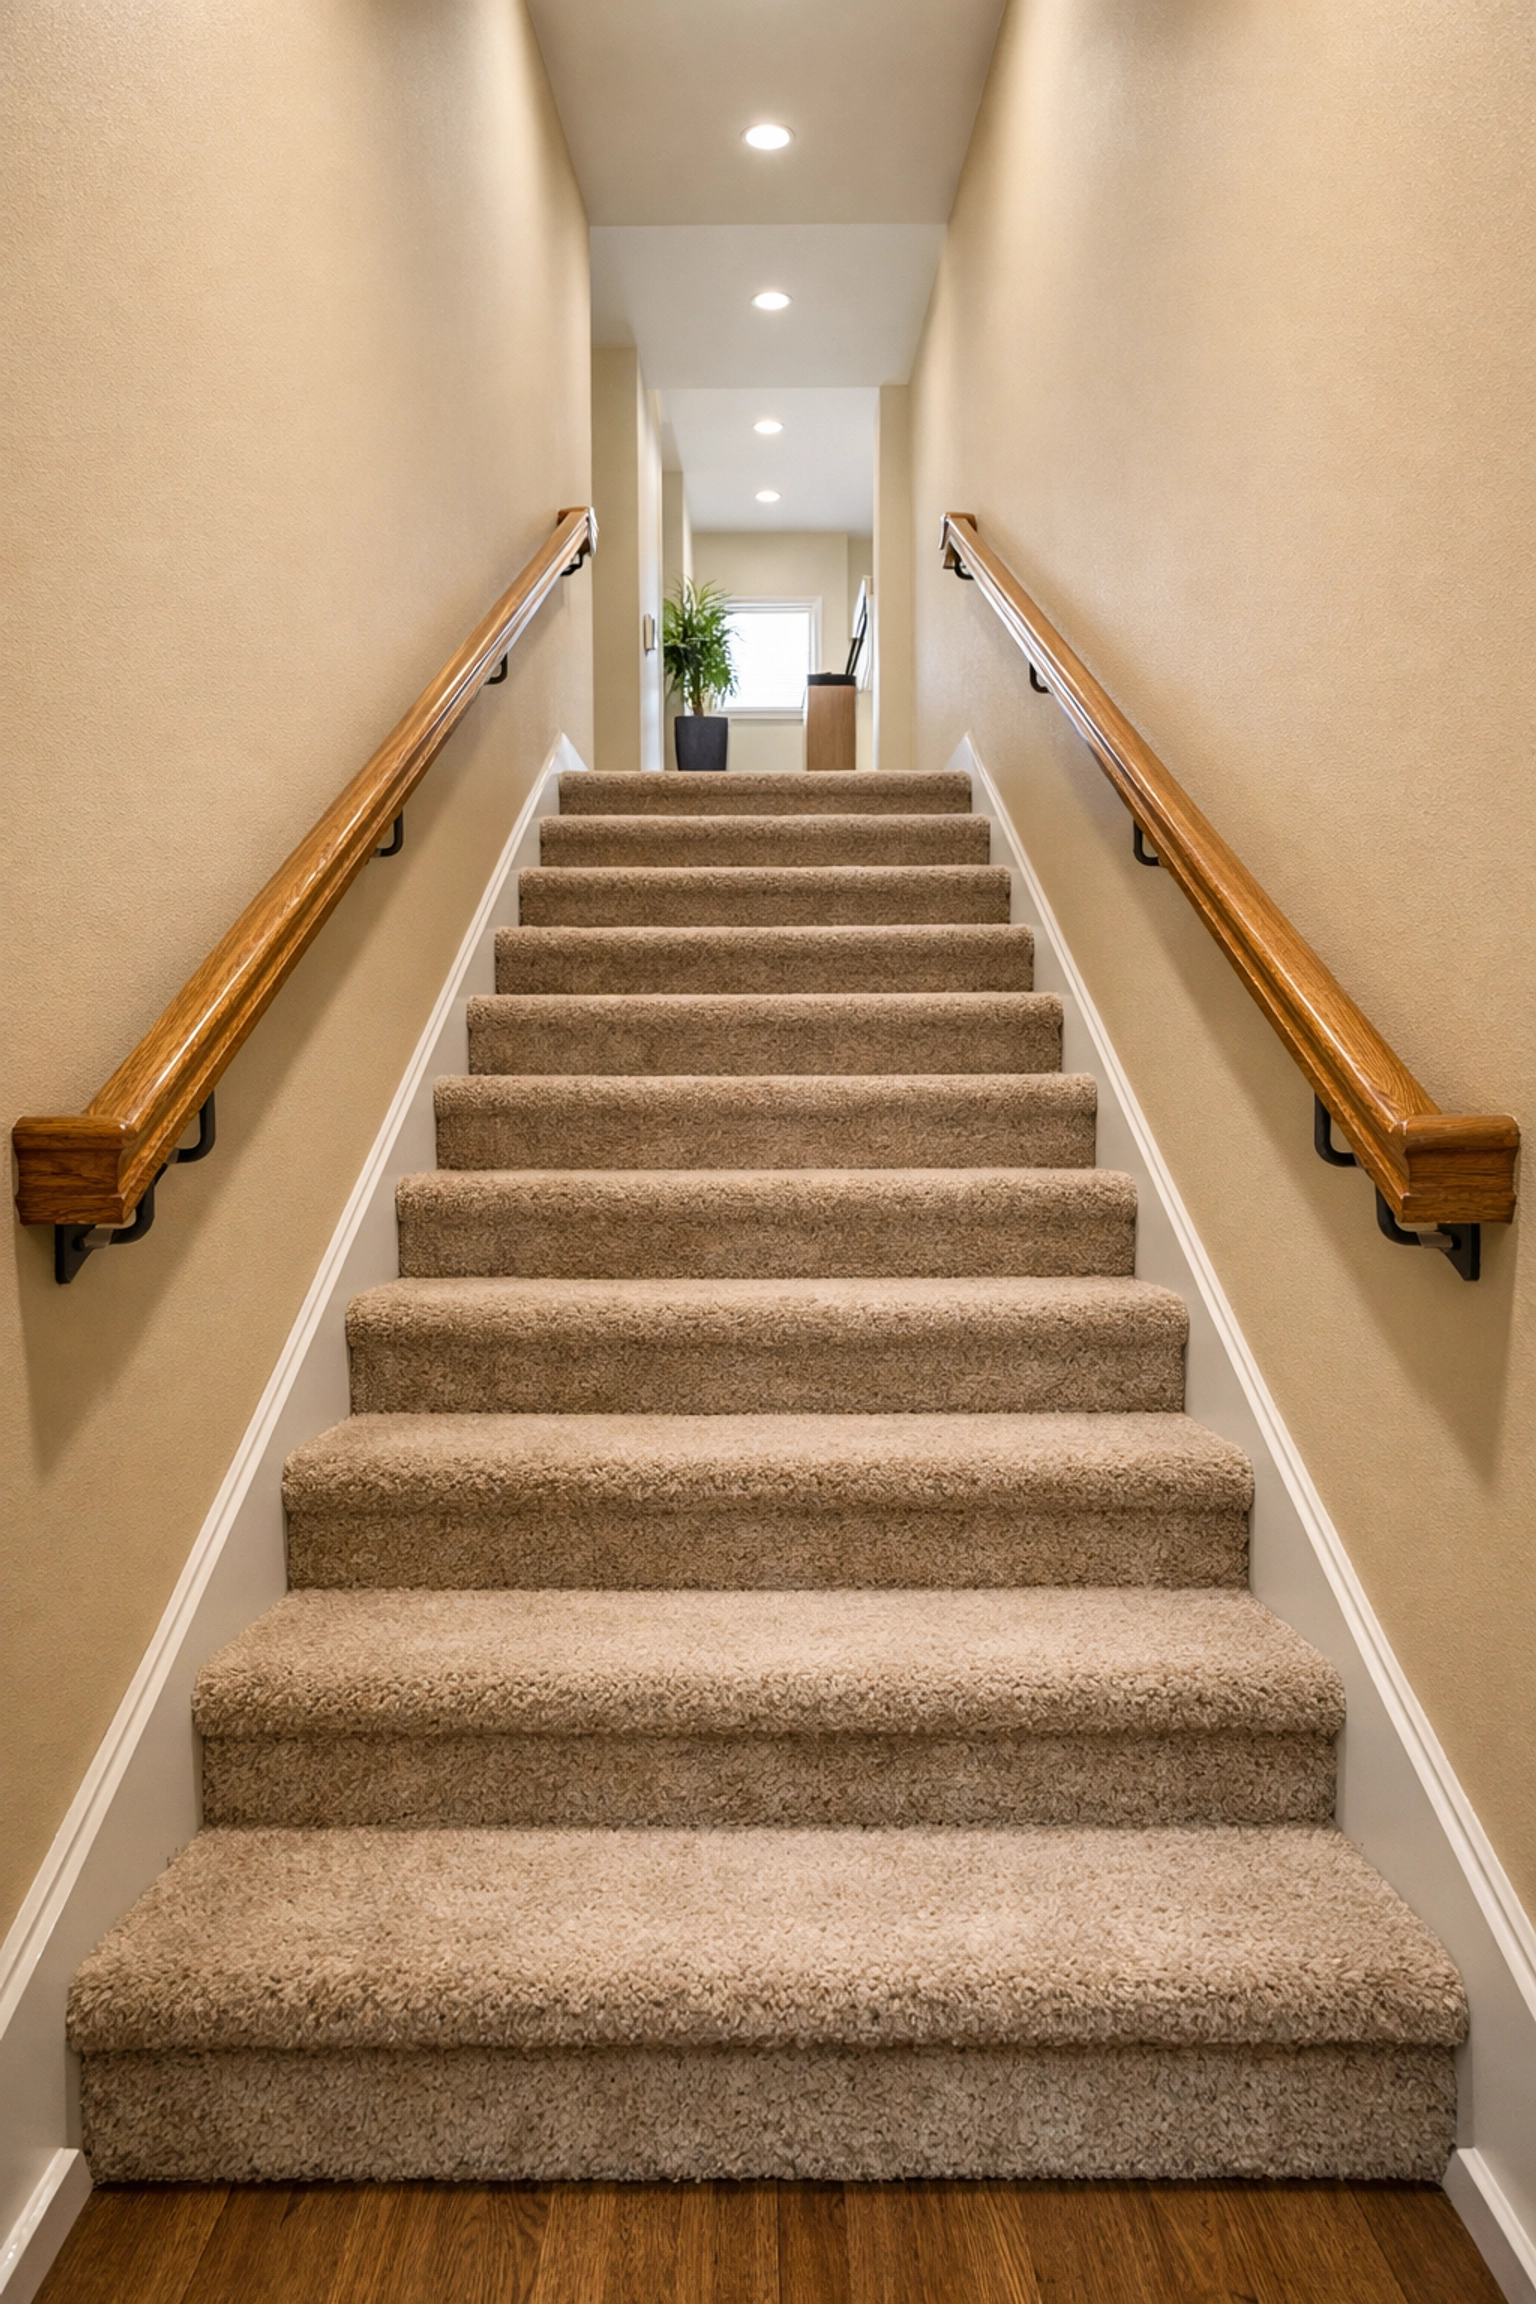
3. The "One-Side" Handrail Habit
Many residential staircases only have a handrail on one side. While this usually meets basic building codes for narrow stairs, it isn't ideal for long-term safety. As we age, we might develop a "strong side" and a "weak side" due to knee issues, hip pain, or even a past injury. If the handrail is only on your weak side, you aren't getting the support you truly need.
Furthermore, a single handrail forces you to use the same arm every time you go up or down. Having rails on both sides allows you to distribute your weight more evenly and provides a "fail-safe" if you lose your balance in either direction.
The Fix: Install a Second Rail
Adding a second handrail is one of the most cost-effective safety upgrades you can make.
- Continuous Rails: Ensure the rail runs the full length of the stairs without breaks.
- Extension: The rail should ideally extend about 12 inches past the top and bottom steps. This gives you a "handhold" before you even start climbing and keeps you stable as you transition back to flat ground.
- Grip Shape: Avoid rails that are too wide to wrap your hand around. An "ovoid" or circular rail that is 1.25 to 2 inches in diameter is usually the easiest to grip firmly.
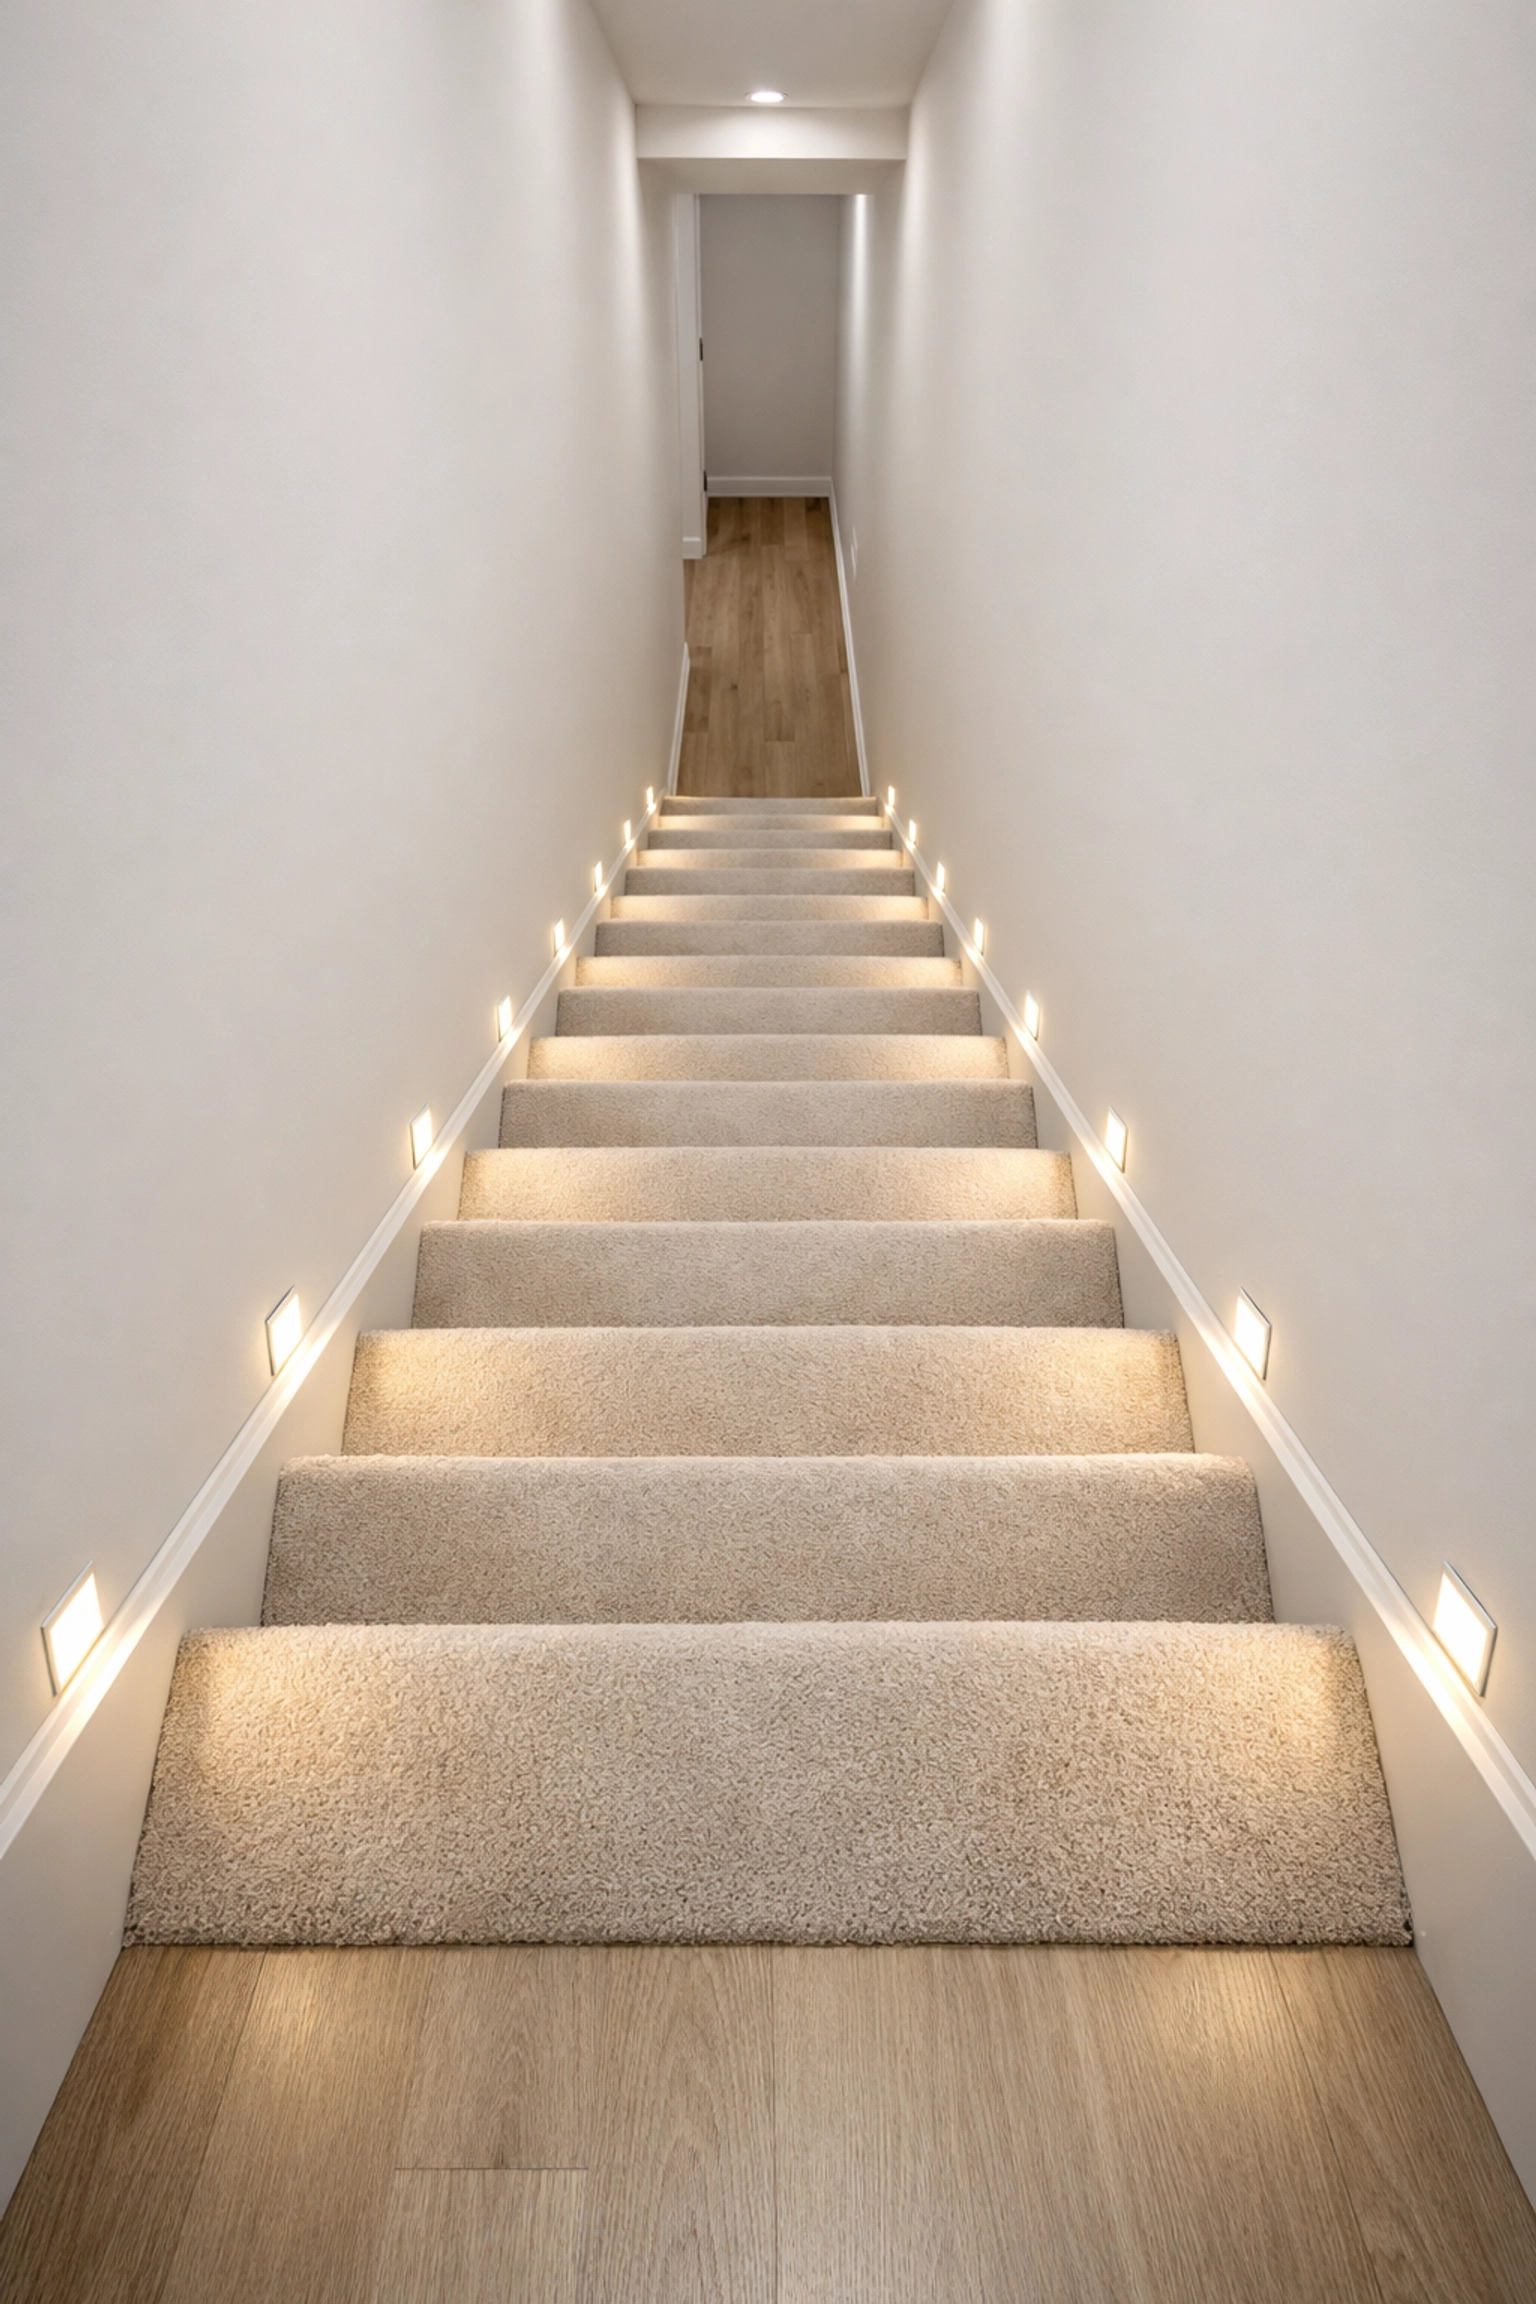
4. Poor Lighting and Deceptive Shadows
Staircases are often tucked away in hallways or corners of the house where natural light doesn't reach. A common mistake is relying on a single overhead light at the top of the landing. This creates long shadows that can hide the edge of the steps, making the staircase look like one flat, dark slope.
Shadows are particularly dangerous for those with declining vision or depth perception issues. If you can’t see where the tread ends and the riser begins, you’re essentially guessing where to put your foot.
The Fix: Light the Path, Not the Ceiling
The goal is to eliminate shadows on the treads.
- Motion-Sensor LED Strips: These can be installed under the lip of each step or along the baseboard. They glow softly when they detect movement, lighting the exact spot where your foot needs to land.
- Two-Way Switches: Ensure there is a light switch at both the top and the bottom of the stairs. Never try to "brave" a dark staircase because you forgot to turn the light on before you headed down.
- Increase Wattage: If your fixtures allow it, use higher-lumen bulbs that mimic natural daylight, which helps with clarity and contrast.
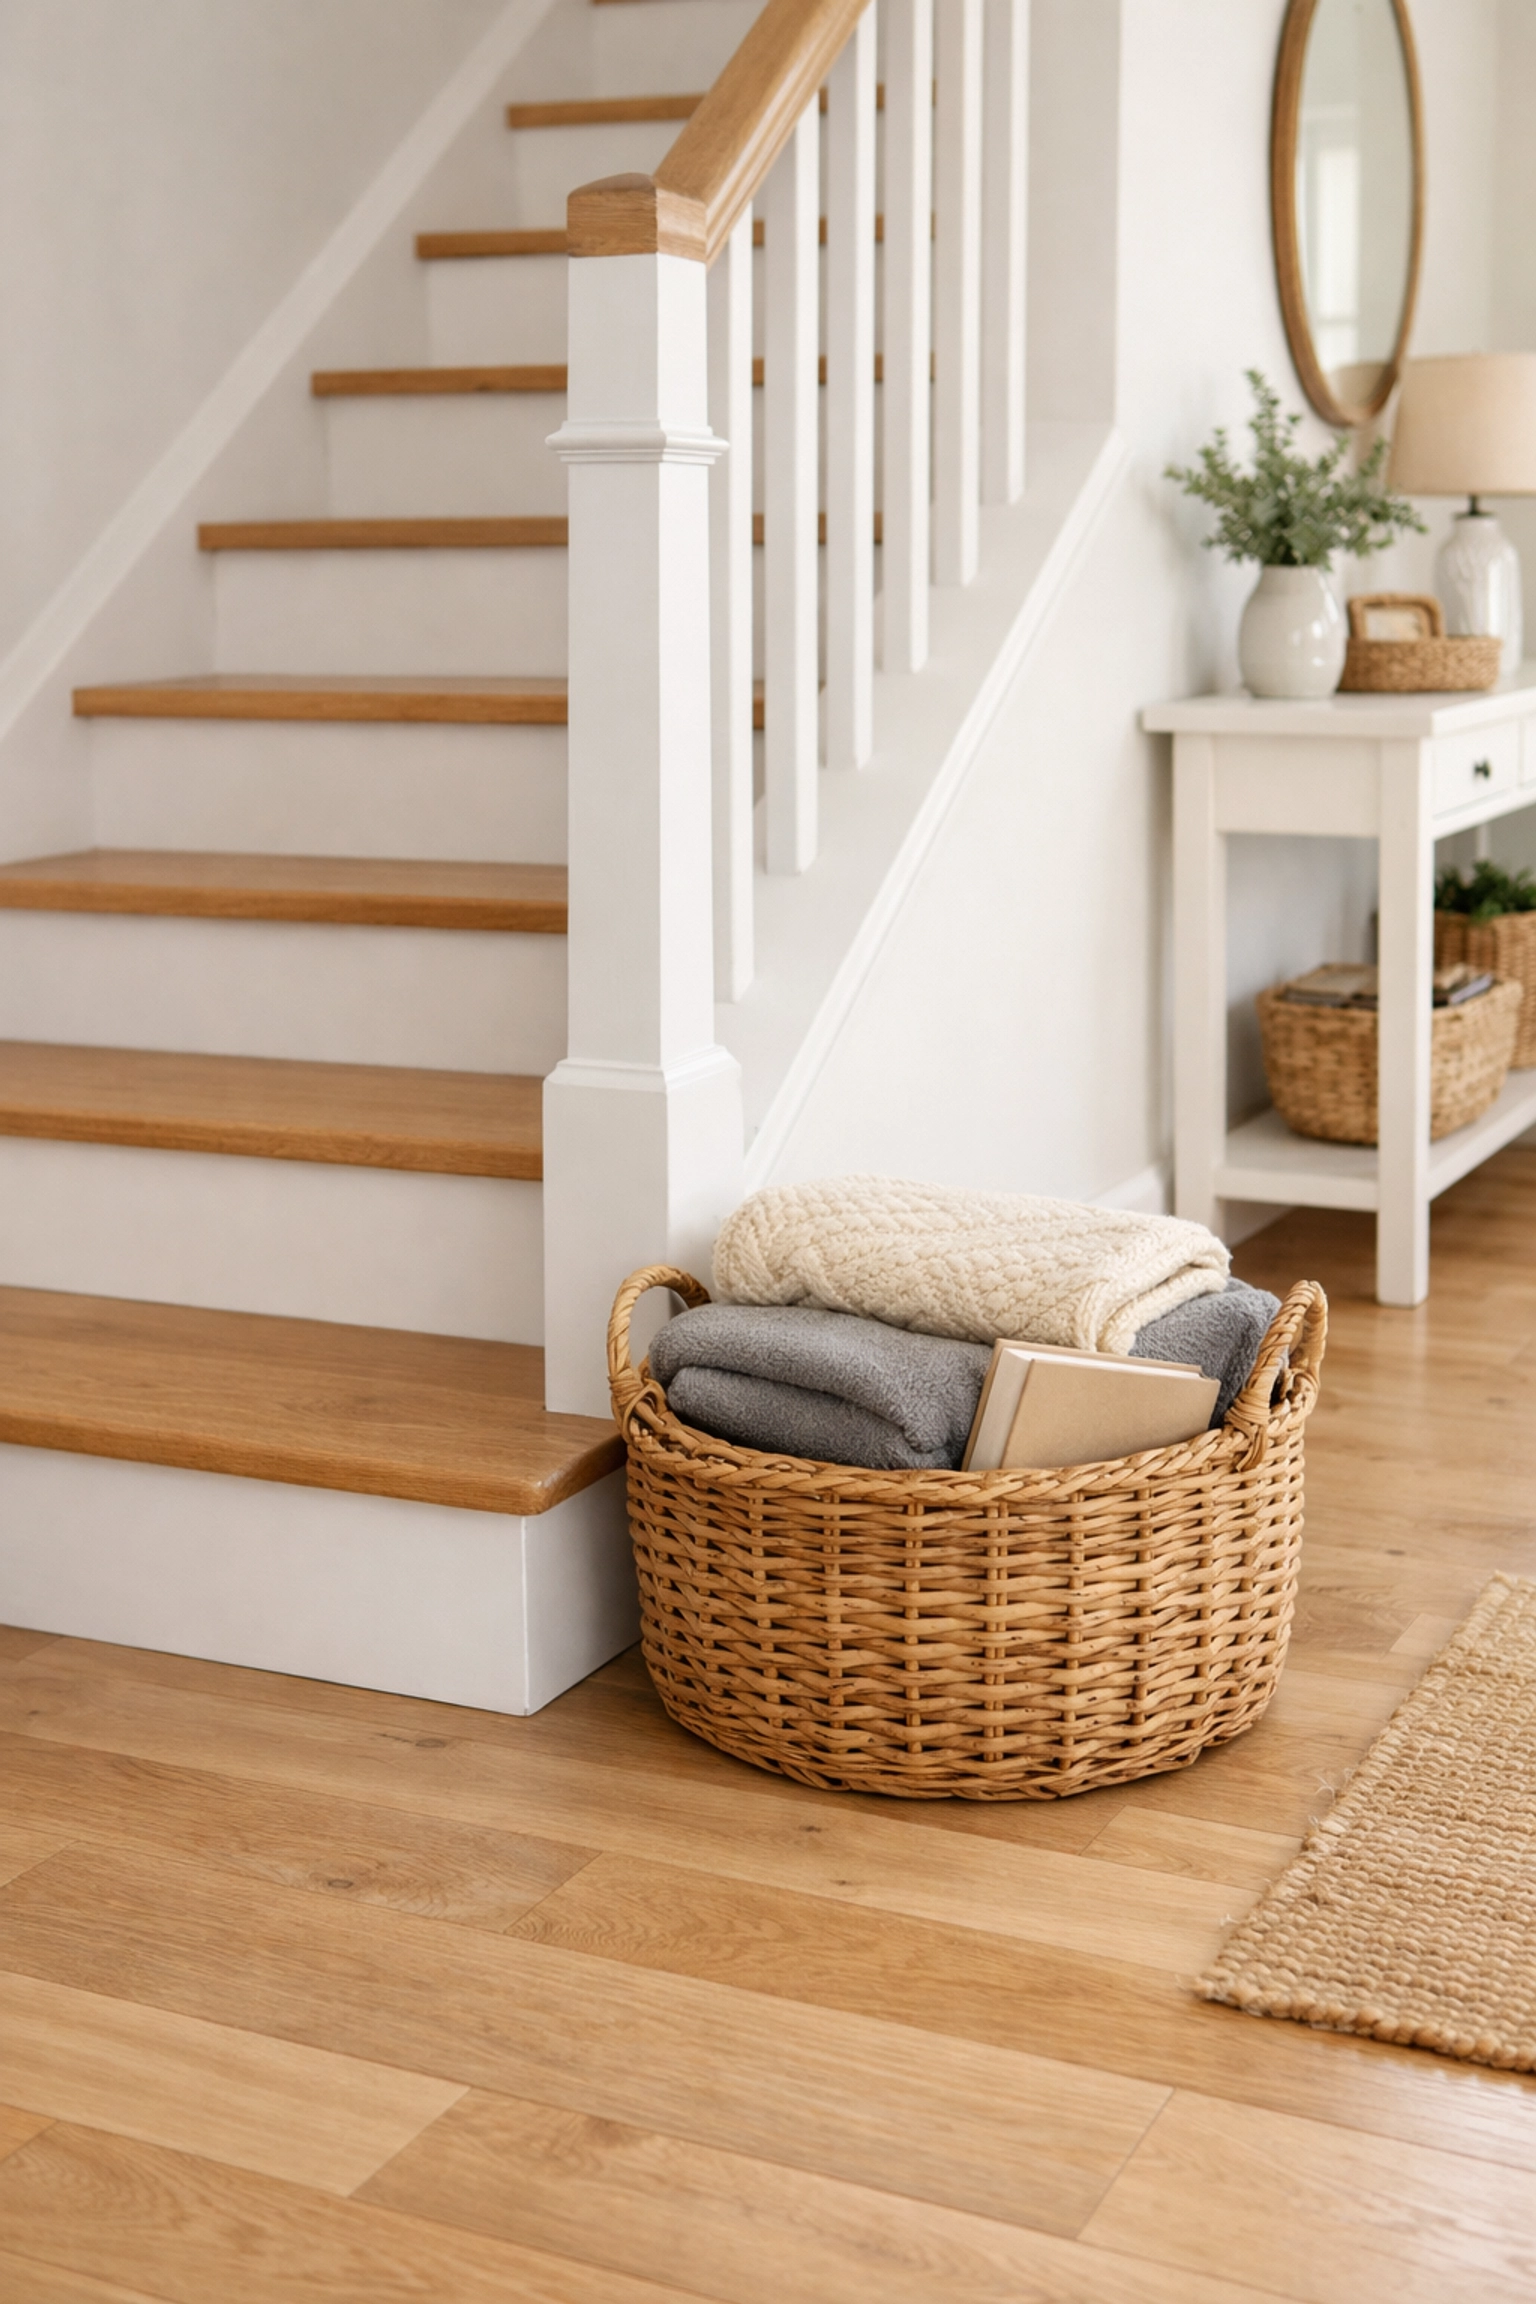
5. Using the Stairs as a "Waiting Room"
We’ve all done it: we have a pile of laundry, a stack of books, or a box that needs to go upstairs, so we leave it on the bottom two steps to take up "next time we go." This is one of the most dangerous habits a household can have.
Stairs are high-traffic transit zones. Any object left on a step: no matter how small: is a massive trip hazard. In the dark or in a hurry, you won't remember that the book is on the third step. Even if you do see it, navigating around it narrows your path and forces you to move in an unbalanced way.
The Fix: The "Clear Path" Policy
Establish a strict rule: nothing ever sits on the stairs.
- Landing Baskets: If you need a place to collect items that need to go up or down, place a basket at the very top or bottom of the stairs, at least three feet away from the first step.
- One Hand Free: Always keep at least one hand on the rail. If you are carrying so much that you need both hands, you shouldn't be on the stairs. Make two trips or ask for help.
6. Neglecting the "Nosing" of the Step
The "nose" is the edge of the step that overhangs the riser. In many homes, this edge is rounded or, worse, has become worn down and slippery over time. If the nosing is too long, it can catch the heel of your shoe as you go down. If it’s too short or slippery, your foot can slide right off.
Many people also overlook the importance of visual contrast on the nosing. If the stairs are all the same color of carpet or wood, the "nose" disappears into the step below it.
The Fix: Define the Edge
- Tread Caps: You can install metal or rubber "nosing caps" that provide a high-friction surface right at the edge where you need it most.
- Contrast Tape: A simple strip of yellow or white tape (depending on your stair color) along the edge of each step can drastically improve depth perception. This is especially helpful for people with cataracts or glaucoma.
7. The Space-Saving Squeeze (Narrow Stairs)
In older homes or "tiny home" renovations, staircases are often narrowed to save square footage. A narrow staircase is difficult to navigate if you need to use a cane or if you require the assistance of a caregiver walking beside you. Furthermore, narrow stairs often have a steeper pitch to compensate for the lack of horizontal space.
The Fix: Optimize the Space You Have
While you might not be able to widen your staircase without a major structural overhaul, you can optimize the environment.
- Remove Bulk: Ensure there are no picture frames, plants, or decorative items protruding from the walls into the stairwell space. You want every inch of width available for your body and your grip.
- Assess the "Turn": If your stairs have a landing or a curve (winders), ensure these areas are exceptionally well-lit. Winder steps (which are pie-shaped) are notoriously dangerous because the tread is very narrow near the center. Always walk on the wide outer edge of a curved staircase.
A Note on Footwear and Habits
While fixing the stairs themselves is vital, how we interact with them matters just as much.
Avoid "Sock-Walking": Running up or down stairs in just socks is one of the leading causes of domestic falls. Socks provide almost zero traction on wood or tile. Always wear shoes with rubber soles or "grip socks" that have silicone pads on the bottom.
The "Pause" Technique: Before you start your ascent or descent, take a one-second pause. Ensure you have a firm grip on the rail and that your vision is clear (and not obstructed by bifocals, which can distort the distance of the floor).
Final Thoughts
Stair safety isn't about fear; it's about preparation. By addressing these seven common mistakes, you’re not just preventing a fall: you’re ensuring that your home remains a place of comfort and independence for years to come.
Most of these fixes are simple, afternoon projects: changing a lightbulb, adding a strip of grip tape, or clearing off the clutter. Take a look at your stairs today through a new lens. A few small changes can make a world of difference in how you move through your home. Stay safe, stay confident, and take it one step at a time.

