Stairs are often the most utilized yet most overlooked part of a home. We use them dozens of times a day without a second thought: until something goes wrong. For many of us, the staircase represents independence, connecting the different "zones" of our lives. But as we age, or as we care for family members who may be experiencing changes in mobility or vision, the stairs can transition from a simple architectural feature to a significant challenge.
At Fall Guys Products, we believe that home safety shouldn't feel like an overhaul; it should feel like an upgrade to your peace of mind. Falling on stairs is rarely the result of a single "accident." Instead, it is usually the result of small, cumulative oversights in design, maintenance, or habit.
In this guide, we’re going to look at the seven most common mistakes people make with their stairs and, more importantly, the practical, reassuring steps you can take to fix them.
1. Living with Inconsistent Step Dimensions
Your brain is an incredible machine. When you start climbing a flight of stairs, your mind "maps" the height and depth of the first two steps. It then automates your movement for the rest of the flight. This is called proprioception: your body’s ability to sense its position in space.
The mistake occurs when steps are inconsistent. If the third step is even a quarter-inch higher than the second, or if the top landing is slightly deeper than the rest of the treads, that internal "map" fails. This is a very common issue in older homes where the house may have settled, or in DIY renovations where "close enough" was the standard.
The Fix: Uniformity is Key
If you suspect your stairs are uneven, use a tape measure to check the "rise" (height) and "run" (depth) of every single step. If there are variations:
- Add Stair Nosing: You can install nosing (the edge that overhangs the step) to help standardize the depth of the treads.
- Consult a Professional: If the variations are significant (more than 3/8 of an inch), it may be worth having a carpenter shim the treads to create a uniform surface.
- Visual Cues: If the structure cannot be easily changed, use high-contrast anti-slip tape on the edge of every step to alert the brain to the specific end of each tread.
2. Falling for the "Bottom-Step Illusion"
Have you ever reached the bottom of the stairs and thought there was one more step, or perhaps thought you were already on the floor when you were actually still on the last riser? This is known as the "bottom-of-flight illusion."
This happens most often when the flooring of the hallway or landing is the exact same color and material as the stairs themselves. Without a visual break, the transition from vertical movement to horizontal movement becomes a "blind spot."
The Fix: Create Contrast
The goal is to make the bottom step stand out clearly from the floor.
- Contrasting Colors: If your stairs are dark wood and your floor is dark wood, place a light-colored, low-pile, slip-resistant rug at the base (secured with rug tape).
- Highlight the Edge: Apply a strip of colored tape or a rubber tread to the very last step. This acts as a visual "stop sign" for your feet, telling your brain that the descent is over.
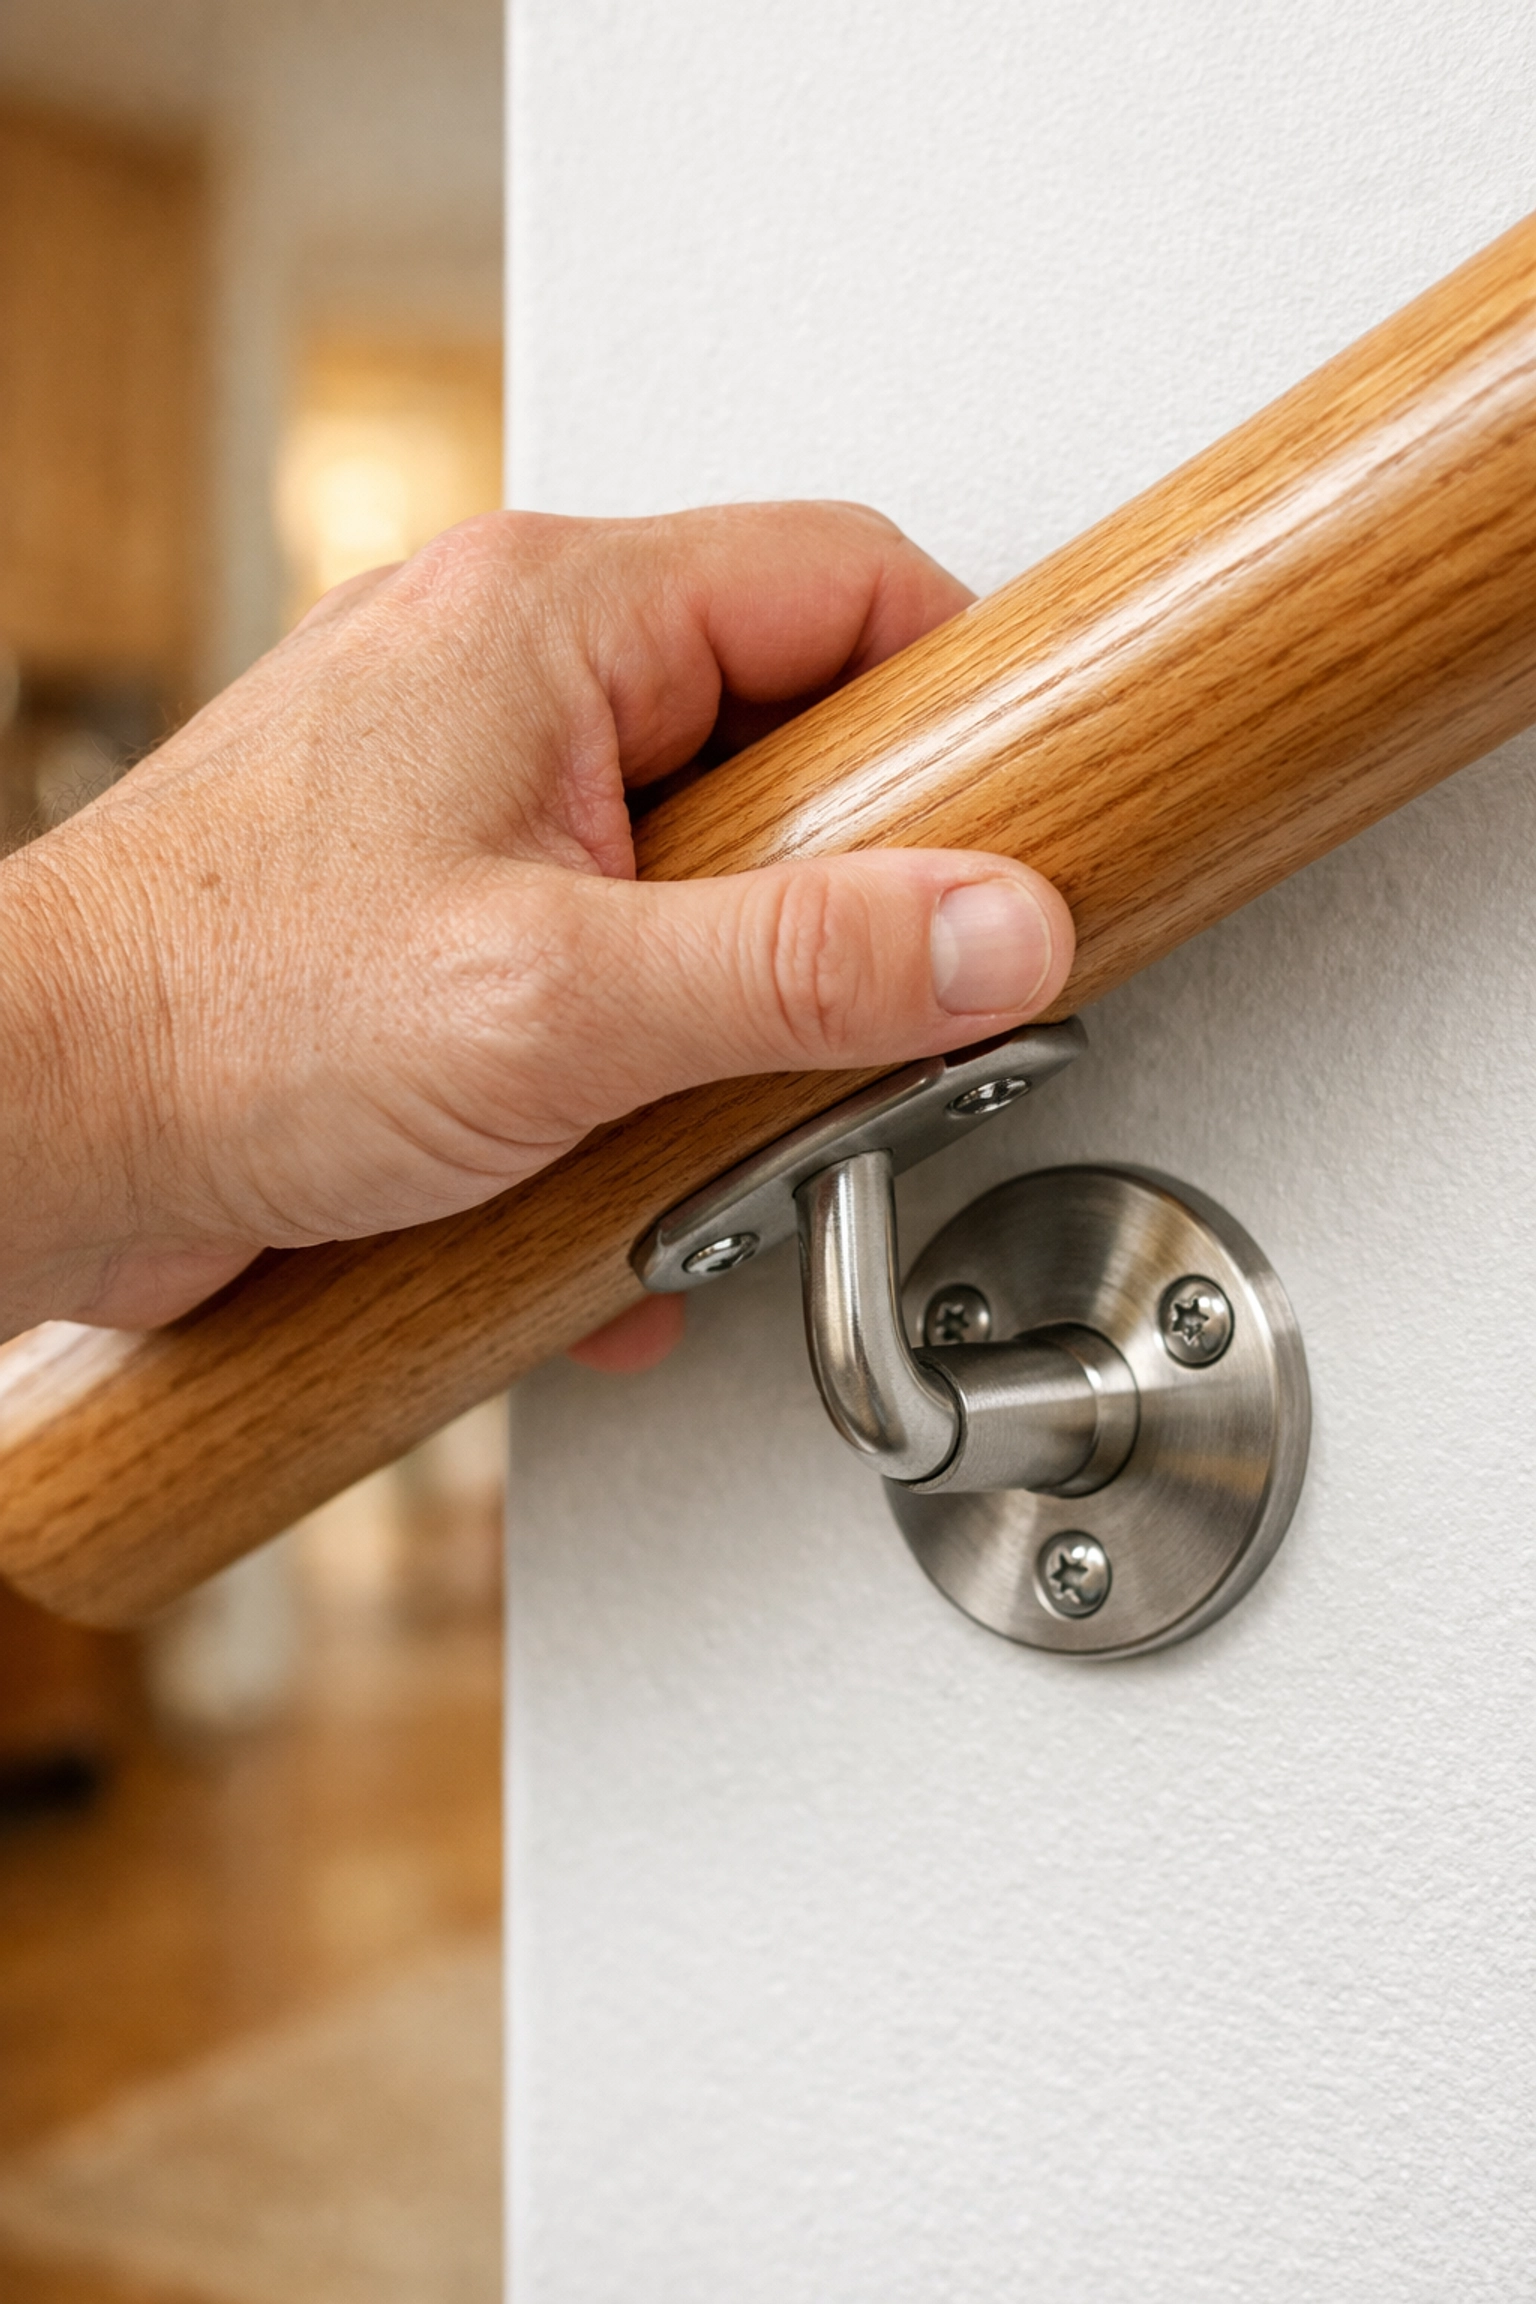
3. Relying on Decorative or "Halfway" Handrails
A handrail shouldn't just be a piece of trim; it should be a life-line. Many homes feature "decorative" handrails that are either too thick to wrap your hand around, too ornate to grip comfortably, or: worst of all: only run along a portion of the staircase.
If you can’t wrap your fingers and thumb entirely around the rail (a "power grip"), you won't have the leverage needed to catch yourself if you slip. Furthermore, if the handrail ends one step before the staircase does, you are left unsupported during the most dangerous part of the transition.
The Fix: Function Over Form
- Check the Shape: The ideal handrail is circular or oval, with a diameter of about 1.25 to 2 inches. This allows for a secure, comfortable grip.
- Extend the Length: Ensure the handrail starts before the first step and continues slightly past the last step. This provides stability before you even begin to climb or descend.
- Double Up: If your staircase is wide, consider installing handrails on both sides. This allows you to use your dominant hand regardless of whether you are going up or down.
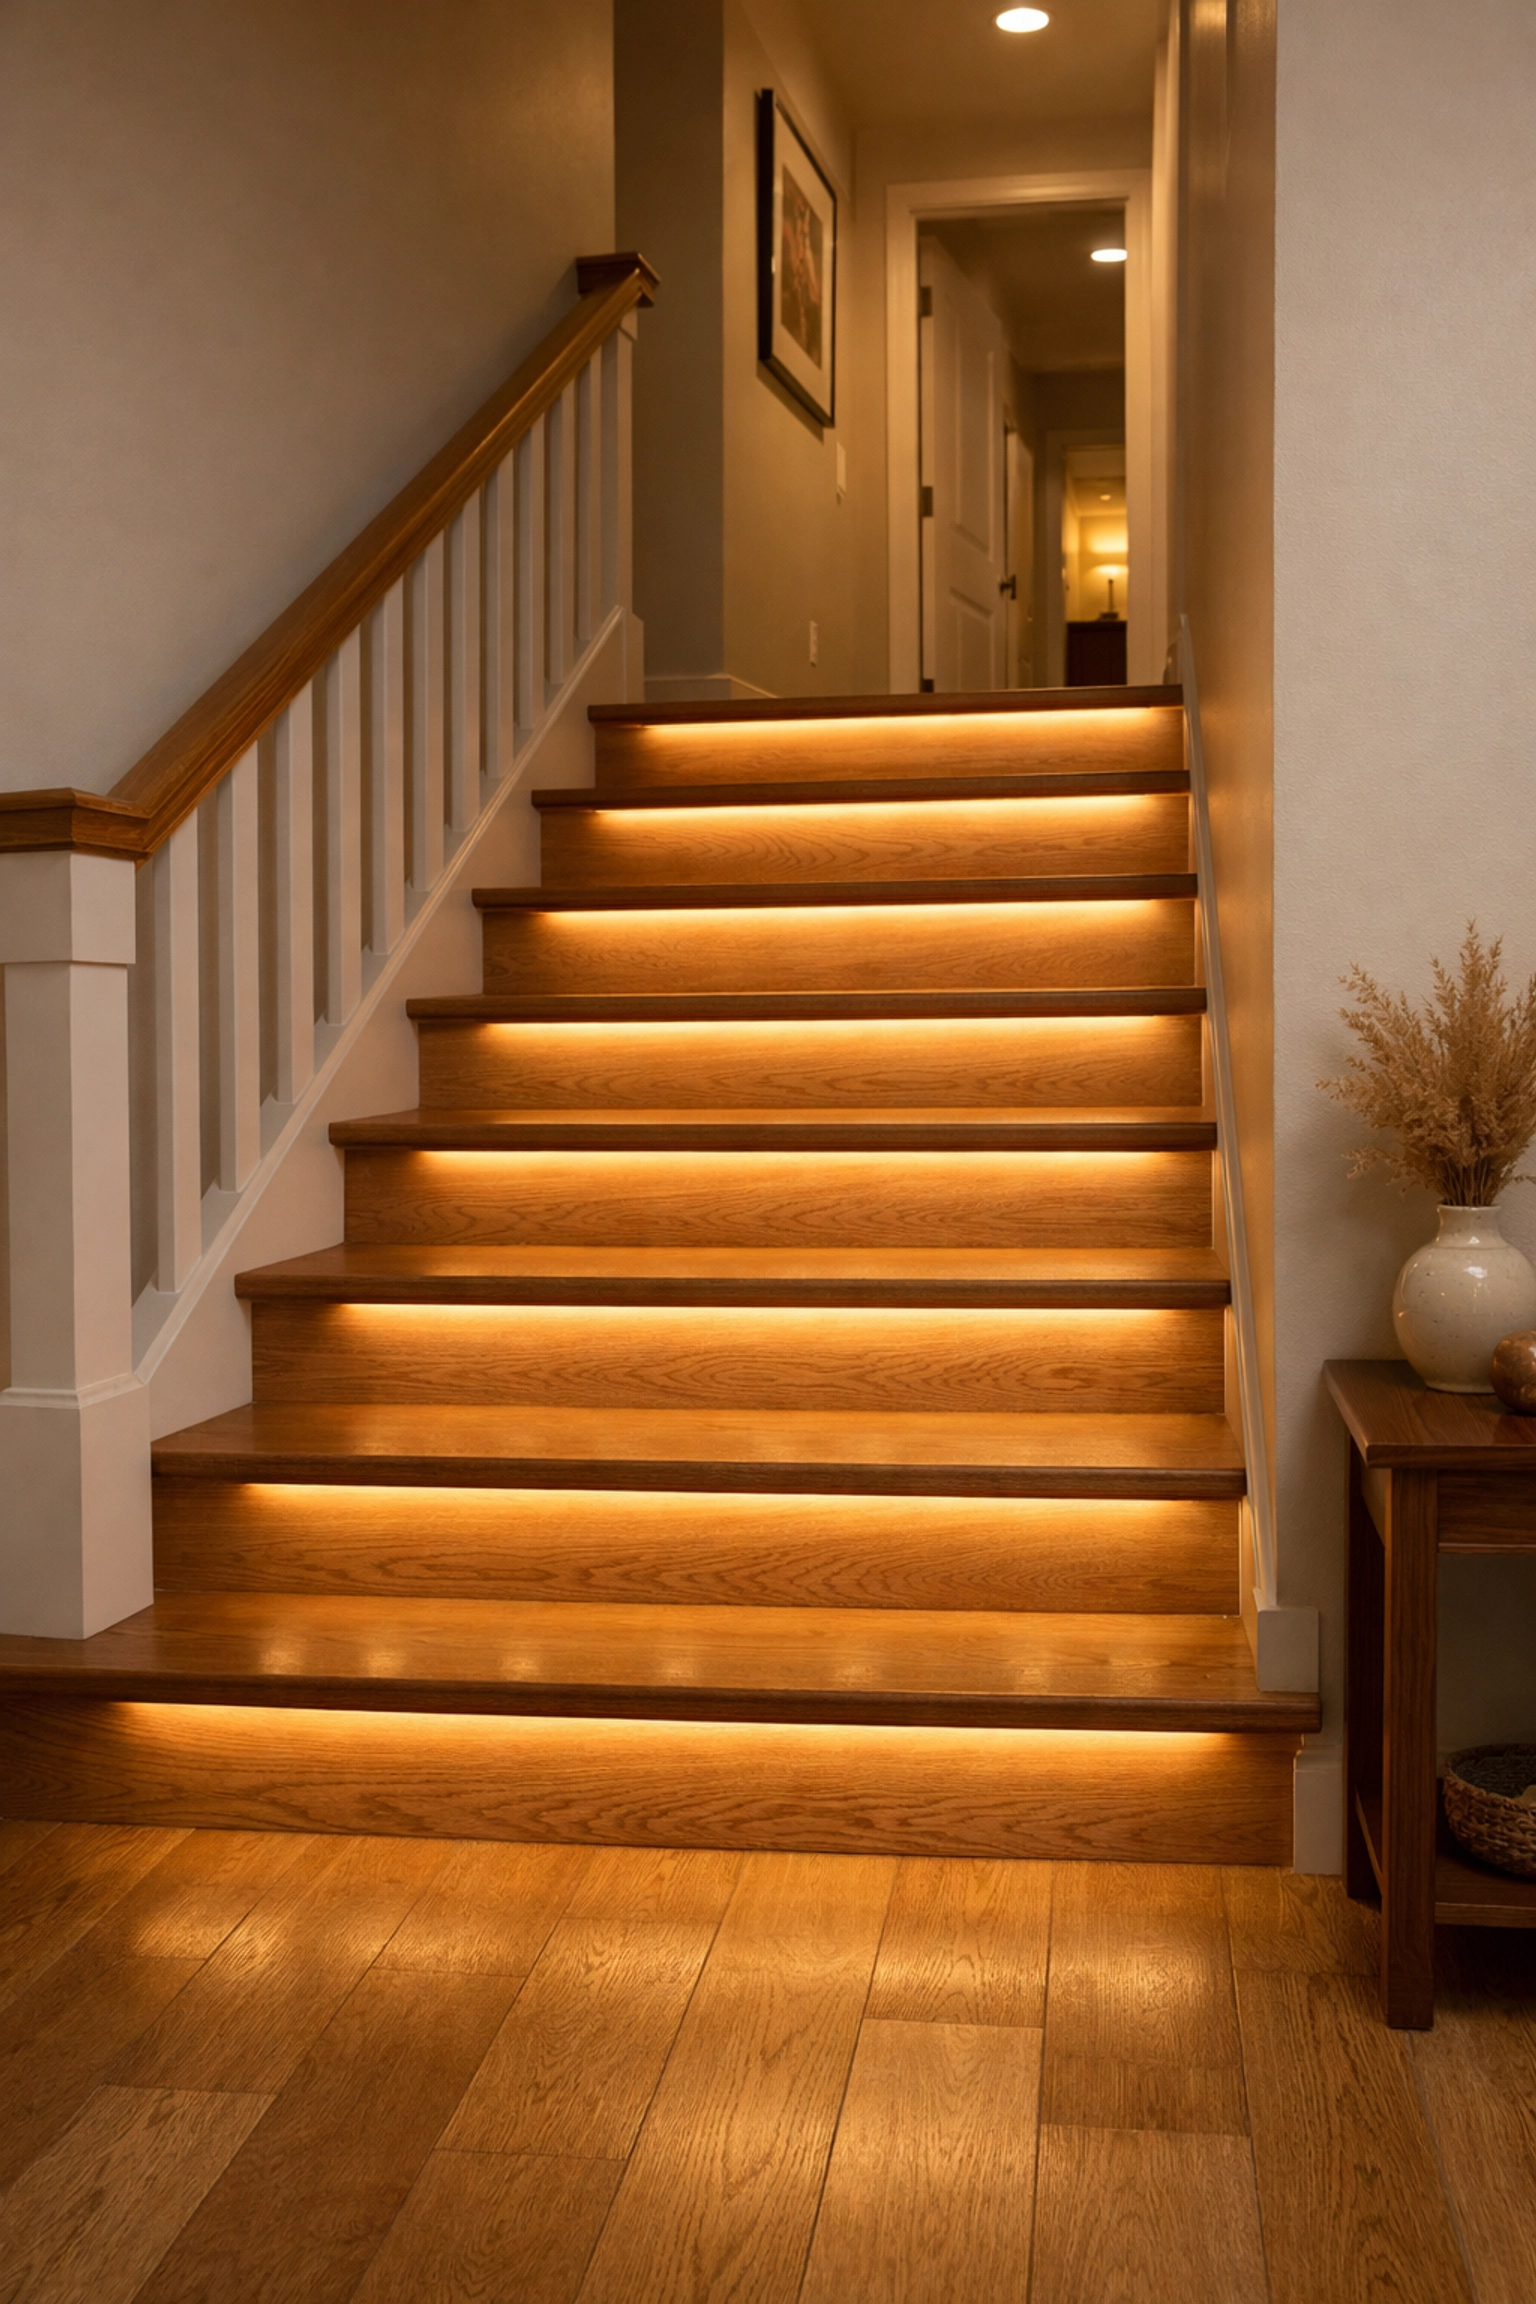
4. Underestimating the "Dark Zones"
Lighting is the most frequent culprit in household falls. We often rely on a single overhead light at the top of the stairs, which creates long shadows. These shadows can hide the edge of the step or make the stairs look like a flat ramp. Furthermore, as we age, our eyes require significantly more light to see clearly and take longer to adjust when moving from a bright room into a dimly lit stairwell.
The Fix: Layered Lighting
- Eliminate Shadows: Install lighting that illuminates the entire flight. LED strip lights tucked under the lip of each step (stair-nosing lights) are excellent because they define the edge of every riser.
- Motion Sensors: Install "plug-in" motion-sensing nightlights at the top and bottom of the stairs. This ensures that even if you’re heading down for a glass of water at 2:00 AM, the path is illuminated without you having to fumble for a switch.
- Dual Switches: Ensure there is a light switch at both the top and the bottom of the stairs. Never "brave" a dark staircase because the switch is at the other end.
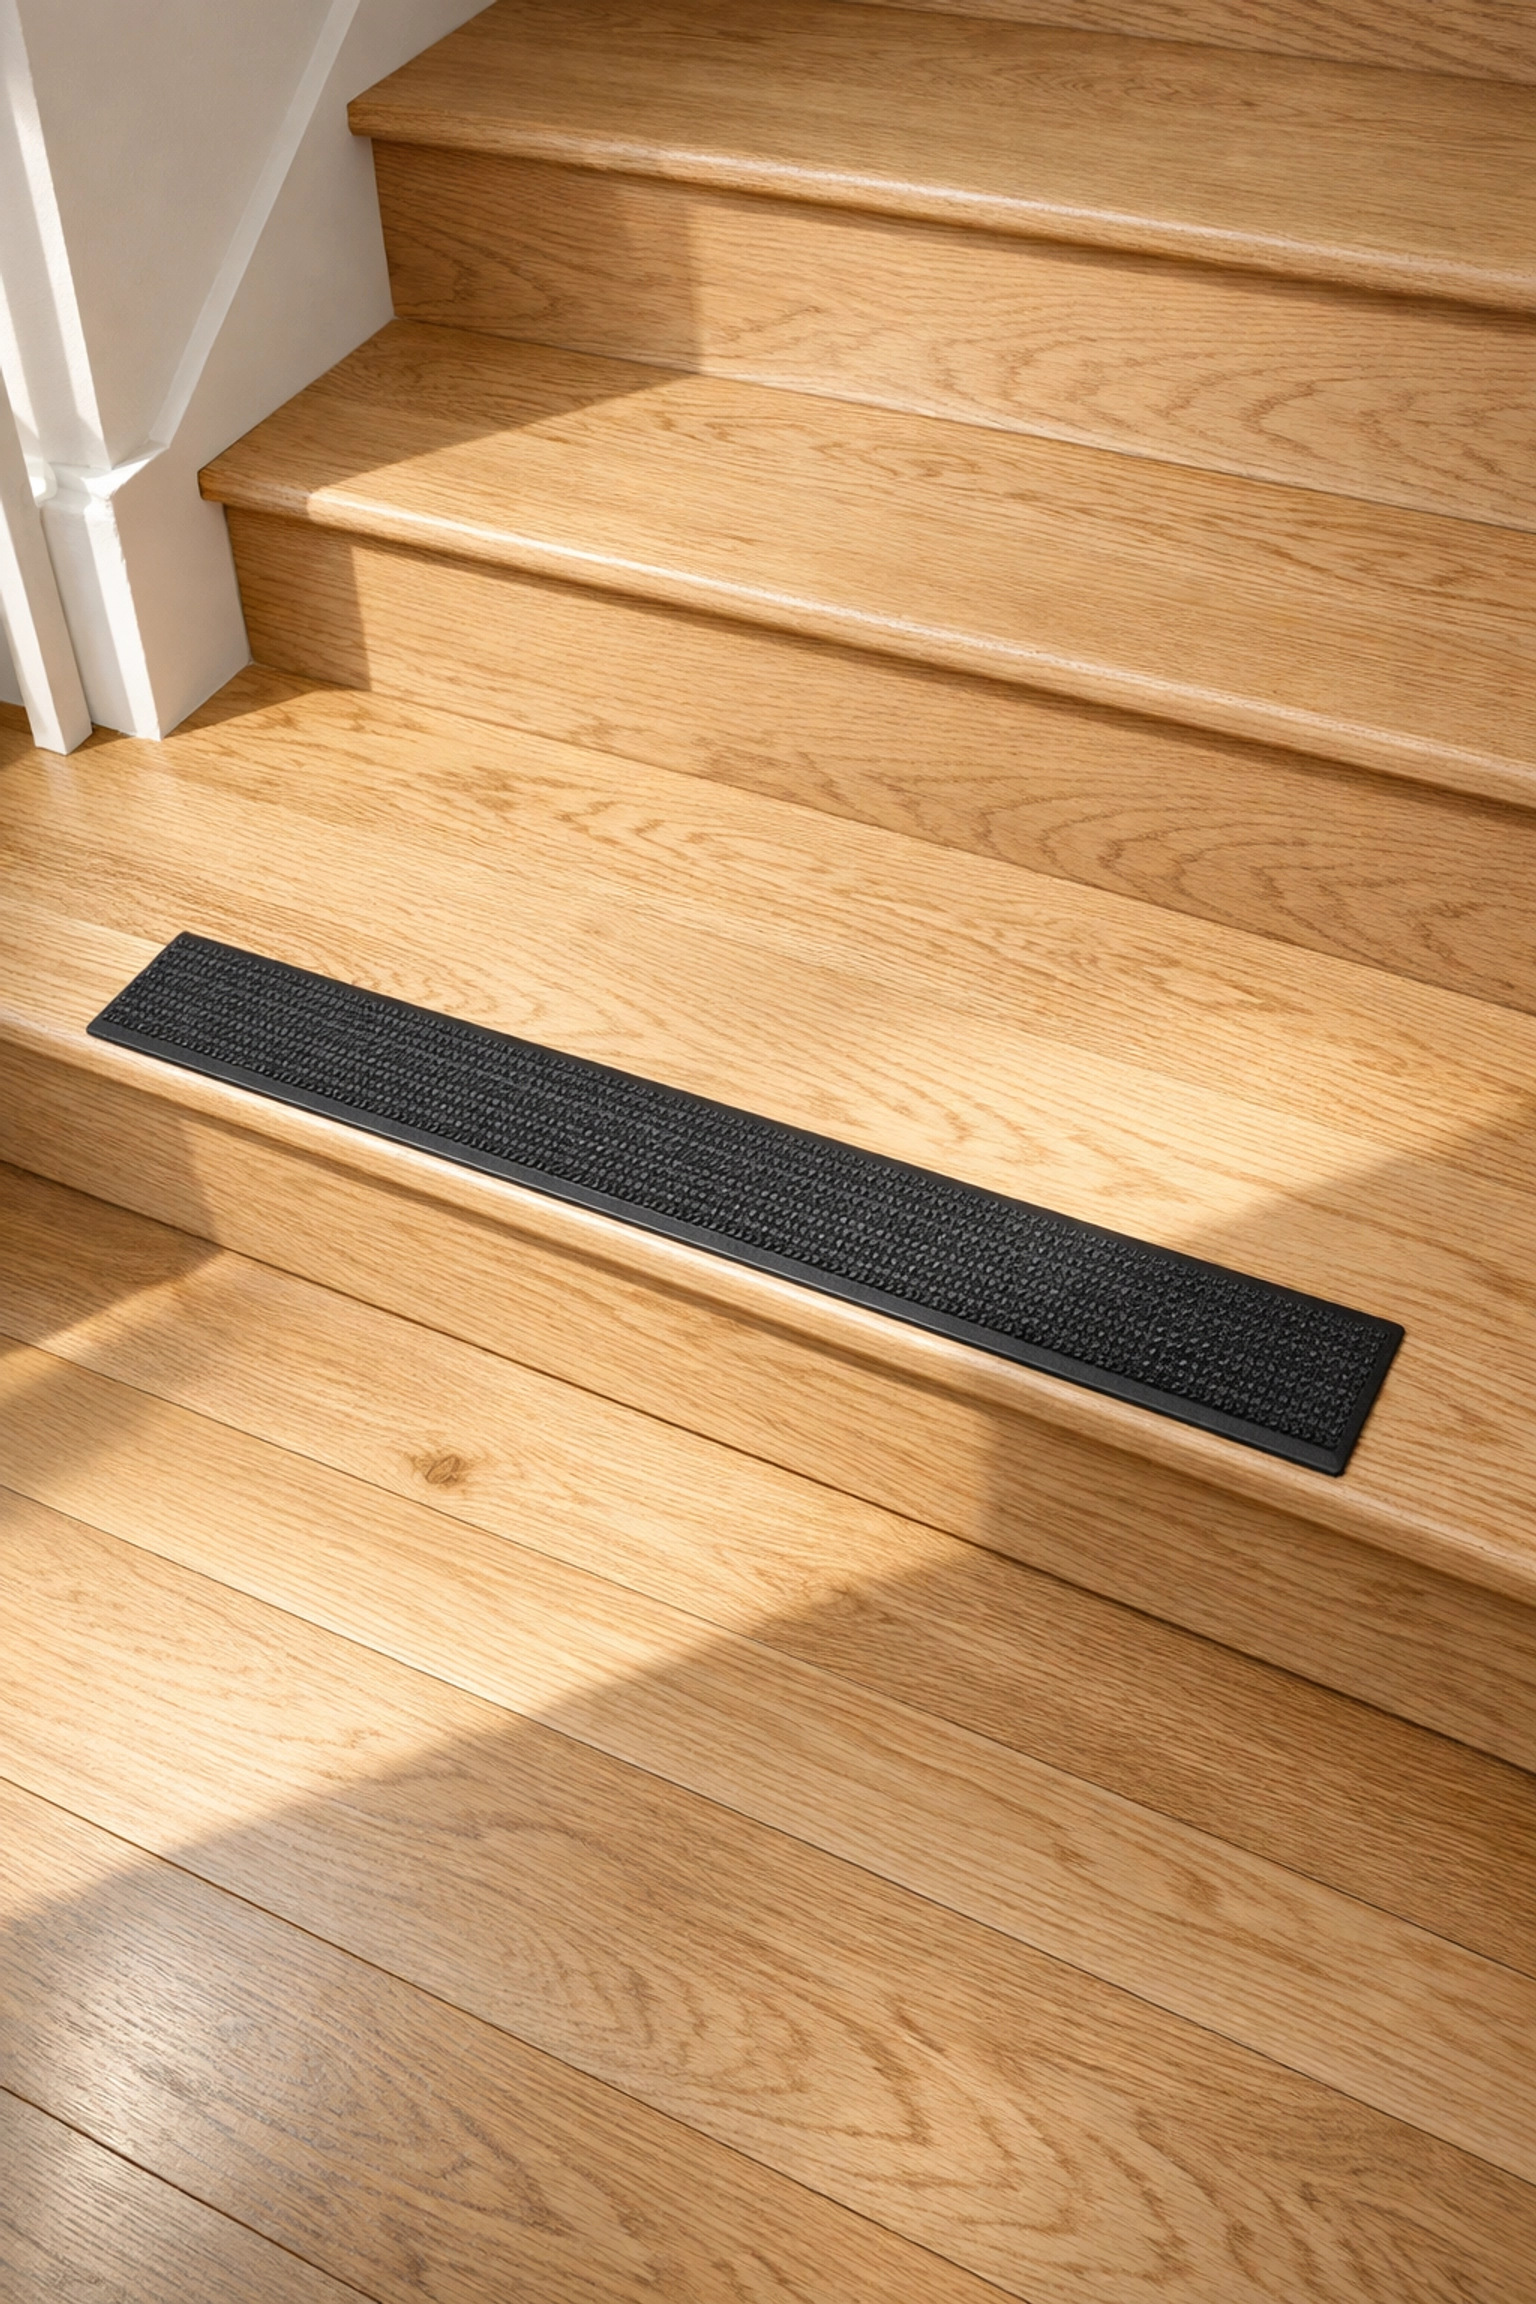
5. Overlooking Slippery Surfaces
Hardwood stairs are beautiful, but they can be incredibly treacherous, especially when navigating them in socks or smooth-soled slippers. Polished stone and tile are equally risky. Even carpet can be a hazard if it is a high-pile "shag" style that hides the edge of the step or if it has become loose over time.
The Fix: Add Traction
- Non-Slip Treads: You don't have to cover your beautiful wood stairs entirely. Clear, adhesive anti-slip strips provide excellent "grit" and traction without hiding the grain of the wood.
- Low-Pile Carpet Runners: If you prefer carpet, choose a "tight" weave or low-pile option. This ensures your foot feels the firm surface of the step beneath, providing better balance.
- The Shoe Rule: Encourage a "no socks on stairs" policy. Bare feet or shoes/slippers with rubberized, non-slip soles provide the best grip.
6. Ignoring Minor Maintenance Issues
A "squeak" in a stair isn't just an annoyance; it’s a sign that a tread is loosening. A frayed piece of carpet at the edge of a landing is a trip hazard waiting to happen. We often walk past these small issues for months, intending to fix them "eventually," but on a staircase, there is no margin for error.
The Fix: The Monthly Audit
Once a month, take five minutes to physically inspect your stairs.
- The "Wiggle" Test: Grab your handrail and give it a firm shake. It should feel like it is part of the wall. If it wobbles, tighten the brackets immediately.
- The "Snag" Check: Look for loose carpet, protruding nails, or peeling tape.
- Screw, Don't Nail: If a wooden tread is loose, use wood screws rather than nails to secure it. Nails can back out over time with the constant pressure of footsteps, creating a new tripping hazard. Screws stay flush and provide a much more permanent hold.
7. Using Stairs as a "Staging Area"
We’ve all done it: we place a stack of books, a pair of shoes, or a basket at the bottom of the stairs, intending to take them up on our "next trip." This turns your staircase into an obstacle course. Even if you think you’ll remember the item is there, a moment of distraction: a ringing phone or a barking dog: can cause you to forget, leading to a dangerous stumble.
The Fix: The "Clear Path" Policy
- The Zero-Tolerance Rule: Establish a rule that nothing: absolutely nothing: is ever placed on a step, even for a moment.
- Stair Baskets (The Safe Way): If you like to collect items to go up later, place a dedicated "stair basket" at least three feet away from the base of the stairs. This keeps the walkway clear while still helping you stay organized.
- Wall Storage: If the area near your stairs is cramped, install small wall-mounted shelves nearby to hold items, rather than using the floor or the steps.
The Importance of Habit
While fixing the physical environment is crucial, our habits play an equally important role in stair safety.
Don't Rush: Many falls occur when we are in a hurry. Treat the stairs as a "slow zone." Take one step at a time, ensuring your entire foot is planted firmly on the tread before moving the next.
The Power of the Handrail: Even if you feel steady, keep at least one hand on the rail at all times. This is what physical therapists call "maintaining a point of contact." If you do experience a dizzy spell or a minor trip, that hand on the rail is what prevents a stumble from becoming a fall.
Avoid Carrying Bulky Items: If you need to move large items or heavy loads (like laundry baskets) between floors, ask for help, or consider "staged" moving: placing the basket on the landing, moving yourself safely, and then reaching for the basket. If you must carry something, keep one hand free for the handrail and ensure the item doesn't block your view of your feet.
Creating a Reassuring Environment
Making these changes isn't about admitting weakness; it’s about taking control of your environment. A safe staircase allows you to move through your home with confidence and grace. It removes the "micro-stress" that comes with navigating a dark or slippery flight of steps.
By addressing these seven common mistakes: consistency, visibility, grip, lighting, traction, maintenance, and clutter: you are turning your stairs back into what they should be: a safe, reliable path through your home. Safety is a journey, and every step counts.

