For many of us, the stairs in our homes are something we navigate hundreds of times a week without a second thought. They are a functional necessity, a way to move between the quiet of a bedroom and the bustle of a kitchen. However, as we age or help our loved ones age in place, the staircase transforms from a simple architectural feature into a significant point of risk.
According to physical therapists and home safety experts, the stairs are one of the most common locations for serious falls. But here is the good news: most stair-related accidents aren't caused by "old age" or "clumsiness." They are caused by specific environmental factors: mistakes in design, lighting, or habits: that can be identified and corrected.
By understanding the mechanics of how we use stairs and where our environments fail us, we can reclaim the confidence to move freely through our homes. Here are the seven most common mistakes people make with stair safety and, more importantly, how to fix them.
1. Ignoring Inconsistent Step Heights and Depths
The human brain is an incredible machine for pattern recognition. When you start climbing a flight of stairs, your brain "maps" the height (rise) and depth (run) of the first two steps. Once that pattern is established, your motor system goes on autopilot. You stop looking at your feet and rely on your "muscle memory" to clear the edge of each subsequent step.
The mistake happens when a staircase is inconsistent. If the third step is even half an inch taller than the others, or if the top landing is slightly shallower, the rhythm is broken. This is a common issue in older homes where settling has occurred or in DIY renovations where the math didn't quite line up. Even a tiny variance can cause a "toe-stub" or a "heel-miss," leading to a loss of balance.
The Fix:
Conduct a "stair audit" with a measuring tape. Measure the height of every riser and the depth of every tread. If you find variances greater than 1/4 of an inch, you have a safety hazard.
While rebuilding a staircase is a major project, you can mitigate minor inconsistencies by using high-contrast "nosing" (the edge of the step). By applying a strip of non-slip tape or a contrasting color to the edge of each step, you force the brain out of "autopilot" and encourage visual confirmation of where each foot should land.
2. Falling for the "Bottom-Step Illusion"
Have you ever reached the bottom of a staircase and tried to take one more step when you were already on the floor? Or conversely, thought you were on the floor only to find there was one more step to go? This is known as the "bottom-of-flight illusion," and it is responsible for a staggering number of turned ankles and jarring falls.
This usually happens because the flooring on the stairs matches the flooring on the lower landing perfectly. When the patterns or colors blend together, the eye fails to see the final change in elevation, especially in low light.
The Fix:
The goal is to create a visual "break" between the last step and the floor. You can achieve this by:
- Using a different color of non-slip adhesive tread on the very last step.
- Ensuring the lighting at the bottom of the stairs is bright enough to cast a slight shadow at the edge of the final riser, defining the depth.
- If you have a rug or runner, ensure it ends precisely where the floor begins, or use a high-contrast transition strip.
3. Treating Handrails as Decorative Rather Than Functional
In many homes, handrails are chosen for their aesthetic appeal rather than their utility. You might see beautiful, wide, rectangular wooden rails or ornate wrought iron designs. While they look lovely, they often fail the "graspability" test.
A functional handrail must be something you can wrap your hand around to create a "power grip." If the rail is too wide, your fingers can’t meet your thumb, meaning you are only leaning on the rail rather than gripping it. If you lose your balance, a "lean" won't save you; a "grip" will. Furthermore, many homes only have a rail on one side, leaving the other side open or flush against a wall with nothing to grab.
The Fix:
First, ensure you have sturdy handrails on both sides of the stairs. This allows for a "three-point contact" system (two feet and at least one hand) at all times.
Second, check the shape and size. A safety-standard handrail should be round or oval, with a diameter between 1.25 and 2 inches. If your current rails are too bulky, you can often install a secondary, "graspable" rail onto the existing wall or even onto the current banister. Finally, ensure the rail extends at least 12 inches beyond the top and bottom steps so you have support before you start climbing and after you finish.
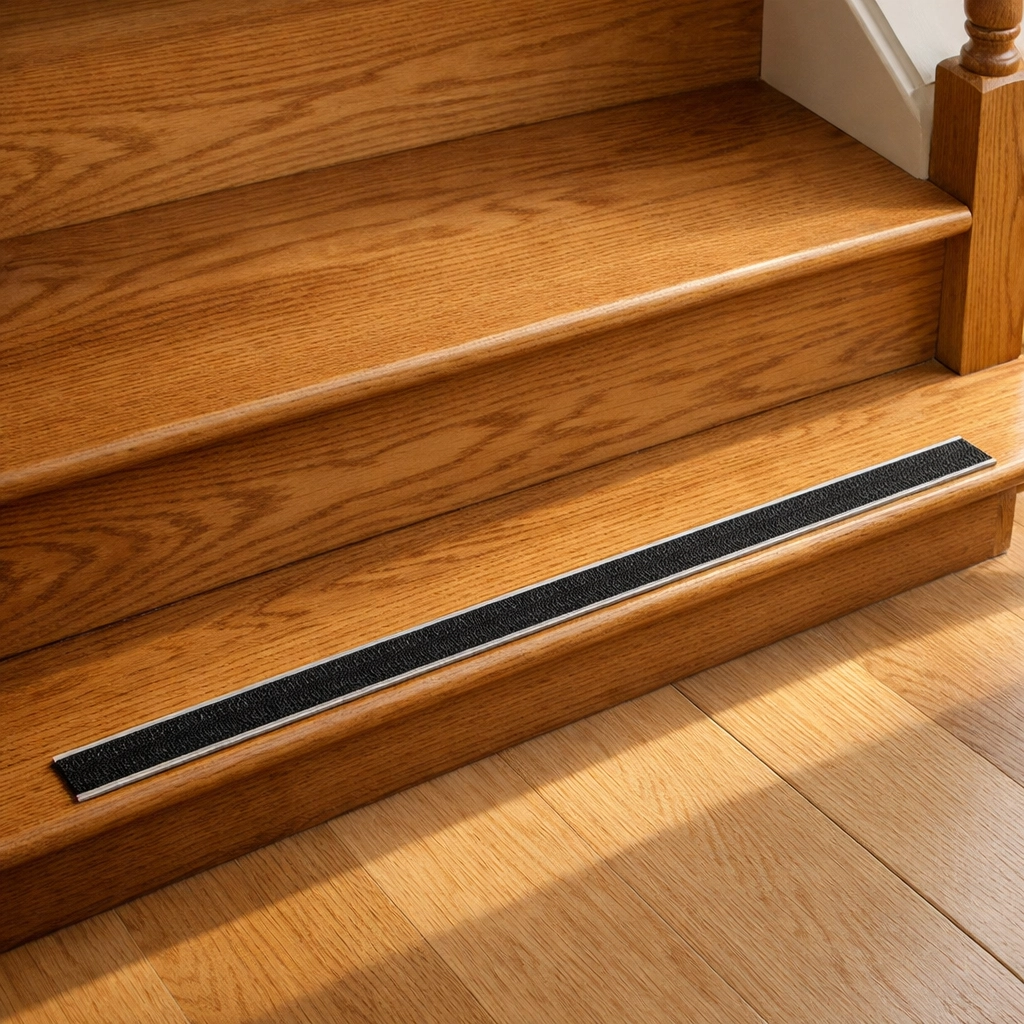
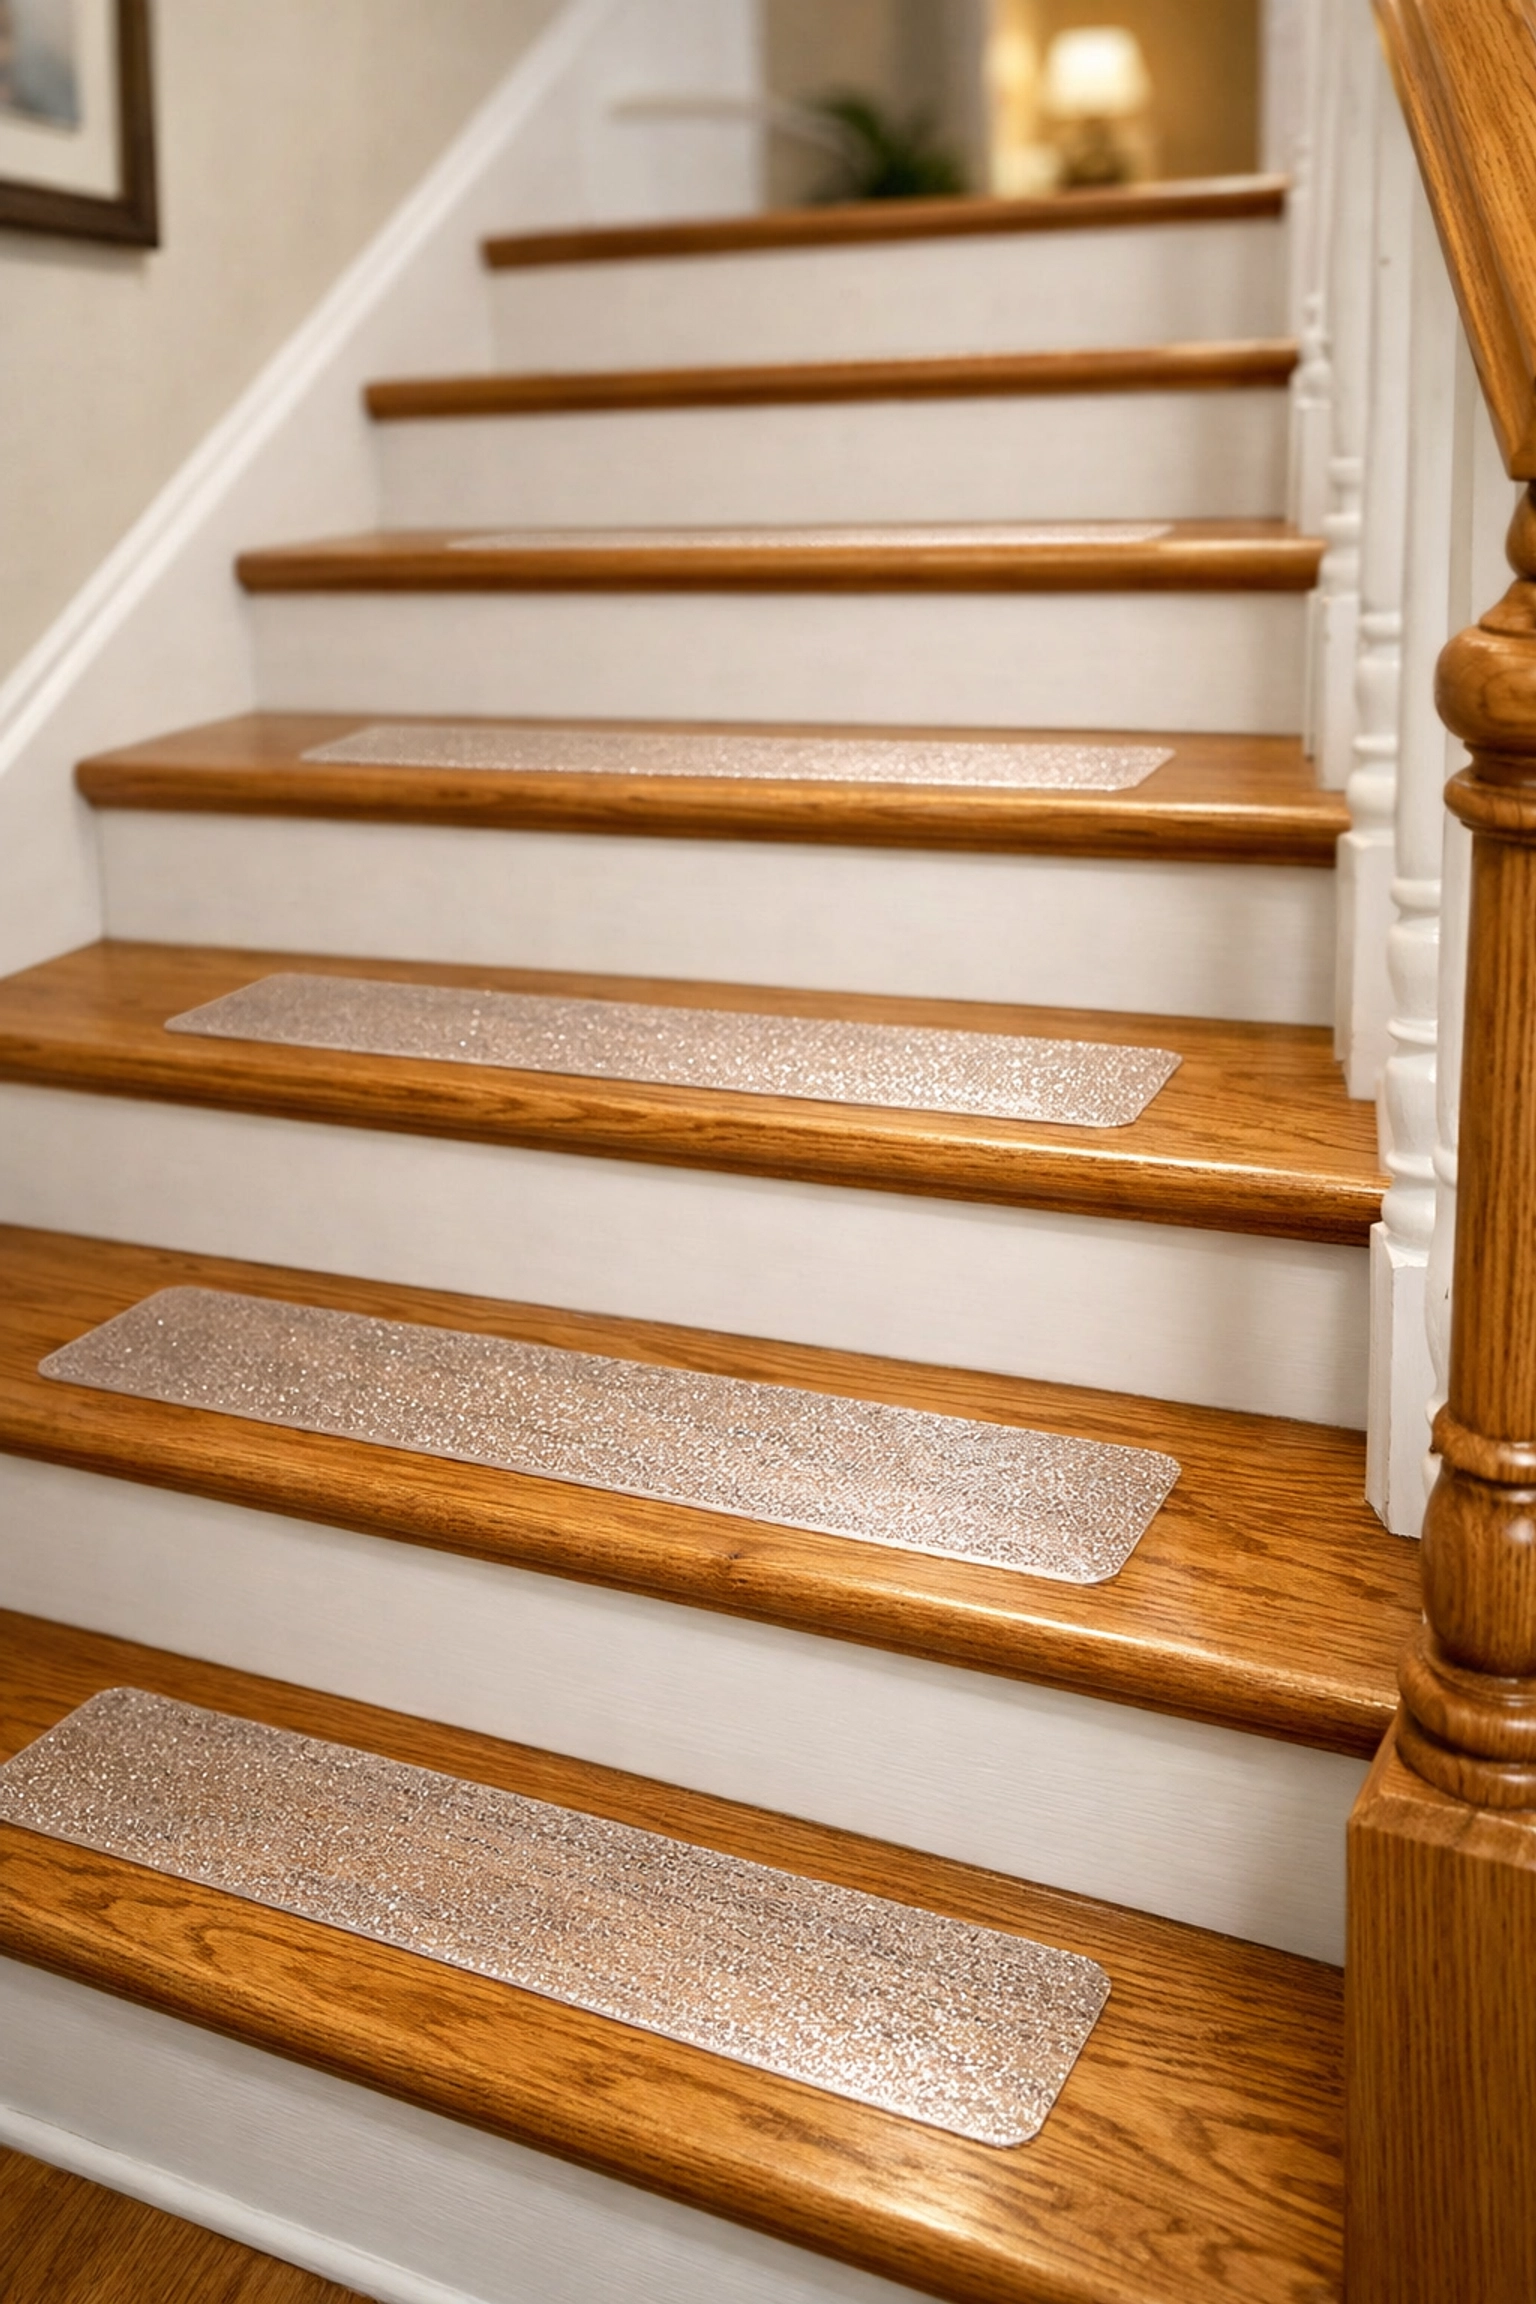
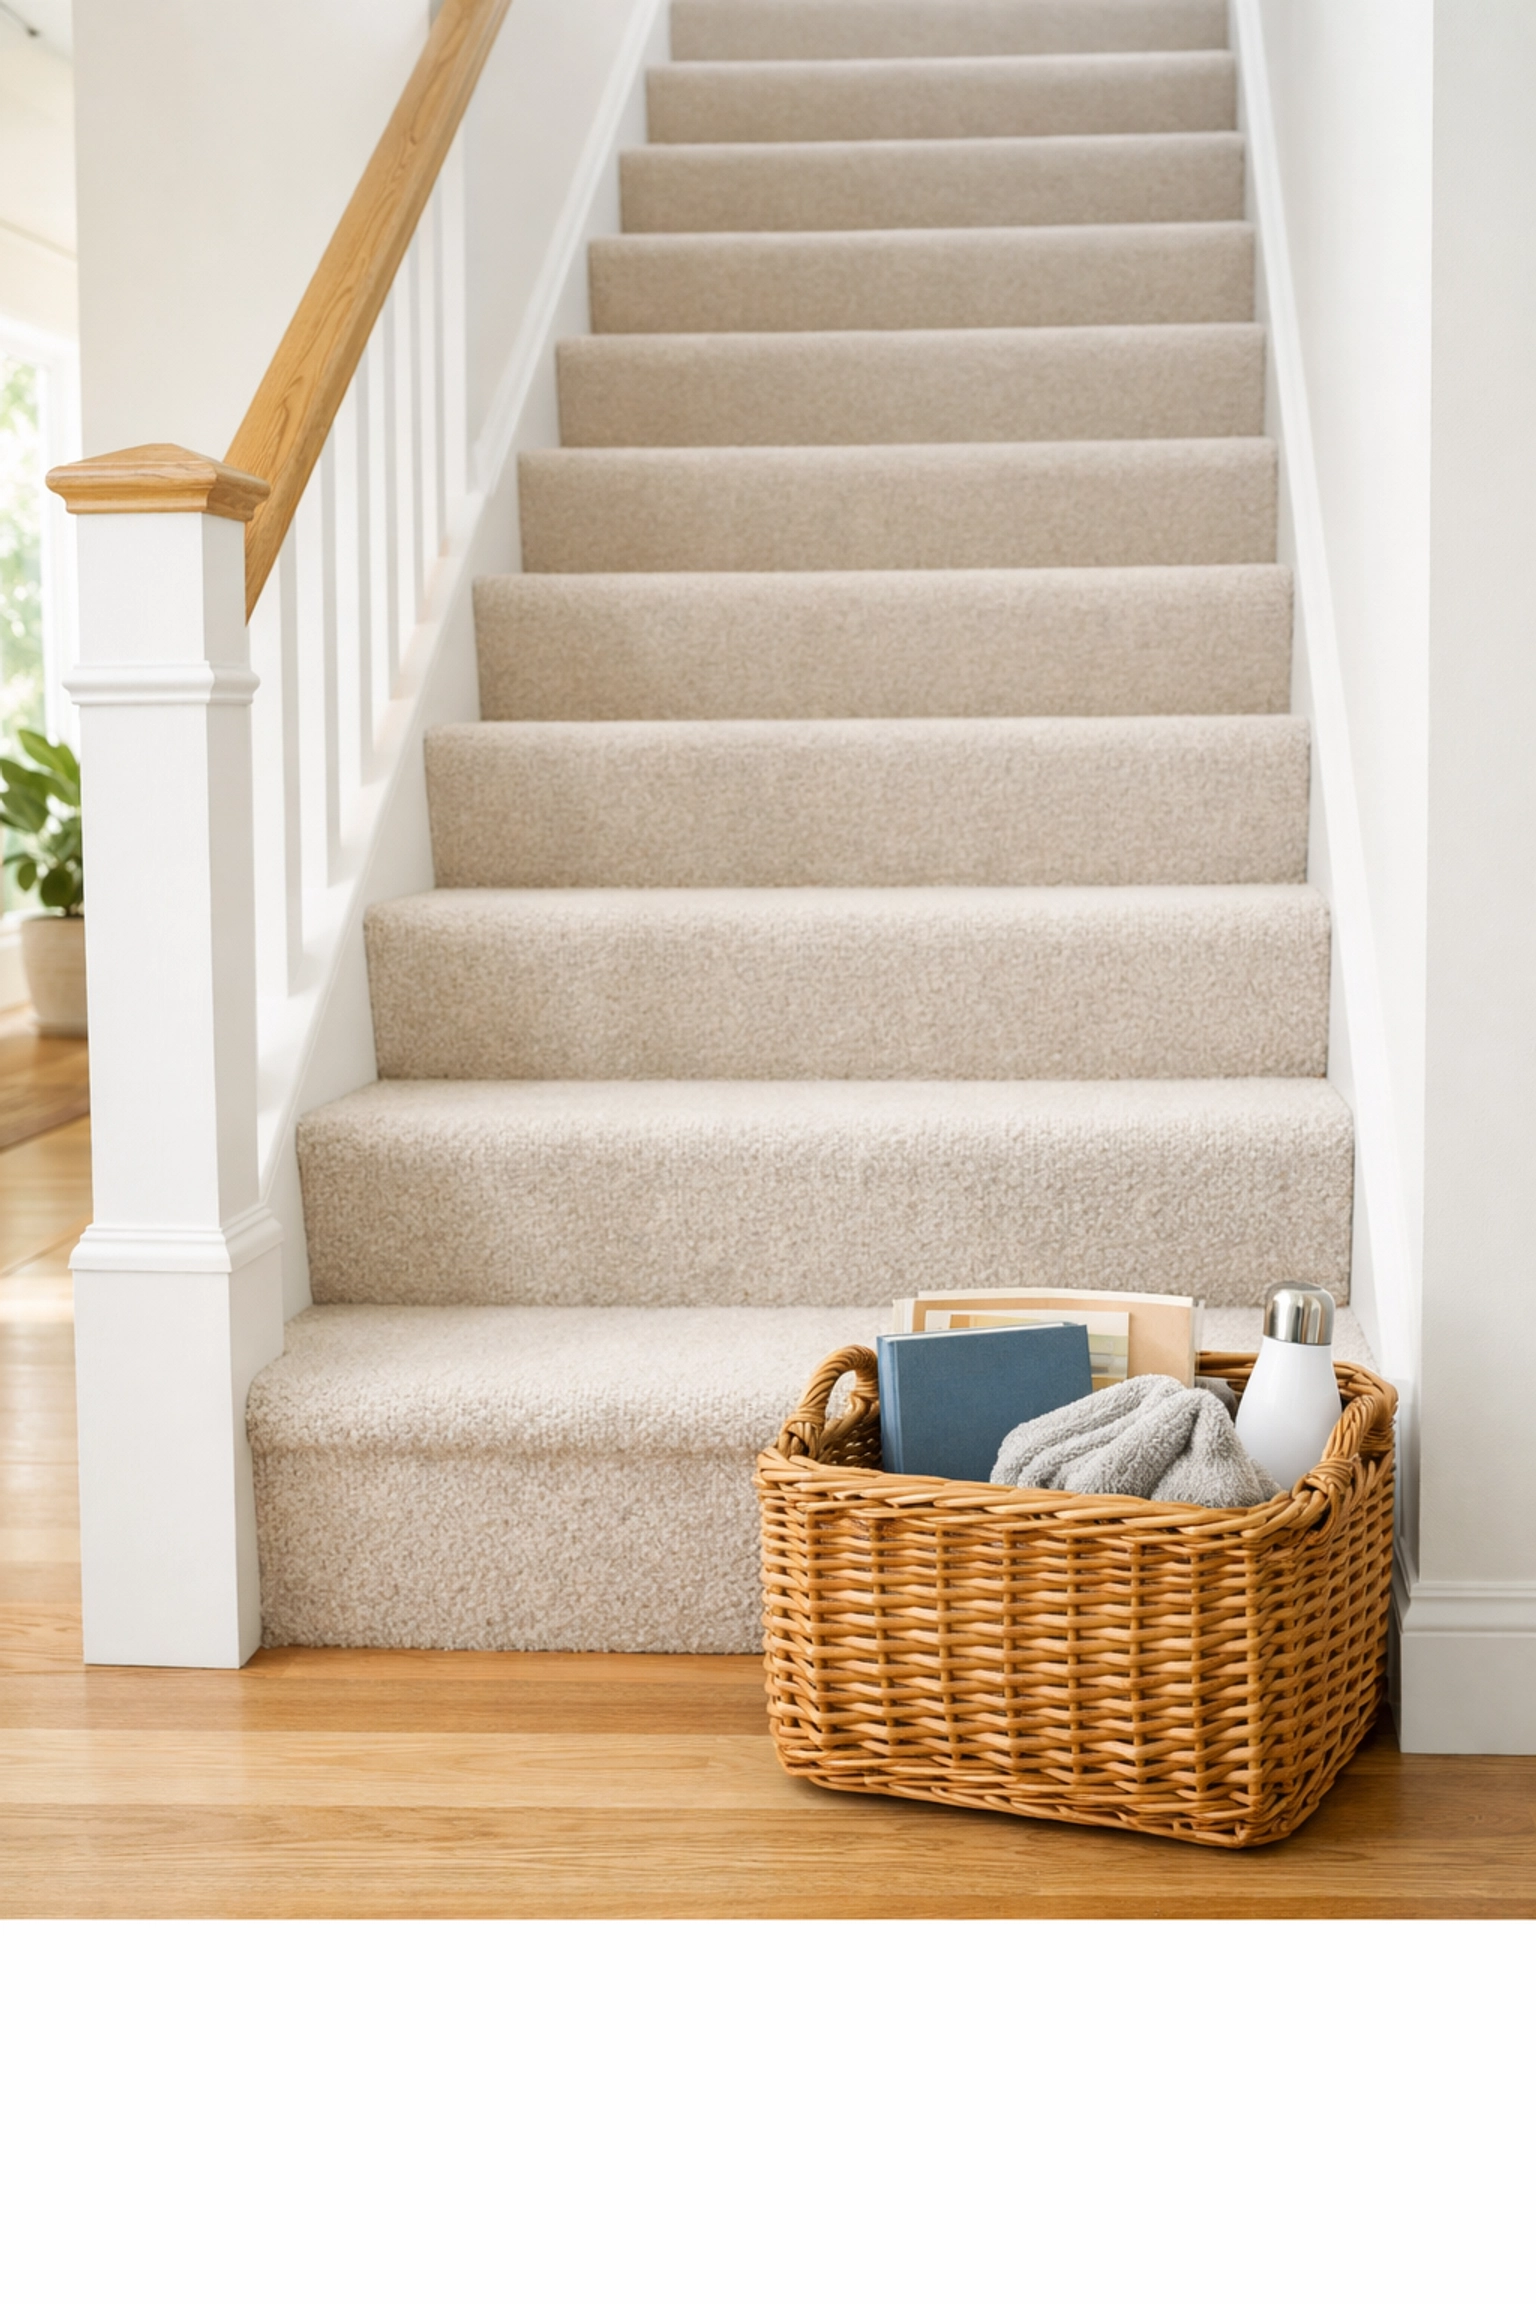
4. Relying on "Slippery" Surfaces
Hardwood stairs are beautiful, and polished stone or tile entryways are elegant. However, these materials offer almost zero traction, especially if you are wearing socks or smooth-soled slippers. Even carpet can be a mistake if it is a "plush" variety that rounds over the edge of the step, hiding the actual corner and making the footing feel unstable.
The Fix:
Traction is your best friend. If you have wooden or tile stairs, you don't necessarily have to cover them in carpet. Transparent, non-slip adhesive strips are nearly invisible but provide the "grit" needed to prevent a slide.
If you prefer carpet, choose a low-pile, tightly woven commercial-grade carpet. Ensure it is "wrapped" tightly over the nosing of the step (the "waterfall" method) so the edge of the step remains sharp and visible. Avoid thick padding under stair carpet, as it can create a "spongy" feeling that makes the foot feel insecure.
5. Inadequate Lighting and "Shadow Zones"
Lighting is often the most overlooked aspect of stair safety. Many staircases have a single light at the top or a single light at the bottom. This creates "shadow zones" in the middle of the flight. If you are walking down the stairs, your own body can cast a shadow over the very steps you are trying to see.
Furthermore, as we age, our eyes require significantly more light to see the same level of detail as a younger person. Glare can also become an issue; a single, blindingly bright bulb can create "white-out" spots on polished stairs, hiding the edges of the steps.
The Fix:
The ideal setup is "even, diffused lighting."
- Motion-activated LEDs: These are inexpensive and can be stuck to the wall along the base of the stairs. They light up the path as you approach, ensuring you never have to "fumble for a switch" in the dark.
- Dual switches: Ensure there is a light switch at both the top and the bottom of the stairs.
- Recessed tread lighting: If you are doing a renovation, small lights built directly into the risers of each step provide the best possible visibility without creating glare.
6. Using the Stairs as a Temporary "Staging Area"
We’ve all done it. You have a pile of mail, a pair of shoes, or a book that needs to go upstairs, so you set it on the bottom step to take up "on the next trip." This habit is one of the leading causes of preventable trips.
Objects on stairs reduce the available "tread depth" (the space for your foot). Even if you think you’ve left enough room to walk around the object, a slight misstep or a momentary distraction can lead to your foot landing on the object instead of the wood, causing an immediate slide.
The Fix:
Adopt a "Zero Items on Stairs" policy. If something needs to go up or down, it either goes all the way or it stays in a designated "stair basket" located at least three feet away from the first step. This keeps the path completely clear. If you find yourself unable to carry items safely while using the handrails, consider using a sturdy backpack to transport items so your hands remain free to grip the rails.
7. Neglecting the "Slow Decay" of Maintenance
Staircases are structural elements that move and shift over time. A house settles, wood dries out and shrinks, and nails loosen. We often ignore the "creak" in the fourth step or the slight "wobble" in the handrail post, thinking it's just "character" of an old home.
In reality, a loose tread can shift under your weight, acting like a mini-seesaw. A wobbly handrail can fail exactly when you need it most: when you are putting your full weight on it during a stumble.
The Fix:
Every six months, perform a physical "stress test" on your stairs.
- Check the Treads: Step firmly on the front, back, and sides of every single step. Look for any movement or significant noise. If a tread is loose, it should be secured with wood screws (not nails, which can pull back out) driven into the stringer.
- Check the Banister: Grab the handrail and give it a firm shake at several points. It should feel like it is part of the wall. If it wiggles, tighten the bracket screws or add additional support brackets.
- Check the Carpet: If you have a runner, look for "waves" or loose edges. Use a staple gun or carpet tacks to pull the fabric taut.
A Reassuring Path Forward
Addressing stair safety doesn't have to be a daunting or expensive task. It’s about small, intentional changes that build a "safety net" around your daily movements. By fixing inconsistent heights, increasing visual contrast, ensuring a solid grip, and keeping the path clear, you aren't just preventing falls: you are preserving your independence.
Your home should be a place of comfort, not a place of worry. Taking the time to audit your staircase today ensures that you can continue to enjoy every level of your home for years to come. Start with one fix: perhaps the lighting or the "zero objects" rule: and build from there. Each step you take toward safety is a step toward peace of mind.

