Hi there, I’m Brian Kerr, the founder of Fall Guys Products. Over the years, I’ve spent a lot of time talking with families, physical therapists, and seniors about how to make the home a safer, more comfortable place to live. When we think about aging in place, the conversation almost always turns to the stairs.
Stairs are a symbol of independence in many homes: they lead to the master bedroom, the hobby room in the basement, or the front porch where you greet neighbors. But they are also one of the most complex architectural features to navigate as our mobility changes. A staircase requires balance, strength, depth perception, and steady footing all at once.
The good news is that most stair-related falls aren't caused by the stairs themselves, but by small, correctable mistakes in how we maintain or use them. Today, I want to walk through seven common mistakes homeowners make with their stairs and, more importantly, how you can fix them without needing a full-scale renovation.
1. Living with Inconsistent Step Heights
In a perfect world, every step on a staircase would be exactly the same height (the riser) and the same depth (the tread). Our brains are actually incredibly efficient at "mapping" a staircase. After the first two steps, your muscle memory takes over. Your feet expect the next step to be exactly where the last one was.
However, many homes: especially older ones or those with DIY additions: have what we call "non-uniform" steps. Often, the very top step or the very bottom step is slightly taller or shorter than the others. Even a difference of a quarter-inch is enough to cause a "swing-and-a-miss" or a trip because your foot didn't clear the edge like it expected to.
How to Fix It:
Take a measuring tape and measure the height of every single riser on your staircase. If you find a discrepancy, you don't necessarily need to tear the stairs out. For minor height differences, a carpenter can often add a thin layer of plywood to a tread or adjust the "nosing" (the edge that hangs over) to even things out. If the stairs are carpeted, sometimes adding a slightly thicker or thinner pad under specific steps can help normalize the height.
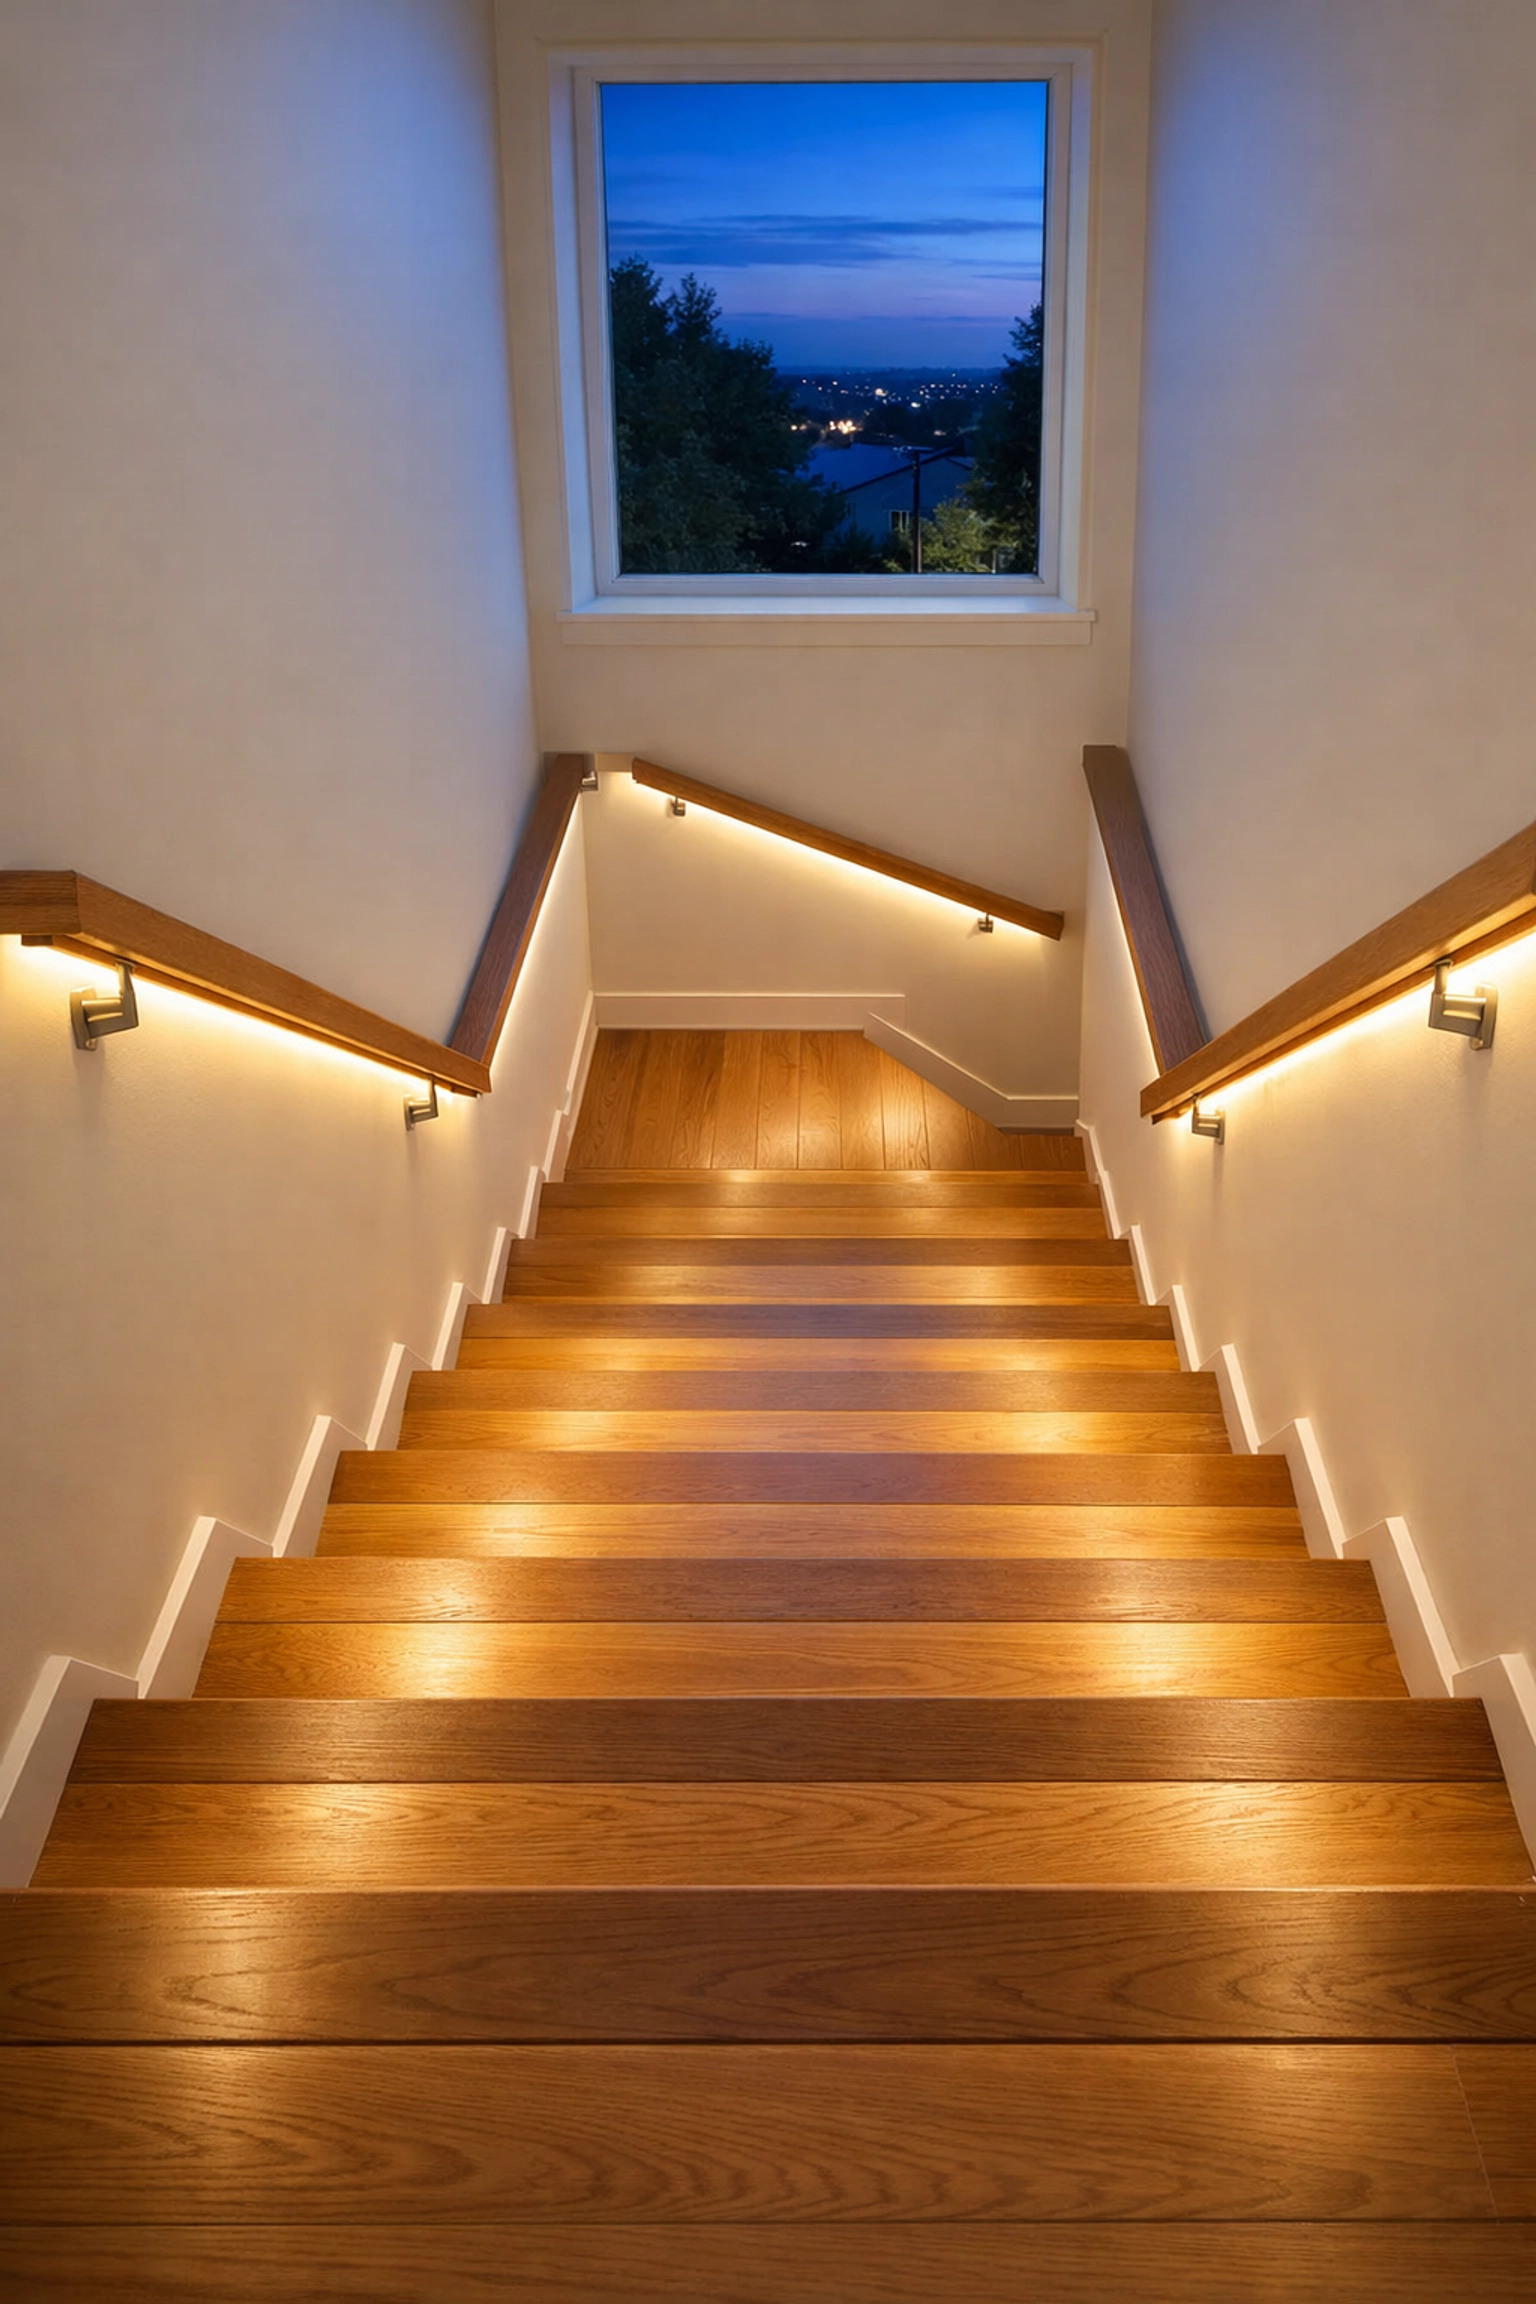
2. Relying on "Mood Lighting"
We all love a cozy, dimly lit home, but the staircase is the one place where bright, clinical light is your best friend. A common mistake is having a single light fixture at the top of the stairs that casts a long shadow over the lower steps. When shadows fall across the treads, it becomes nearly impossible to see where the edge of the step ends and the next one begins.
As we age, our eyes require more light to distinguish depth and contrast. If you find yourself squinting or "feeling" for the edge with your toe, your lighting is insufficient.
How to Fix It:
Ideally, you want light that illuminates the entire flight from top to bottom.
- Motion-Sensor LEDs: You can find battery-operated LED strips that stick under the handrail or along the baseboards. They light up the moment they detect movement, ensuring you never have to fumble for a switch in the dark.
- High-Contrast Bulbs: Swap out "warm" yellow bulbs for "cool white" or "daylight" bulbs. These provide better clarity and help the edges of the steps stand out.
- Dual Switches: Ensure there is a light switch at both the top and the bottom of the stairs. If there isn't, wireless smart switches are an easy way to add a second control point without rewiring your walls.
3. Prioritizing Style Over Handrail Grip
I see this a lot in beautiful, older homes: ornate, wide, or rectangular handrails that look like works of art but are nearly impossible to actually hold onto. A handrail isn't just a guide for your hand; it’s a safety device that you should be able to wrap your hand entirely around in a "power grip."
If a handrail is too wide (like a 2×4 piece of lumber) or too close to the wall, you can only use a "pinch grip" with your fingertips. If you start to lose your balance, a pinch grip won't provide the leverage needed to stop a fall.
How to Fix It:
The ideal handrail should be round or oval, with a diameter between 1.25 and 2 inches. You should be able to comfortably close your thumb and fingers around it.
- Check the Clearance: There should be at least 1.5 inches of space between the rail and the wall so your knuckles don't hit the drywall.
- Continuous Rails: Ensure the handrail extends past the top and bottom steps. Many people lose their balance on the very last step because the handrail ended too early, leaving them without support exactly when they needed it to transition to flat ground.
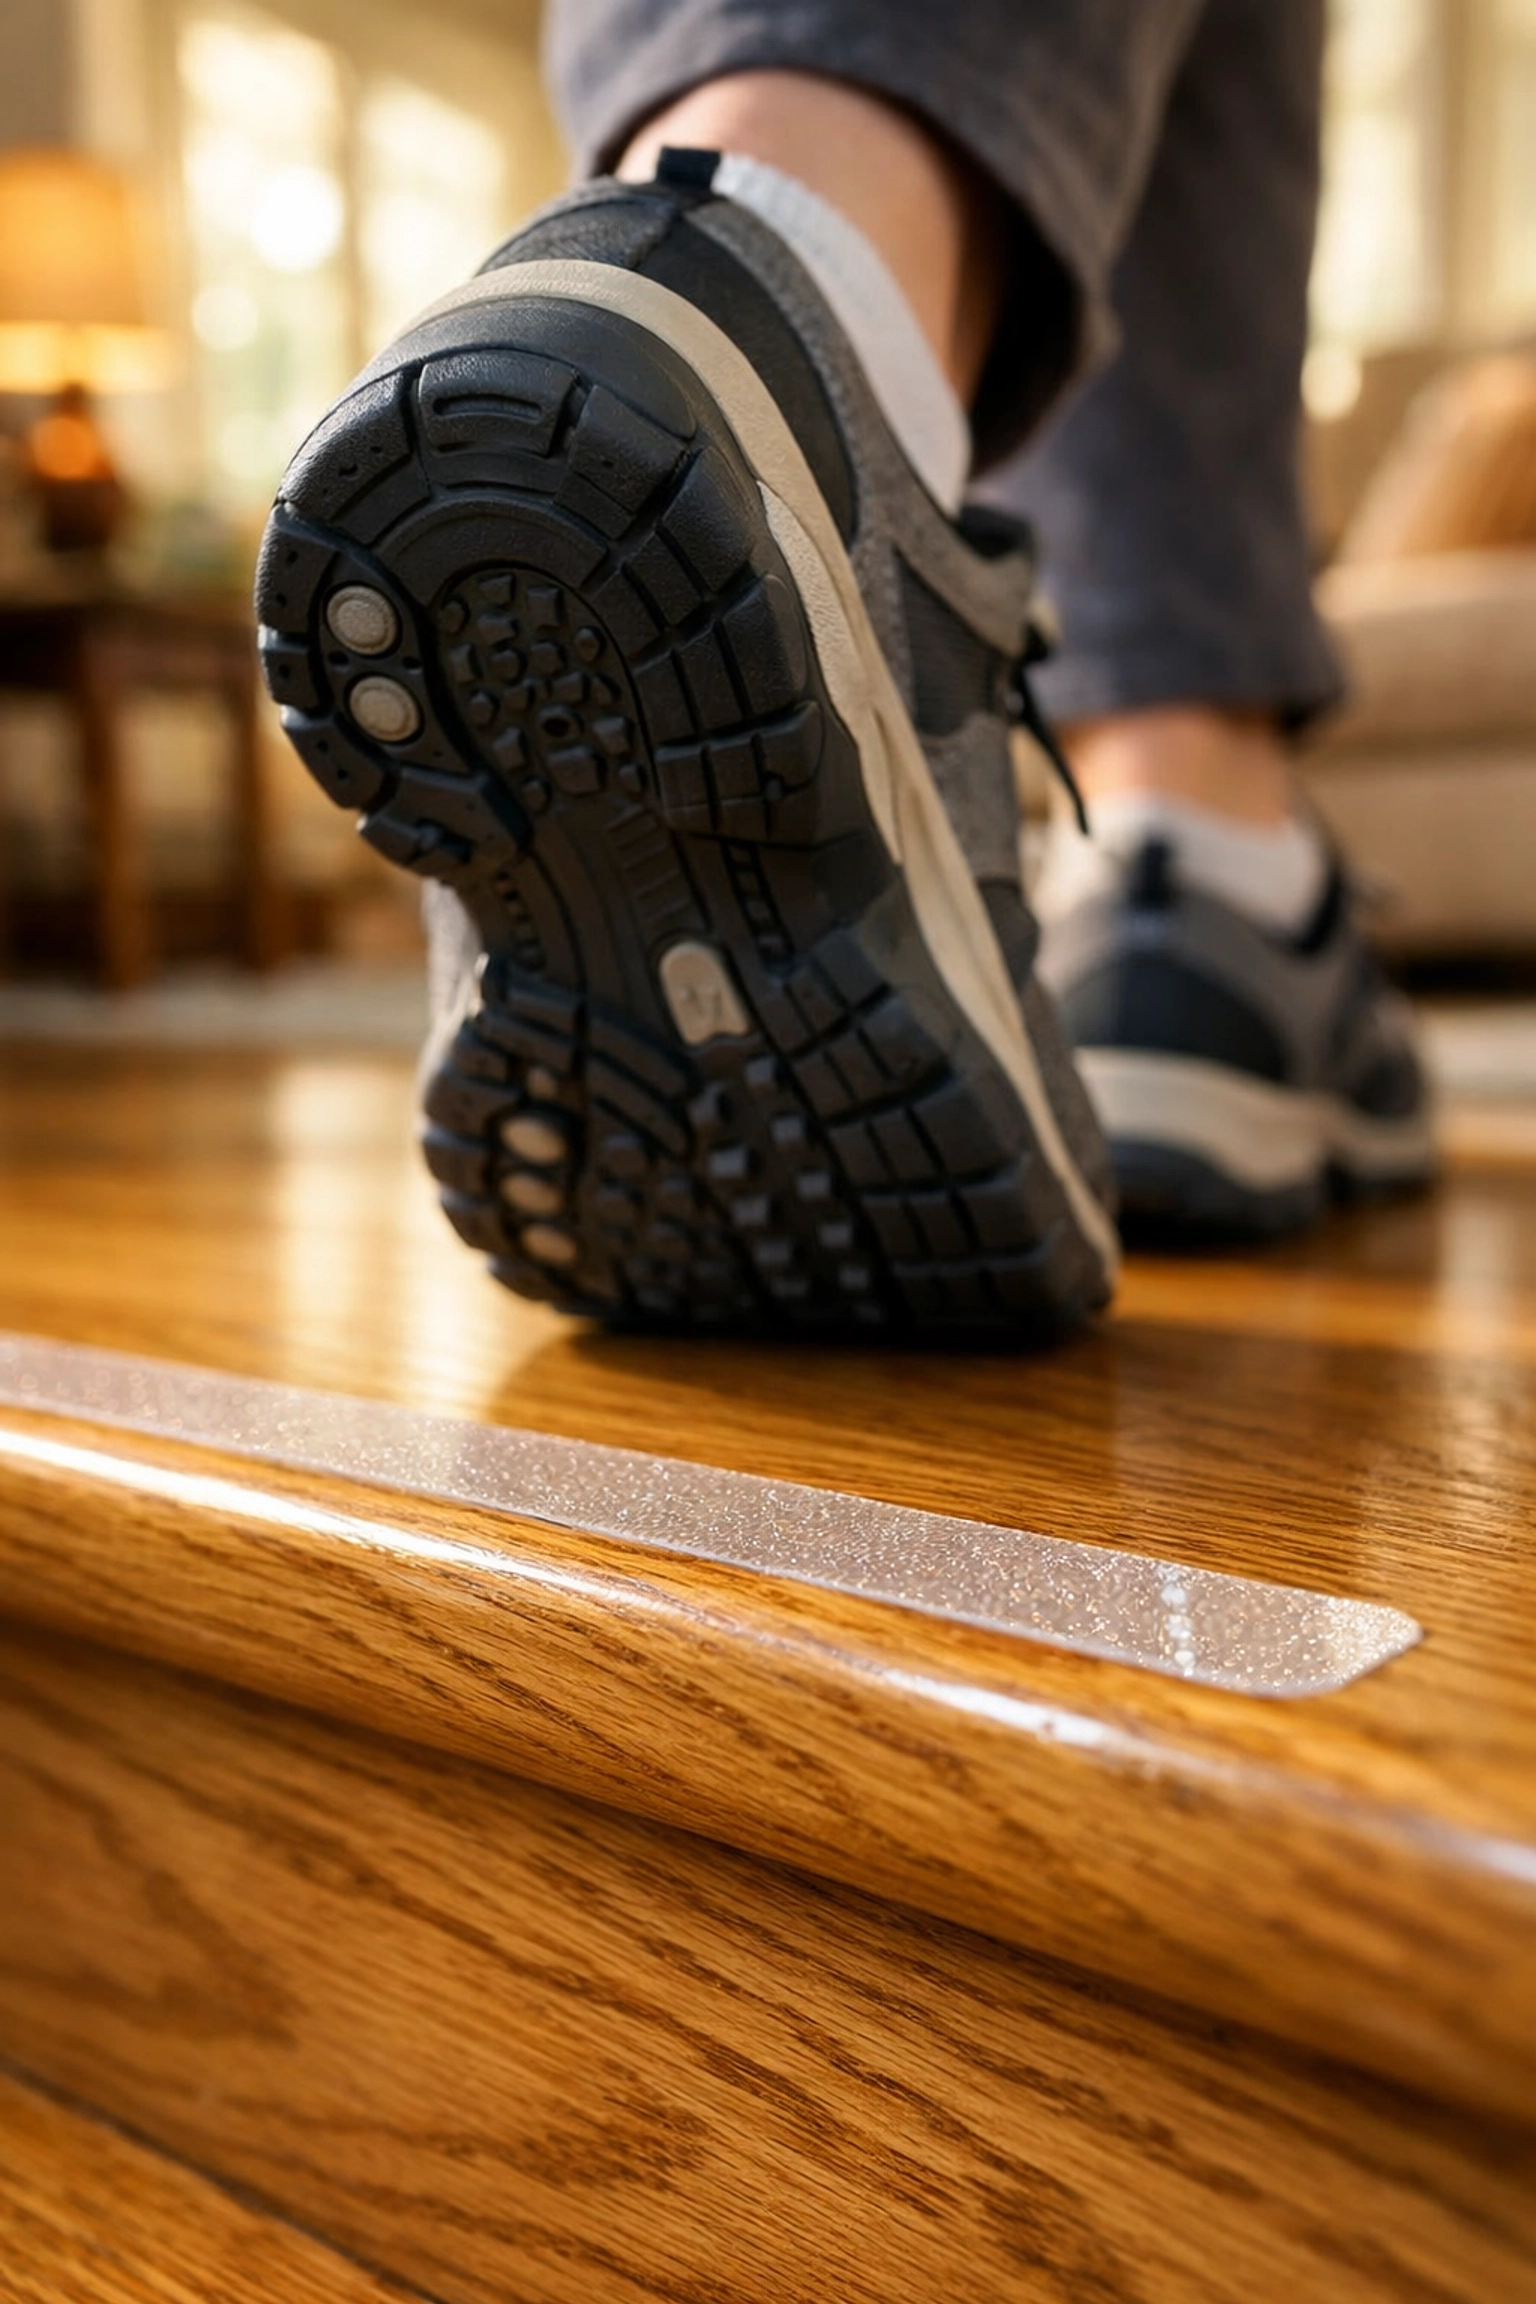
4. Walking in Socks on Smooth Surfaces
Polished hardwood stairs are stunning, but they are effectively indoor ice rinks if you are wearing standard socks or smooth-bottomed slippers. A huge percentage of stair slips happen because there is zero friction between the foot and the step.
How to Fix It:
You have two main options here: modify the stairs or modify your footwear.
- Non-Slip Treads: You can apply transparent anti-slip adhesive strips to the edge of each wooden or tile step. They are almost invisible but provide a gritty texture that catches your foot.
- Carpet Runners: A firmly anchored carpet runner provides excellent traction. Just ensure it is low-pile; thick, shaggy carpet can actually make the edges of steps "roll" under your foot, which is its own hazard.
- Footwear Rules: Make it a habit to never walk the stairs in socks. Bare feet are better than socks, but supportive shoes with rubber soles are the gold standard for home safety.
5. Falling for the "Bottom-Step Illusion"
The bottom-step illusion occurs when the floor of the landing and the last step of the staircase are the same color or pattern. From a standing height looking down, the bottom step can visually "blend" into the floor. This leads people to think they’ve reached the bottom when they actually have one more step to go. They step out onto "flat" ground that isn't there, leading to a jarring jolt to the knees or a forward tumble.
How to Fix It:
The key here is visual contrast. You need to "break" the pattern so your eyes can clearly see the change in elevation.
- Contrast Strips: Apply a strip of colored tape or a different colored wood stain to the very edge (the nosing) of the bottom step.
- Lighting Focus: Place a specific light source, like a wall sconce, that highlights the transition from the stairs to the floor.
- Rug Placement: Avoid placing a rug at the very base of the stairs that looks similar to the stair carpet. A contrasting color rug (with a non-slip pad!) can help signal that you have reached the floor.
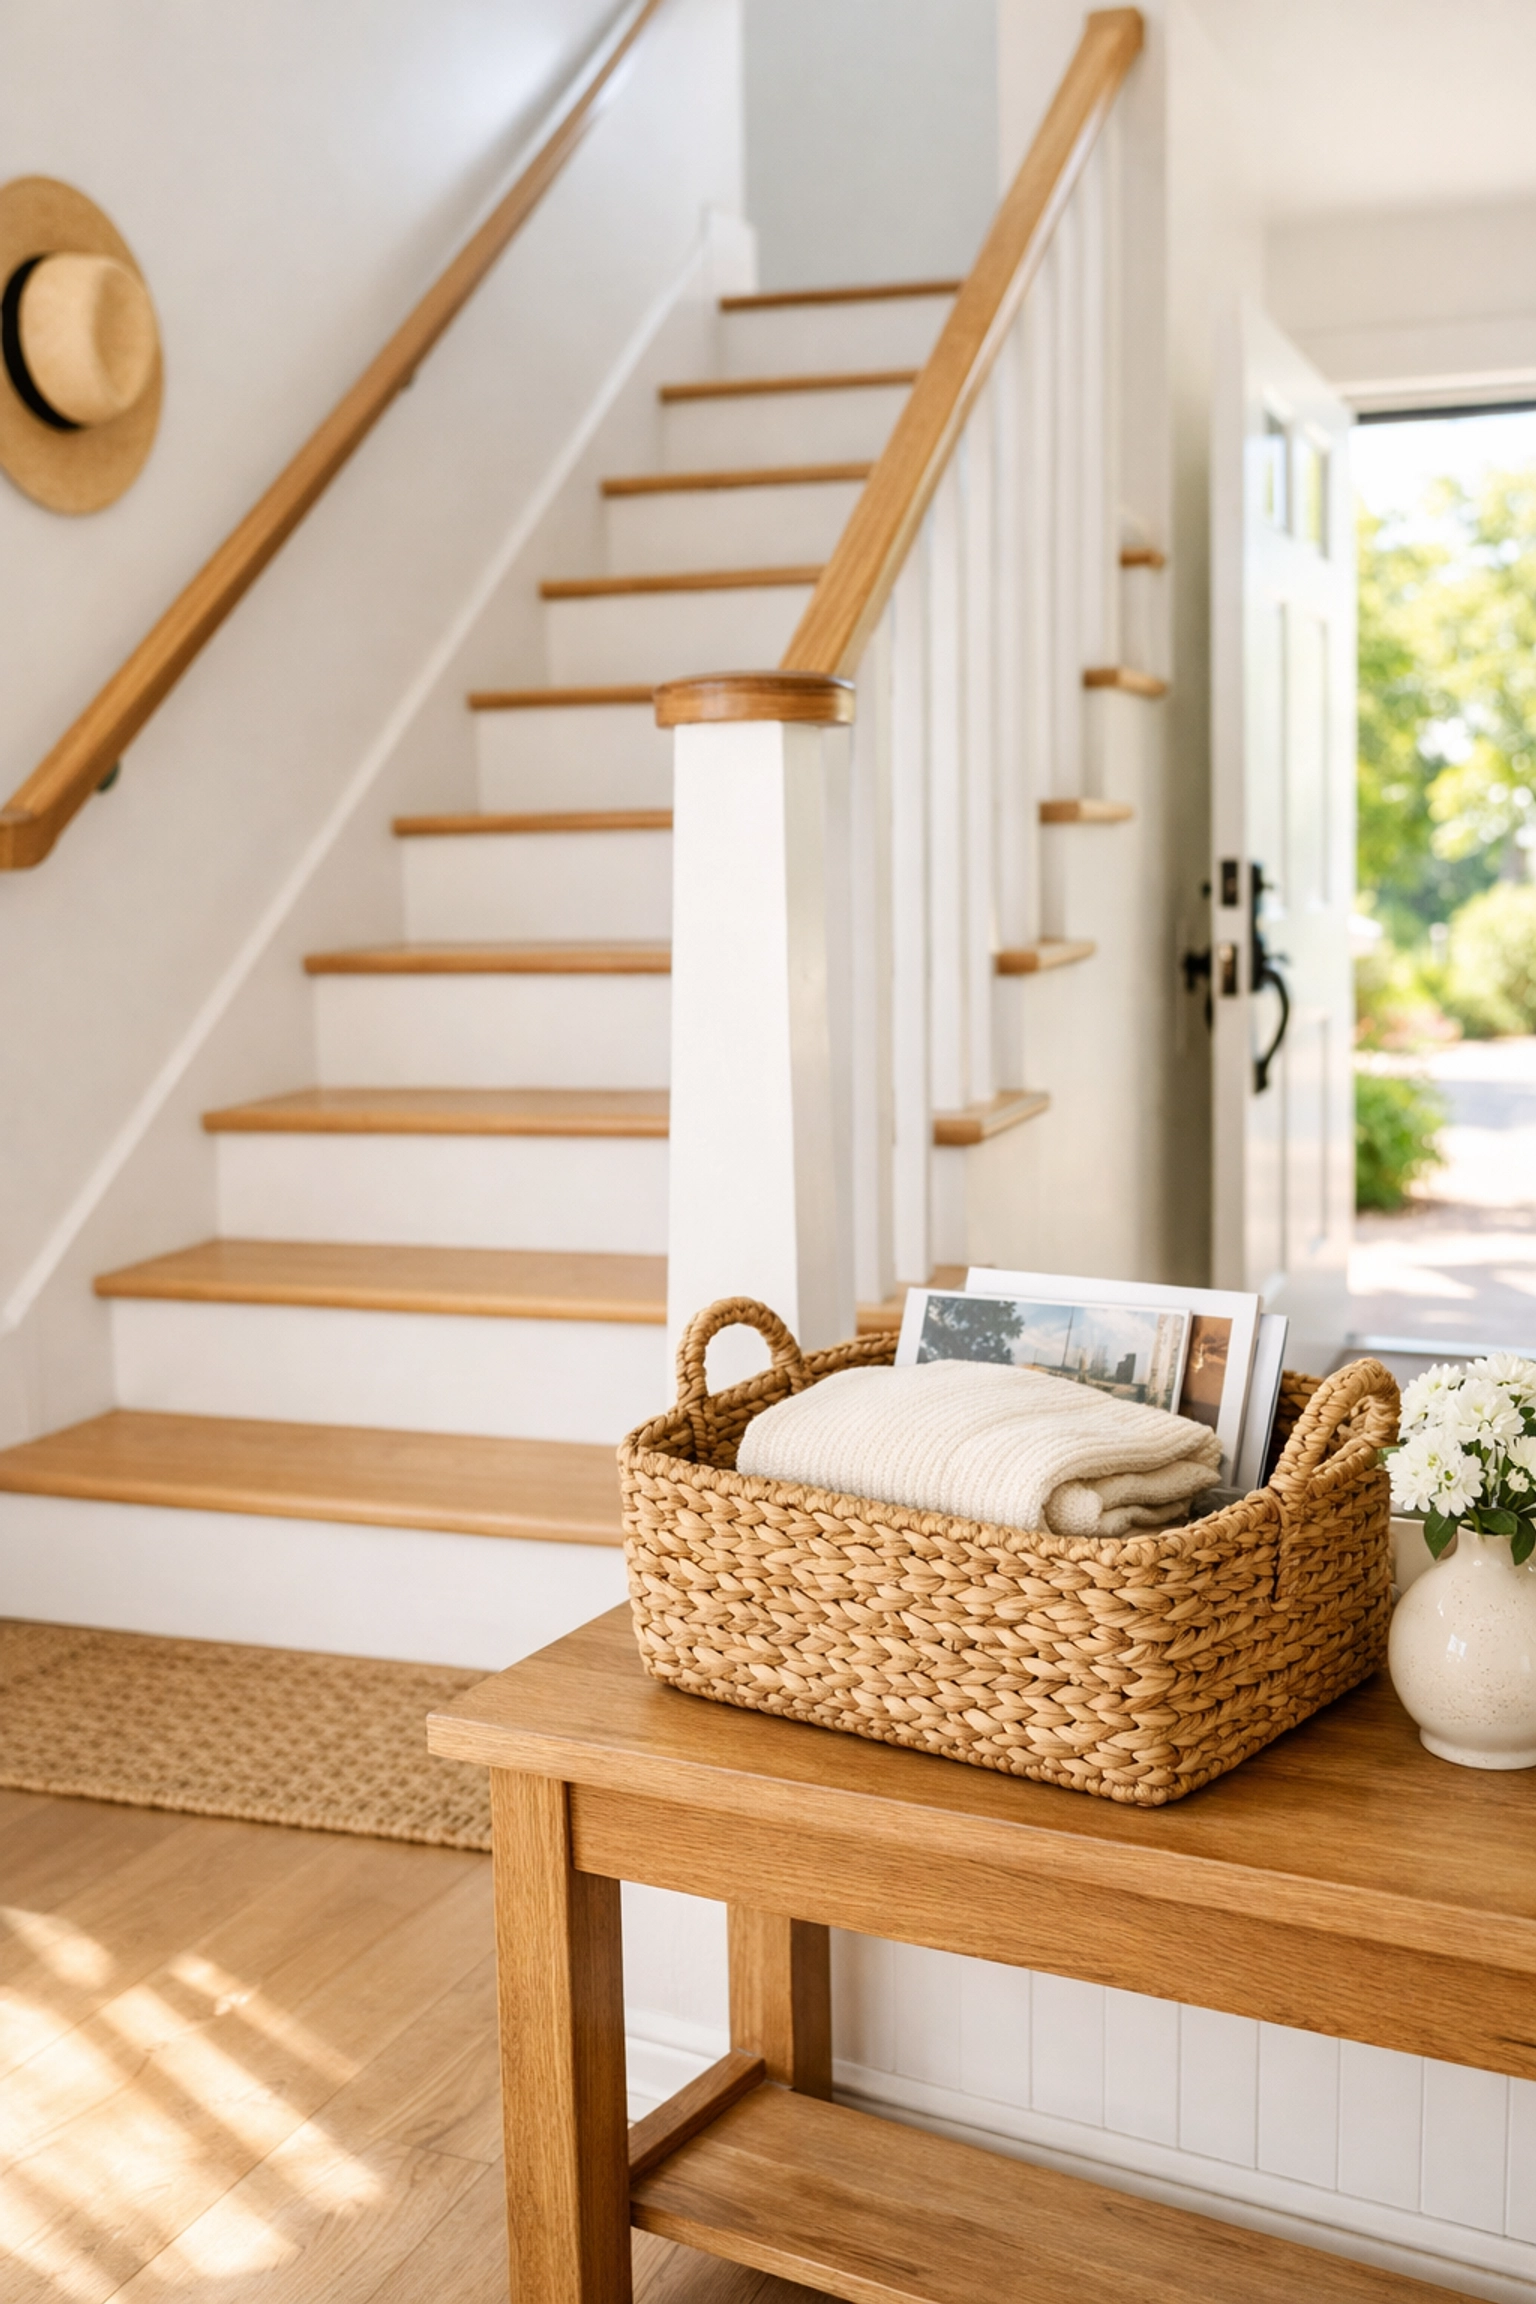
6. Using Stairs as a "Temporary" Storage Shelf
We’ve all done it. We have a pile of mail, a pair of shoes, or a basket of laundry that needs to go upstairs, so we set it on the bottom two steps to remind ourselves to take it up later.
This is one of the most dangerous habits a household can have. Stairs are narrow, and your focus should be entirely on your footing. Having to "step around" an object shifts your center of gravity and forces you to place your feet in awkward positions. Even worse, if you’re carrying something down and your vision of the steps is blocked, you might not see the object you left there earlier.
How to Fix It:
Adopt a "Zero Objects on Stairs" policy.
- The Landing Basket: If you have items that need to go up or down, place them in a dedicated basket located on a table near the stairs, but never on the steps themselves.
- Clear the Path: Ensure that the "approach" to the stairs (about 3 feet at the top and bottom) is also kept clear of clutter, rugs that bunch up, or furniture that narrows the path.
7. Rushing and "Single-Point" Contact
We live in a fast-paced world, and it’s easy to treat the stairs like a transition to be finished as quickly as possible. However, rushing is a leading cause of missteps. Furthermore, many people walk the stairs without holding the handrail, or they use the handrail but don't actually watch where they are placing their feet.
How to Fix It:
Safe stair climbing is about intentionality.
- The Three-Point Rule: In mountain climbing, they use the "three-point contact" rule (two hands and one foot, or two feet and one hand on the surface at all times). While that’s extreme for a home, the principle holds: always have one hand firmly on the rail before you move your feet.
- Slow Down: Take one step at a time. If you feel tired or winded, stop on a landing or a wide step and catch your breath. There is no prize for finishing the flight in record time.
- Eye Contact: Look at the steps. It sounds simple, but many people look ahead at the door or the room they are entering rather than the step they are currently on. If you wear bifocals, be extra careful, as the bottom lens can distort your view of the floor. You may need to tilt your head down further to see the steps through the top part of your glasses.
A Note on Maintenance
Beyond these seven mistakes, general wear and tear can sneak up on you. Wood can warp, nails can pop up, and carpet can become loose and "bunched." Every few months, give your staircase a "health check."
- Listen: Do any steps creak or groan? This could mean a tread is becoming loose.
- Shake: Grab your handrail and give it a firm shake. It should feel like it’s part of the house. If it wiggles, the brackets need to be tightened or moved into a wall stud.
- Feel: Run your hand along the carpet or wood. Is it smooth, or are there snags and splinters?
Why This Matters
At Fall Guys Products, we believe that home should be the place where you feel most secure. Stairs don't have to be a source of anxiety. By taking a Saturday afternoon to fix the lighting, clear the clutter, and check your handrails, you aren't just preventing a fall: you’re ensuring that you can continue to enjoy every level of your home for years to come.
Stay safe, stay steady, and remember that small changes make the biggest difference.