Hey there. I’m Brian Kerr, and if you’re reading this, it’s likely because you or someone you care about is looking for ways to stay safe and independent at home. That is a goal we take very seriously here. A home mobility assessment is the foundation of that independence. It is the roadmap that tells you where the bumps in the road are before you trip over them.
However, after years in the mobility industry, I’ve seen a lot of folks treat these assessments like a quick "check-the-box" activity. They do a quick walk-through, buy a grab bar, and think they’re set. Unfortunately, a poorly executed assessment can sometimes be worse than no assessment at all because it gives you a false sense of security.
If we want to prevent falls and keep our homes as sanctuaries of comfort rather than obstacle courses, we need to get the assessment right. Let’s look at the seven most common mistakes people make during home mobility assessments and, more importantly, how you can fix them.
1. Treating the Assessment as a "One and Done" Visit
The biggest mistake I see is people treating a mobility assessment like a home inspection you do when buying a house. You do it once, get the report, and you're finished.
In reality, mobility is fluid. Our physical needs change, our balance might fluctuate, and even the way we move through our house changes as we age or recover from an injury. Many times, a doctor might order a "Physical Therapy evaluation for a wheelchair." If the therapist only comes once, they are seeing a snapshot of that person on one specific day. They aren't seeing how that person navigates the kitchen at 2:00 AM or how they feel after a long day of activity.
The Fix: Think of mobility assessment as an ongoing process. If you’re working with a professional, ask for a plan of care that includes follow-up visits. If you are doing a self-assessment, schedule a "safety check" every six months. Mobility needs to be integrated into your daily life. It’s not just about getting the equipment; it’s about learning how to use it in different scenarios: like practicing a transfer from a wheelchair to a commode when you're tired, not just when you're fresh.
2. Ignoring the Technical Weight Capacity
This one is a safety issue that often gets overlooked in the rush to find a solution. Every piece of equipment: whether it’s a walker, a shower chair, or a bed rail: has a specific weight rating.
Mistakenly using equipment that isn't rated for the user’s weight can lead to structural failure. Beyond the risk of the item breaking, equipment used near its maximum capacity often becomes less stable. A walker might flex more than it should, or a chair might tip more easily. For powered equipment, like scooters, ignoring weight limits puts unnecessary strain on the battery and motor, leading to breakdowns when you least expect them.
The Fix: Always check the manufacturer's labels. If you or your loved one is anywhere near the upper limit of a "standard" device, it is always safer to move up to a bariatric or heavy-duty model. These are designed with reinforced frames and wider bases of support. It’s better to have more support than you need than just barely enough.
3. Choosing Equipment Based on "Looks" or "General Popularity"
I often hear, "My neighbor has a rollator with a seat, and she loves it, so I want one too." While it’s great to get recommendations from friends, mobility equipment is not one-size-fits-all.
The mistake here is choosing equipment that doesn't match the specific environment or the user’s physical capabilities. For example, a heavy-duty power scooter might be great for outdoor trips to the park, but if you try to use it inside a home with narrow hallways and tight turns, it becomes a liability. Conversely, a lightweight transport chair might be easy to fold, but if the user needs to propel themselves, it’s the wrong tool for the job.
The Fix: Match the tool to the task and the environment. Before buying or installing anything, measure your doorways, consider the flooring (carpet vs. hardwood), and be honest about the user’s strength. Do they have the hand strength to use hand brakes? Do they have the core stability to sit upright without side supports? A thorough assessment considers the "who, where, and how" before the "what."
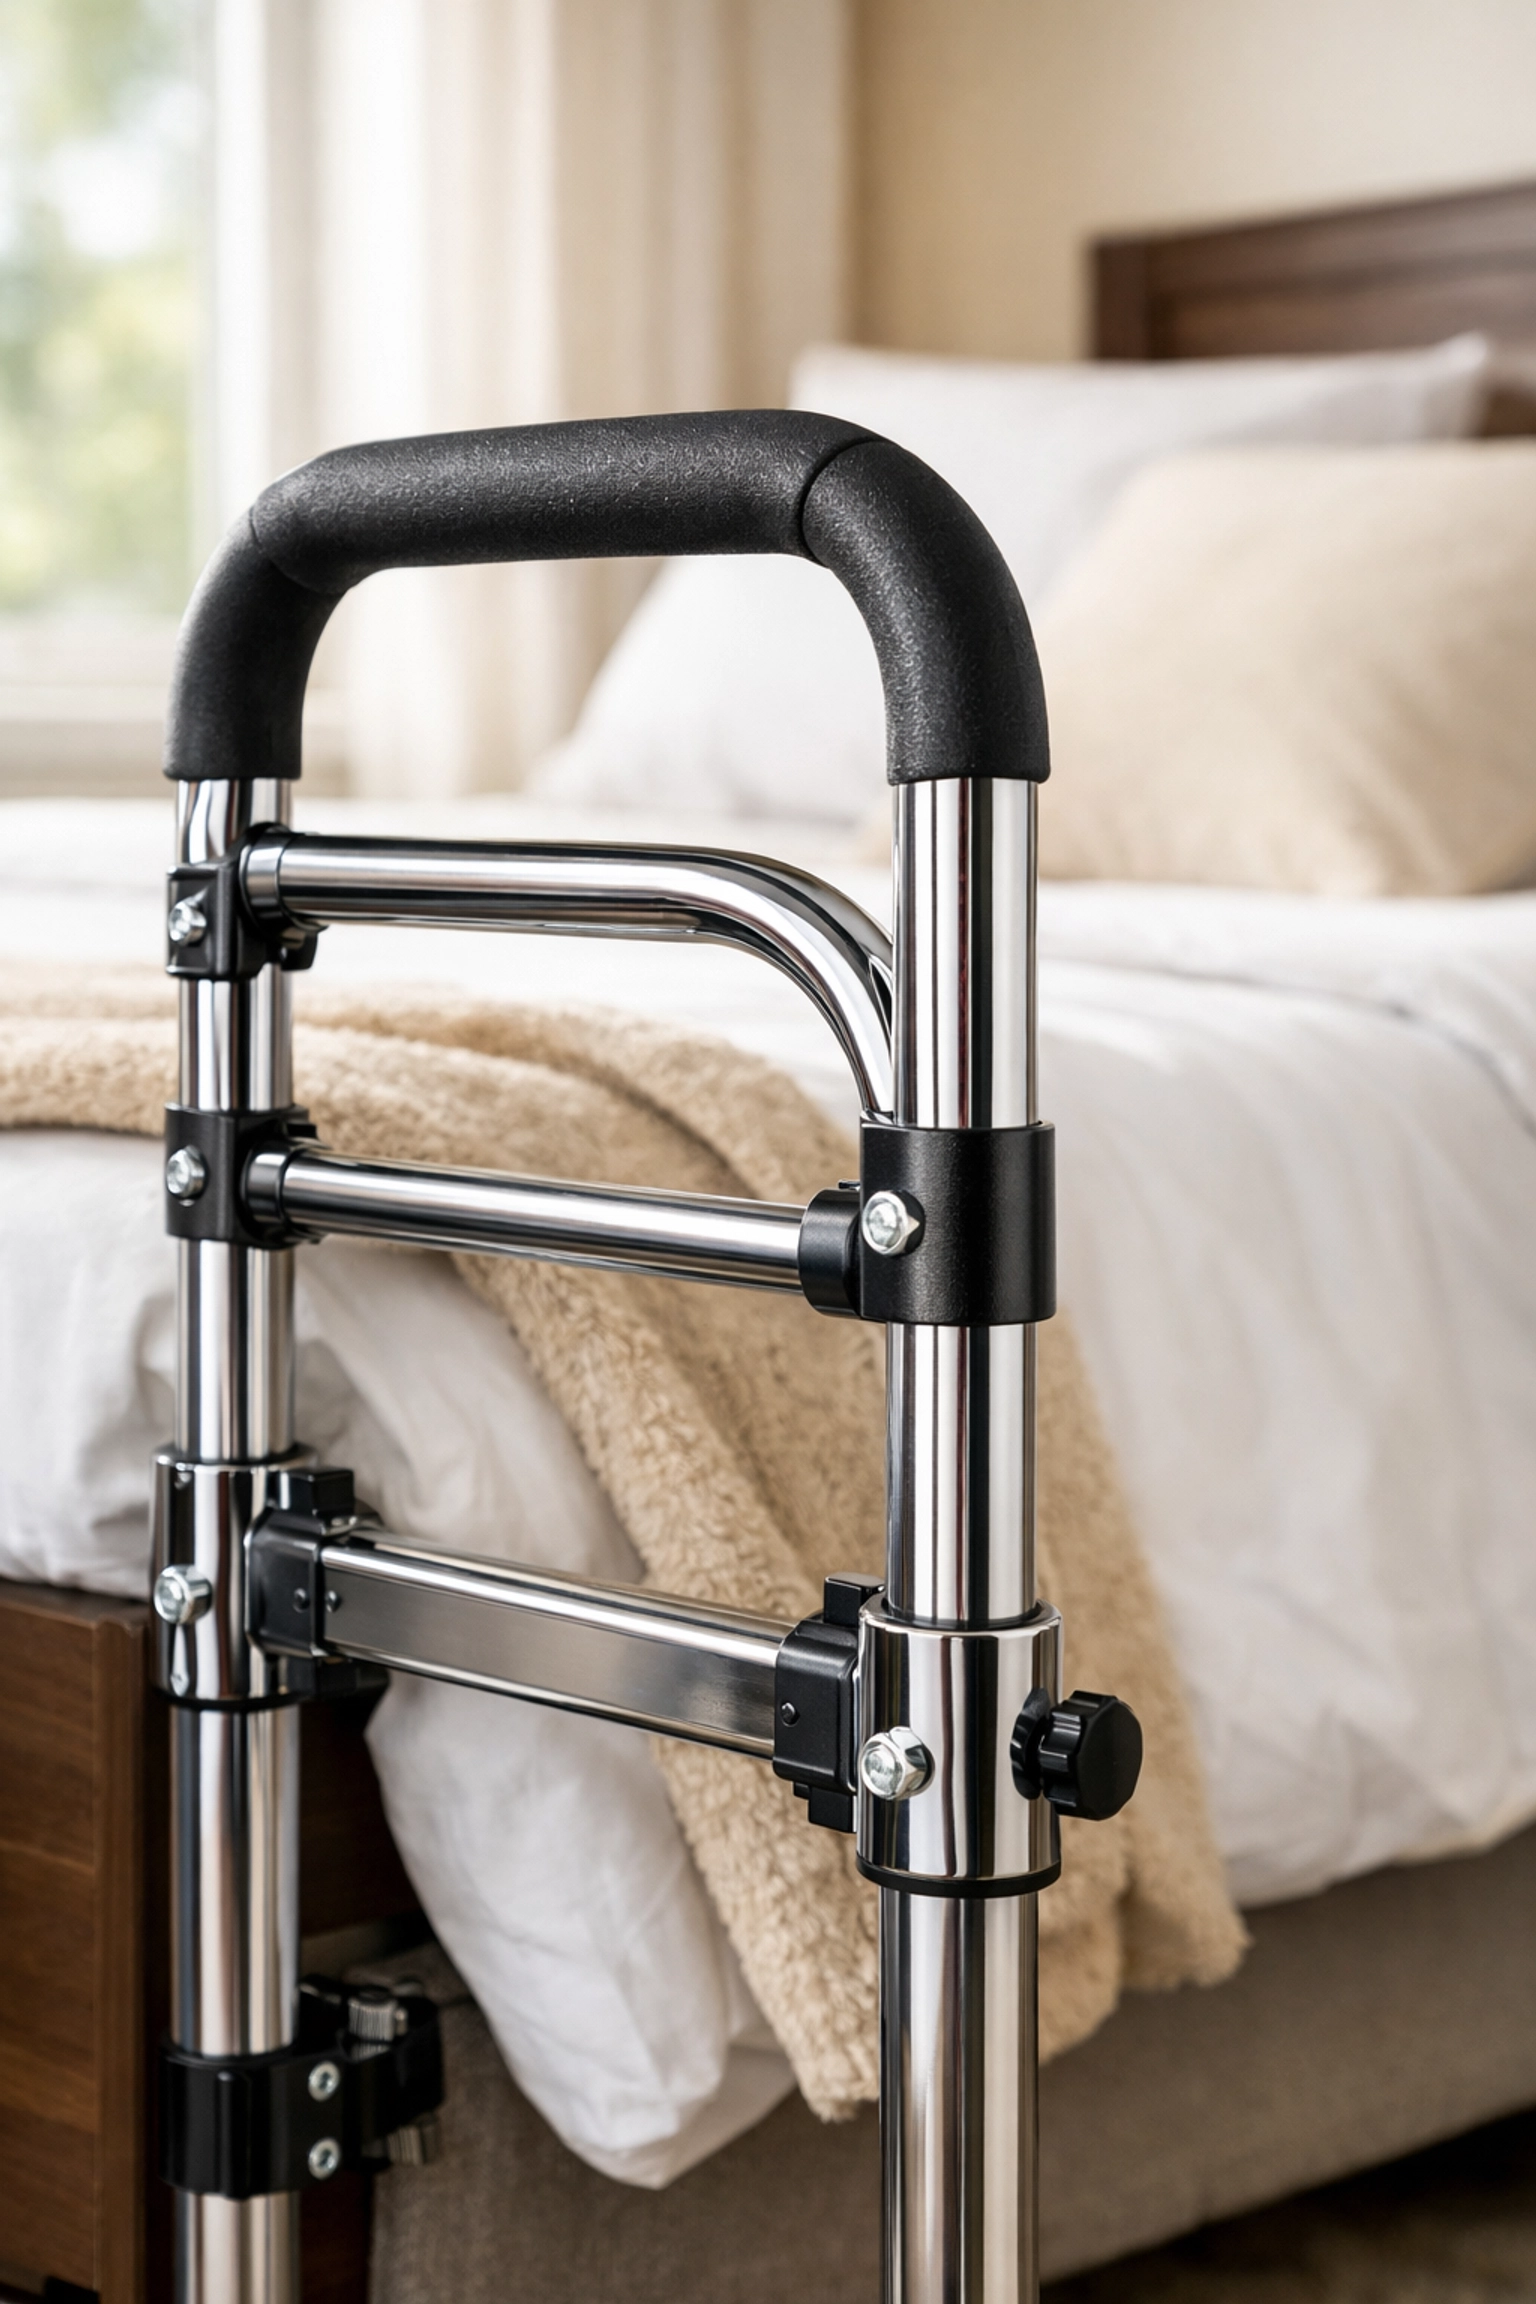
4. The DIY Installation Trap
We all love a good weekend project, but when it comes to mobility aids, a "good enough" installation can be dangerous. The most common offender here is the suction-cup grab bar. They look convenient and require no drilling, but they are notorious for losing their grip at the exact moment you put weight on them.
Another common error is installing ramps that are far too steep. Most people don't realize that for every inch of "rise" (height), you need a foot of "run" (length). This is the 1:12 ADA standard. If your porch is 24 inches high, you need a 24-foot ramp. A DIY ramp that is too short becomes a literal uphill battle that can cause a wheelchair to tip backward.
The Fix: For permanent fixtures like grab bars and ramps, skip the "no-drill" options. Grab bars should be mounted directly into the wall studs or used with specialized high-strength anchors designed for that purpose. If you’re installing a ramp, follow the 1:12 rule strictly. If you don't have the space for a long ramp, it might be time to look into a vertical platform lift instead. When in doubt, call a professional installer who understands the structural requirements of mobility equipment.

5. Over-Engineering the Home (Equipment Overkill)
It sounds counterintuitive, but you can actually have too much equipment. I’ve walked into homes where there are so many rails, poles, and chairs that the resident actually has less room to move safely.
This "over-engineering" usually happens when people panic after a fall and buy everything they see online. When a home starts to feel like a hospital ward, it can be demoralizing. More importantly, excessive equipment can create new tripping hazards or block the "swing" path of doors and walkers.
The Fix: Focus on the "Safe Path." Identify the most common routes taken in the house: from the bed to the bathroom, or the kitchen to the living room. Only place equipment where it is absolutely necessary for a transition (like standing up or sitting down). The goal is to keep the home feeling like a home, with clear, wide-open spaces for movement. Efficiency is safer than excess.
6. Overlooking the "Small" Environmental Hazards
During an assessment, people tend to look at the big things: "Do we need a stairlift?" or "Can we fit a hospital bed?" In doing so, they often walk right over the small things that actually cause the most falls.
I’m talking about "thresholds": those little strips of wood or metal between rooms. For someone using a walker or someone who struggles with "foot drop," a half-inch threshold is a major tripping hazard. Other overlooked items include loose rugs, poor lighting in transition areas (like hallways), and "clutter" that has been there so long you don’t even see it anymore.
The Fix: Do a "low-level" walk-through. Literally look at the floor. If there is a rug, remove it or secure it with heavy-duty double-sided tape. If there is a threshold, look into "transition strips" that create a tiny ramp over the bump. Swap out your light bulbs for higher-wattage LEDs and consider motion-sync nightlights for those midnight trips to the kitchen. These small, inexpensive fixes often do more to prevent falls than the big, expensive equipment.

7. Skipping the Expert Consultation
The final mistake is trying to do it all yourself without professional guidance. While self-education is vital, there is no substitute for the trained eye of an Occupational Therapist (OT) or a Physical Therapist (PT).
These professionals are trained to look at "body mechanics." They don't just see a hallway; they see how your hips move, how your balance shifts when you turn a corner, and how your vision affects your confidence. They can identify risks that a layperson: even a well-meaning family member: would never notice. For example, an OT might notice that the way you reach for a cabinet is putting you at risk of a dizzy spell.
The Fix: Ask your primary care physician for a referral for a "Home Safety Evaluation" by an Occupational Therapist. Many insurance plans cover this. They will come to your home and provide a detailed report. You don't have to follow every single suggestion immediately, but having that professional baseline is invaluable. It takes the guesswork out of the process and ensures that the changes you make are actually the ones that will keep you safe.
A Reassuring Path Forward
Navigating the world of home mobility can feel overwhelming. It’s a lot of information, and it’s okay to feel a bit unsure of where to start. But remember, the goal isn't perfection; it's progress. By avoiding these seven mistakes, you are already ahead of the curve.
Think of your home as a partner in your health. When you take the time to assess it properly: checking weight limits, ensuring professional installation, and clearing the pathways: you are creating an environment that supports you. You are making it possible to focus on the things you love, rather than worrying about where you step.
Take it one room at a time. Start with the bathroom, move to the bedroom, and then check the entryways. Be patient with yourself and don't be afraid to ask for professional help. We’re all in this together, and staying safe at home is a goal worth every bit of effort. Stay safe, stay mobile, and keep enjoying your home.

