Maintaining independence at home is a priority for many of us as we age. The bathroom, while a place of routine and self-care, is statistically the most frequent site for falls in the household. It makes sense: slick surfaces, hard fixtures, and the physical transitions required for bathing or using the toilet create a unique set of challenges.
Bathroom safety rails, often referred to as grab bars or assist rails, are among the most effective tools for preventing these accidents. However, simply having them in the room isn't enough. If they aren't chosen, placed, or installed correctly, they can provide a false sense of security that actually increases risk.
I’m Brian Kerr, and I’ve seen how much of a difference the right setup can make. When safety equipment is installed properly, it fades into the background of daily life, providing quiet support. When it’s done wrong, it becomes a hazard. Let’s walk through the seven most common mistakes people make with bathroom safety rails and, more importantly, how you can fix them to ensure your home remains a safe haven.
1. Mounting Directly into Drywall
This is perhaps the most dangerous mistake a homeowner or DIYer can make. Drywall is essentially a core of gypsum plaster sandwiched between layers of paper. While it is excellent for creating smooth walls, it has almost no structural integrity when it comes to weight-bearing loads.
The Mistake: Many people use standard plastic wall anchors or toggle bolts to screw a grab bar directly into the drywall. While the bar might feel sturdy when you first tug on it, it is not designed to support 150, 200, or 300 pounds of sudden force. If someone slips and grabs that rail with their full body weight, the screws will likely pull right through the drywall, causing the person to fall while holding a heavy metal bar.
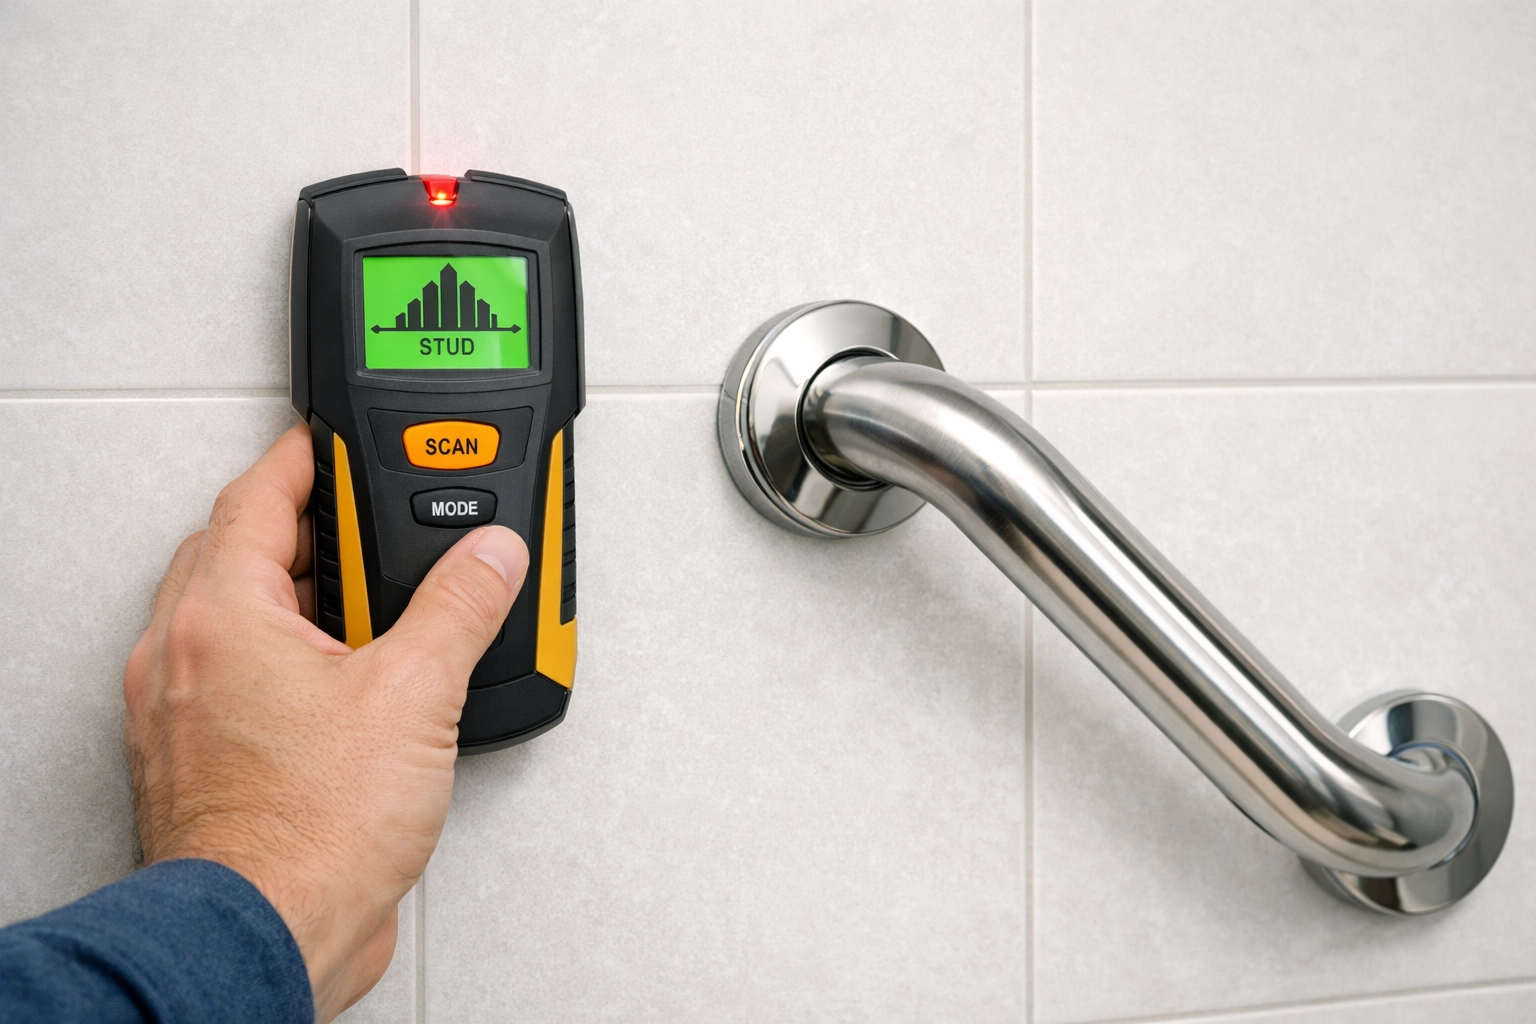
The Fix: Always anchor safety rails into the wall studs: the vertical wooden or metal beams that form the frame of your house. Studs are typically spaced 16 inches apart. Using a high-quality stud finder is essential. If the studs don't align with where you need the bar, you must use specialized, load-rated anchors specifically designed for grab bars (like "wing-style" hollow wall anchors) that are rated for the necessary weight. If you are unsure, this is a task best left to a professional installer.
2. Placing Bars Based on Convenience Rather Than Movement
Often, grab bars are installed where they "look right" or where there is an empty patch of wall. However, safety isn't about aesthetics; it’s about biomechanics.
The Mistake: Placing a bar too far forward in a shower or too high above a toilet means the user has to overextend their reach. When you reach too far, you shift your center of gravity, which actually makes you more likely to lose your balance.
The Fix: The placement should be determined by the specific movements of the person using the bathroom. Before drilling any holes, have the user sit on the toilet or stand in the shower and naturally reach for support.
- For the toilet: You generally want a rail that helps with the transition from sitting to standing. This usually means a bar positioned slightly forward of the knees when seated.
- For the shower: You need support for the "threshold transition" (getting in and out) and for stability while washing. This often requires a combination of vertical and horizontal bars.
3. The "One and Done" Mentality
Many families believe that installing a single grab bar next to the shower door solves the problem. While one bar is better than none, it rarely covers all the "danger zones" in a bathroom.
The Mistake: Relying on a single point of contact. Fall prevention is about creating a continuous path of support. A person might be safe getting into the shower, but if there is no support near the toilet or near the sink where they might experience a dizzy spell, the safety plan is incomplete.
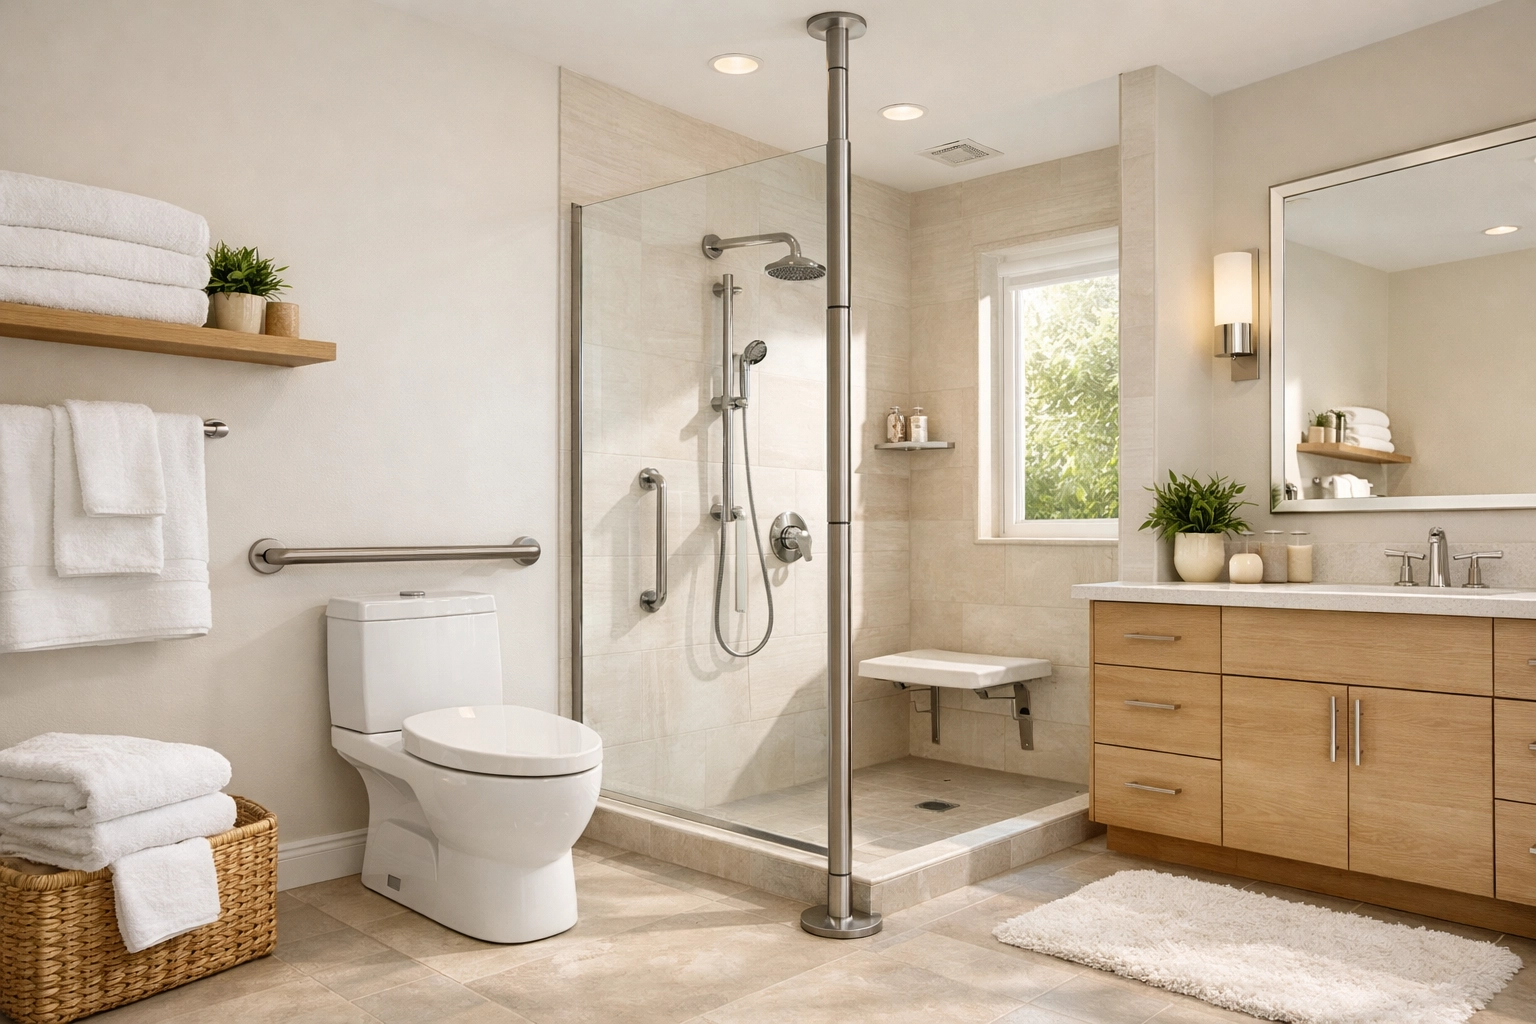
The Fix: Think of your bathroom in "zones."
- The Entry Zone: Support for stepping over a tub edge or shower lip.
- The Activity Zone: Support while standing to wash or adjust water temperature.
- The Transition Zone: Support for sitting down on or rising from the toilet.
A comprehensive safety plan usually involves at least two or three strategically placed rails or poles to ensure that a handhold is always within reach.
4. Relying on Suction Cup Rails for Weight Support
Suction cup grab bars are widely available and tempting because they don't require drilling. However, they are frequently misunderstood and misused.
The Mistake: Using a suction cup rail as a primary weight-bearing device. These bars rely on a vacuum seal against a non-porous surface (like smooth tile). Over time, air can leak into the seal, or the tile itself can shift slightly, causing the bar to release without warning. Furthermore, they cannot be used on textured tile or across grout lines.
The Fix: Suction bars should only be used for "balance assistance": meaning a light touch to help keep you steady. They should never be used to pull oneself up or to catch a fall. For true safety and weight support, permanent, bolt-down hardware is the only reliable option. If you are in a rental where drilling isn't allowed, consider floor-to-ceiling tension poles, which provide structural stability without damaging the walls.
5. Incorrect Installation Height and Angle
There is a reason the Americans with Disabilities Act (ADA) has specific guidelines for grab bar height. Even in a private home where you aren't required to follow ADA codes, those measurements provide a safer baseline.
The Mistake: Installing bars too high (making them hard to reach) or too low (forcing the user to hunch over). Another mistake is installing all bars horizontally. While horizontal bars are great for pushing up, they aren't always the best for pulling or for maintaining balance while standing.
The Fix:
- Height: Standard grab bars are typically installed between 33 and 36 inches from the floor.
- Angle: Vertical bars are excellent for the entry/exit of a shower because they accommodate users of different heights. Angled or diagonal bars (often at a 45-degree angle) can be helpful near a toilet because they allow the wrist to stay in a neutral position as a person moves from a sitting to a standing posture.
6. Using Improper or Low-Quality Hardware
Not all screws are created equal. The hardware that comes in the box with a generic rail might not be suitable for your specific wall type.
The Mistake: Using interior wood screws or, worse, drywall screws to mount a safety rail. These screws can snap under high shear force or rust over time due to the high humidity in a bathroom. Rust weakens the metal and can eventually lead to a catastrophic failure of the rail.
The Fix: Use stainless steel hardware to prevent corrosion. Ensure the screws are long enough to penetrate at least 1.5 to 2 inches into the wood stud. If you are mounting into tile, you must use a diamond-tipped masonry bit to drill through the tile first to avoid cracking it, and then ensure your fasteners are reaching the structural framing behind the tile and backer board.
7. Ignoring the Texture and Grip of the Rail
In the heat of the moment, when a hand is wet or soapy, the surface of the rail matters just as much as how it’s attached to the wall.
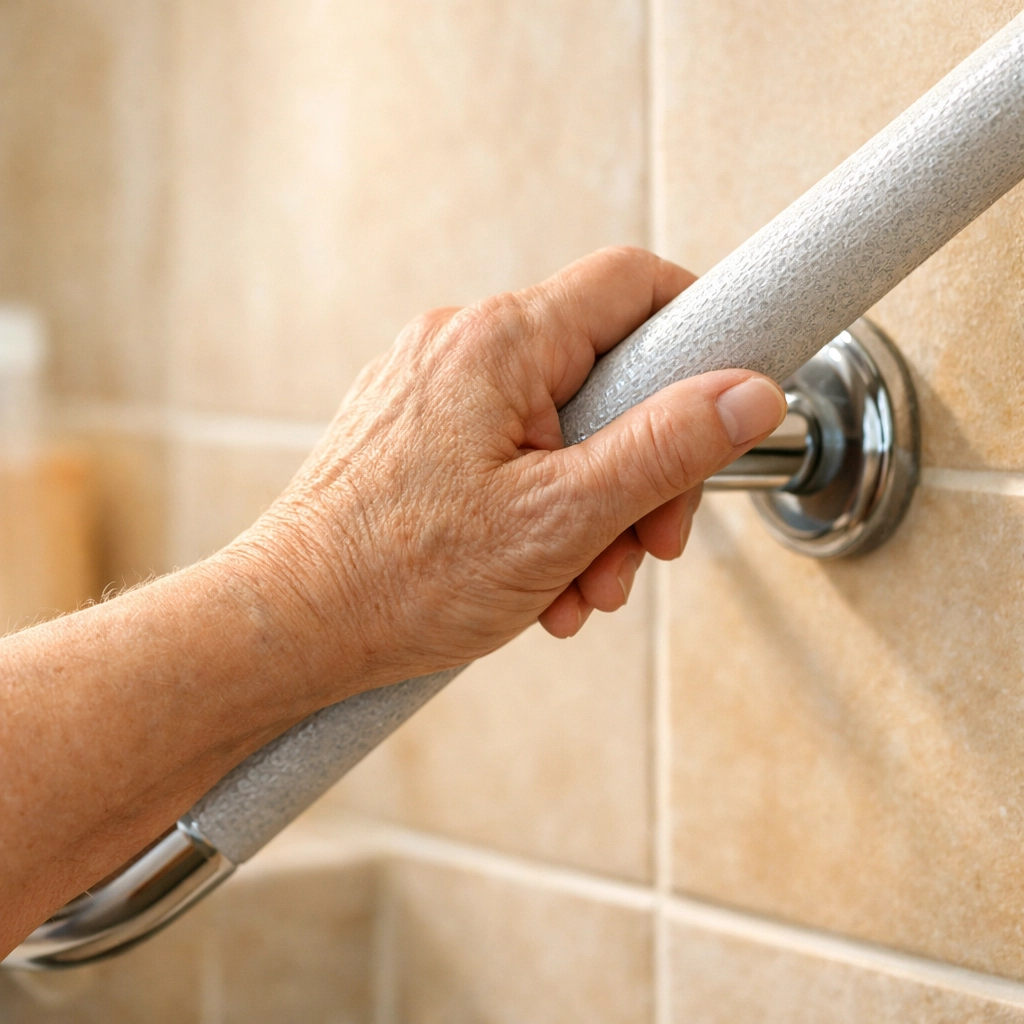
The Mistake: Choosing a high-gloss, smooth chrome rail because it matches the faucets. While these look nice, they can become as slippery as the shower floor when they get wet. If your hand slides off the bar when you need it most, the bar has failed its purpose.
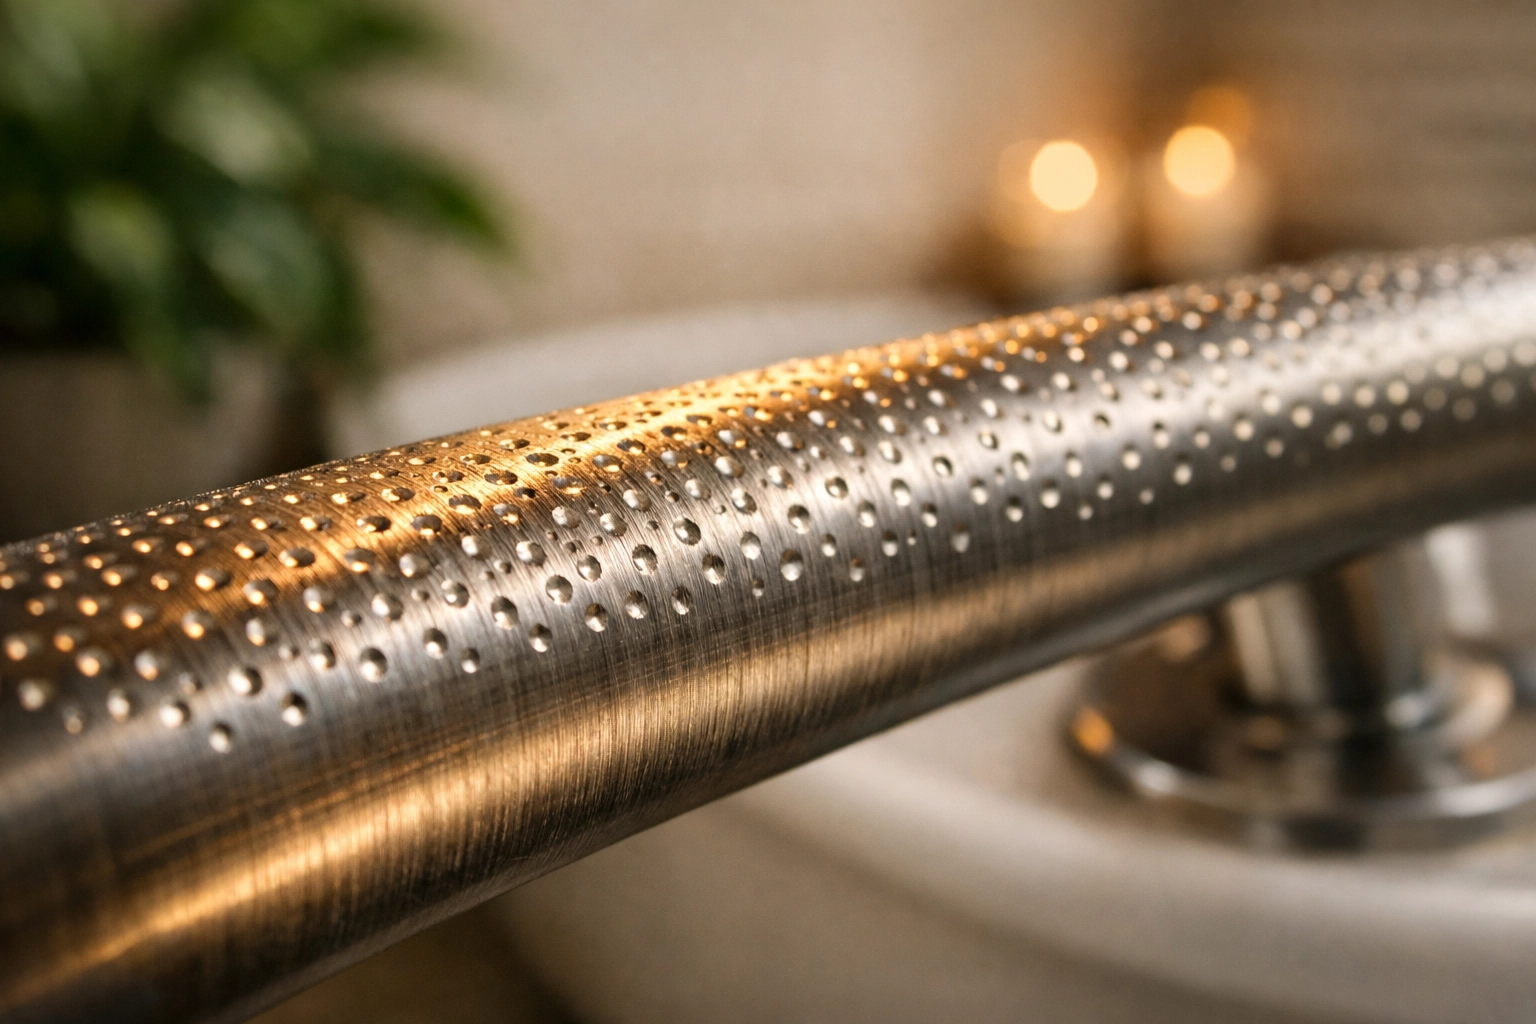
The Fix: Look for safety rails with a textured surface. This might be a "peened" finish (which looks like tiny dimples in the metal), a knurled grip (a cross-hatch pattern), or a slip-resistant coating. If you already have smooth bars, you can improve them by adding high-friction safety tape, though replacing them with purpose-built textured rails is always the more reliable long-term solution.
The Importance of a Professional Assessment
Every bathroom is different, and every person’s mobility needs are unique. What works for a tall person with knee pain might not work for a shorter person recovering from a stroke.
If you find yourself overwhelmed by the options or worried about making one of these mistakes, consider a professional assessment. Physical therapists or certified aging-in-place specialists can look at how you move within your space and recommend the exact height, angle, and location for your safety rails.
Final Thoughts on Maintenance
Once your rails are installed correctly, the job isn't quite over. Every few months, give your safety rails a "tug test." Apply some weight to them to ensure they haven't loosened. Check the mounting plates for any signs of rust or wear.
Safety in the bathroom provides more than just physical protection; it provides peace of mind. By avoiding these seven common mistakes, you can ensure that your bathroom remains a place of comfort and independence for years to come. Remember, the best time to fix a safety mistake is before a fall happens, not after. Stay safe, stay proactive, and don't hesitate to reach out to experts if you're unsure about your setup.

