For many of us, the home is a place of comfort, memories, and independence. However, as we age, certain areas of the home that we once navigated without a second thought can start to feel a bit more challenging. The staircase is often at the top of that list.
Stairs are one of the most common areas for falls in the home, but that doesn't mean they have to be off-limits or a source of constant anxiety. Securing your stairs isn't necessarily about a massive, expensive renovation; often, it’s about making smart, targeted adjustments that improve visibility, stability, and grip.
In this guide, we’re going to walk through five practical steps to make your stairs significantly safer. Whether you are looking to modify your own home or helping a loved one stay safe, these tips are designed to be straightforward and effective.
Step 1: Add Non-Slip Traction to Every Step
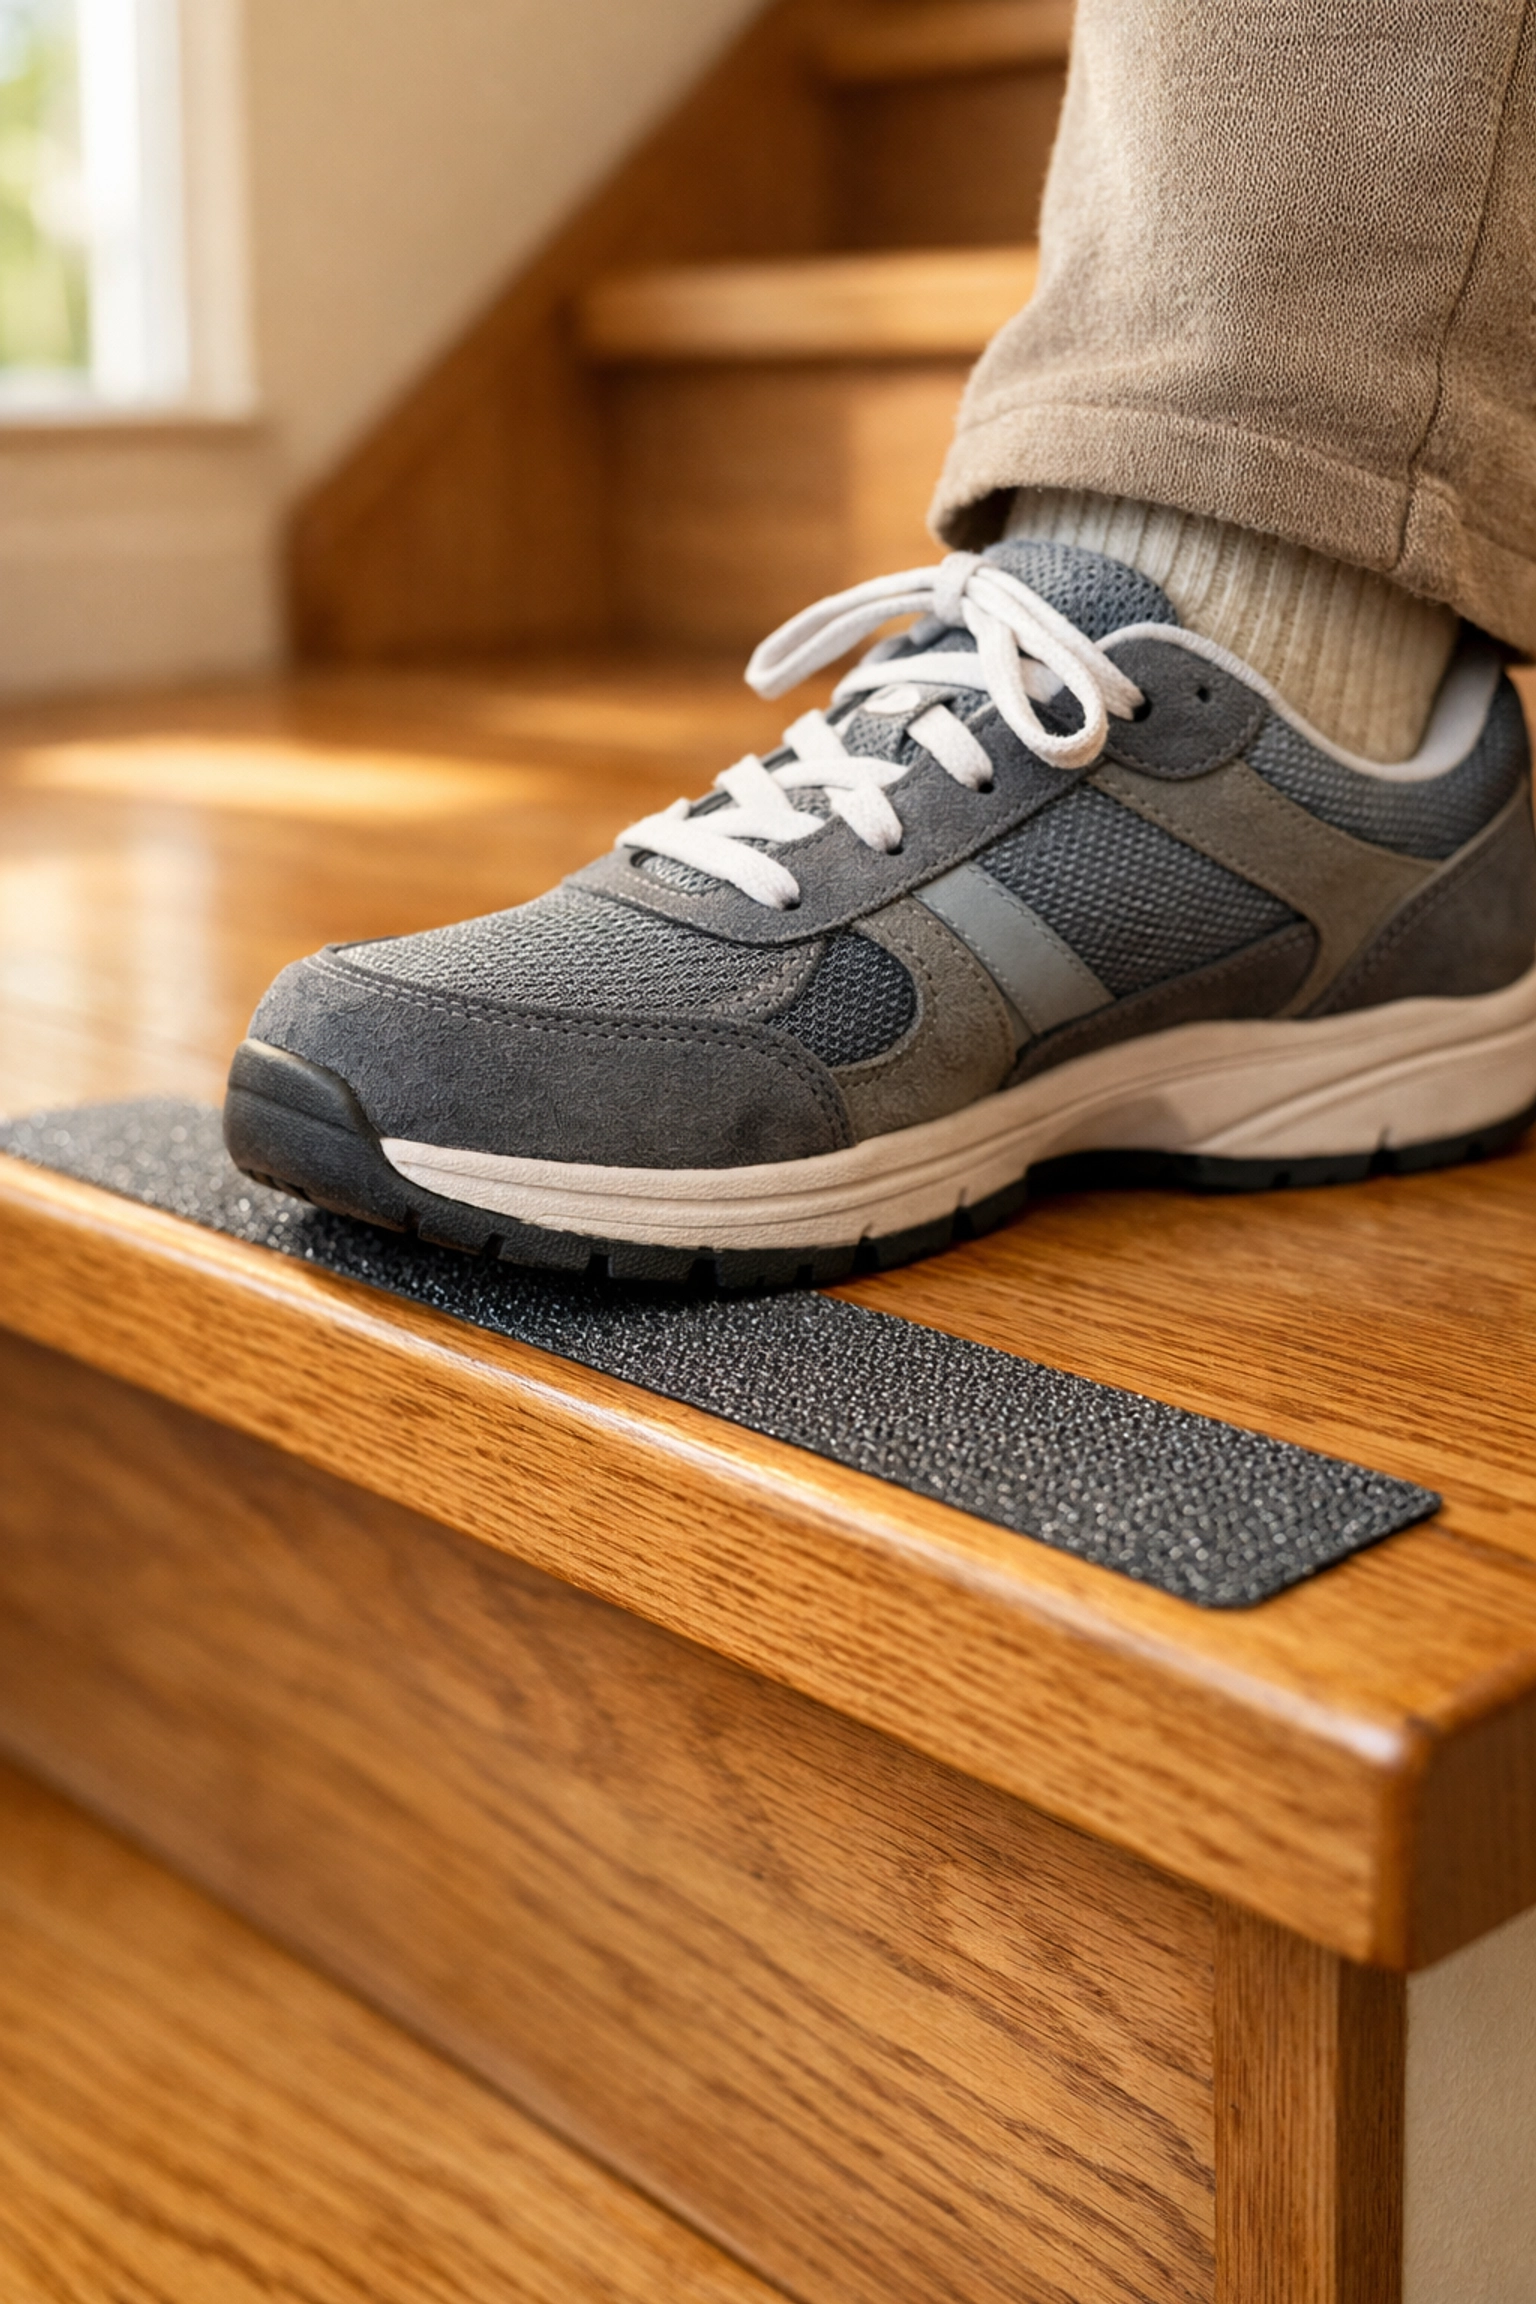
The surface of your stairs plays a massive role in fall prevention. Many traditional stair materials: like polished wood, tile, or even certain types of laminate: can be incredibly slippery, especially if you’re wearing socks or if your shoes have worn-down soles. Even carpet, if it’s the wrong kind, can create a "rolling" effect under the foot that leads to a slip.
Understanding Friction and Grip
The goal here is to increase "coefficient of friction." In simpler terms, we want to make sure that when your foot hits the step, it stays exactly where you put it.
Anti-Slip Treads and Tapes
One of the easiest and most cost-effective ways to improve traction is by applying anti-slip adhesive tapes or treads. These are often made of a gritty, sandpaper-like material or a textured rubber.
- Transparent Tapes: If you love the look of your wood stairs, you can find transparent grit tapes that provide safety without hiding the wood grain.
- Rubber Treads: These are thicker and offer a bit of cushioning. They are excellent for outdoor stairs or basement steps where aesthetics might be secondary to pure utility.
The Trouble with Carpet
Many people assume carpet is safer because it feels soft, but that isn't always the case. Thick, "shag" carpeting can actually hide the edge of the step (the nosing), making it hard for your brain to tell exactly where to place your foot. If you have carpeted stairs, ensure the carpet is low-pile and stretched very tightly. If the carpet is loose or bunching, it becomes a major tripping hazard and should be re-stretched or replaced immediately.
Step 2: Improve Lighting at Strategic Points
Our vision naturally changes as we get older. We often need more light to see clearly, and our eyes take longer to adjust when moving from a dark room into a brightly lit one (and vice versa). On a staircase, even a split-second of "blindness" or a shadow that looks like a step can lead to a misstep.
Creating a Path of Light
Lighting should be consistent from the very top to the very bottom. Shadows are the enemy of stair safety because they can disguise the depth of a step or hide a small object left on the stairs.
The Dual-Switch Rule
Ideally, you should have a light switch at both the top and the bottom of the stairs. You should never have to navigate a dark staircase to reach a light switch. If your home isn't wired this way, don't worry: there are wireless, battery-operated LED switches that can be synced to a light fixture without needing an electrician.
Motion-Sensing Night Lights
For those middle-of-the-night trips to the kitchen or bathroom, motion-sensing lights are a lifesaver. You can find small LED lights that plug into outlets or stick to the baseboards.
- Place them at ankle level along the wall of the staircase.
- They will illuminate the actual surface of the steps as you approach, providing a clear path without being so bright that they ruin your night vision.
Reducing Glare
While we want things bright, we don't want "glare." High-gloss finishes on stairs can reflect overhead lights in a way that makes it hard to see the edge of the step. Using matte finishes or non-reflective treads (as mentioned in Step 1) can help solve this problem.
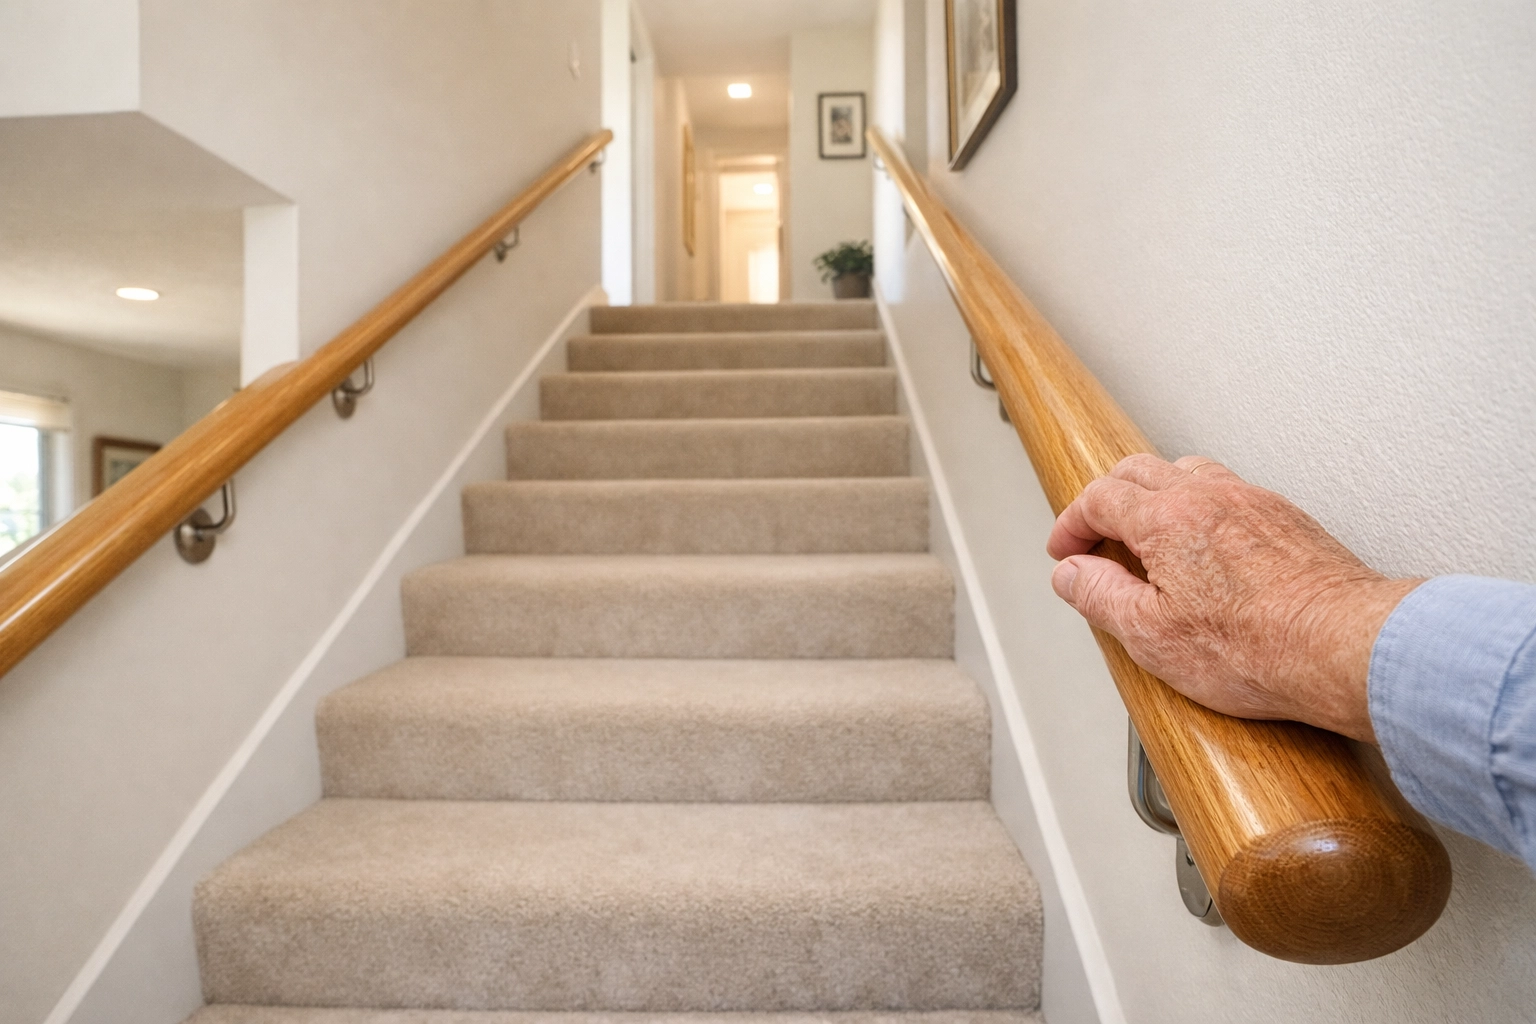
Step 3: Install Sturdy Handrails on Both Sides
A single handrail is common in most homes, but for maximum safety, having a rail on both sides is the gold standard. This allows you to use your dominant hand regardless of whether you are going up or down, and it provides a "backup" if you lose your balance.
What Makes a Handrail Safe?
Not all handrails are created equal. A decorative piece of wood might look nice, but it may not provide the grip you need in an emergency.
The Shape Matters
A safe handrail should be "graspable." This means you should be able to wrap your hand almost all the way around it. If the rail is too wide or too flat, you can't get a firm "power grip" on it. A round or oval rail with a diameter of about 1.25 to 2 inches is usually ideal for most people.
Continuous Support
The handrail should run the entire length of the stairs and actually extend a few inches beyond the top and bottom steps. This is crucial because the transition onto and off of the staircase is often where balance is most precarious. Having that extra bit of rail to hold onto as you take your first or last step makes a huge difference.
Height and Stability
Standard handrail height is usually between 34 and 38 inches from the floor. However, the most important factor is that it feels comfortable for you. More importantly, the rail must be able to support the full weight of an adult. If the rail wiggles even slightly when you pull on it, it needs to be reinforced or re-mounted into the wall studs using heavy-duty brackets.
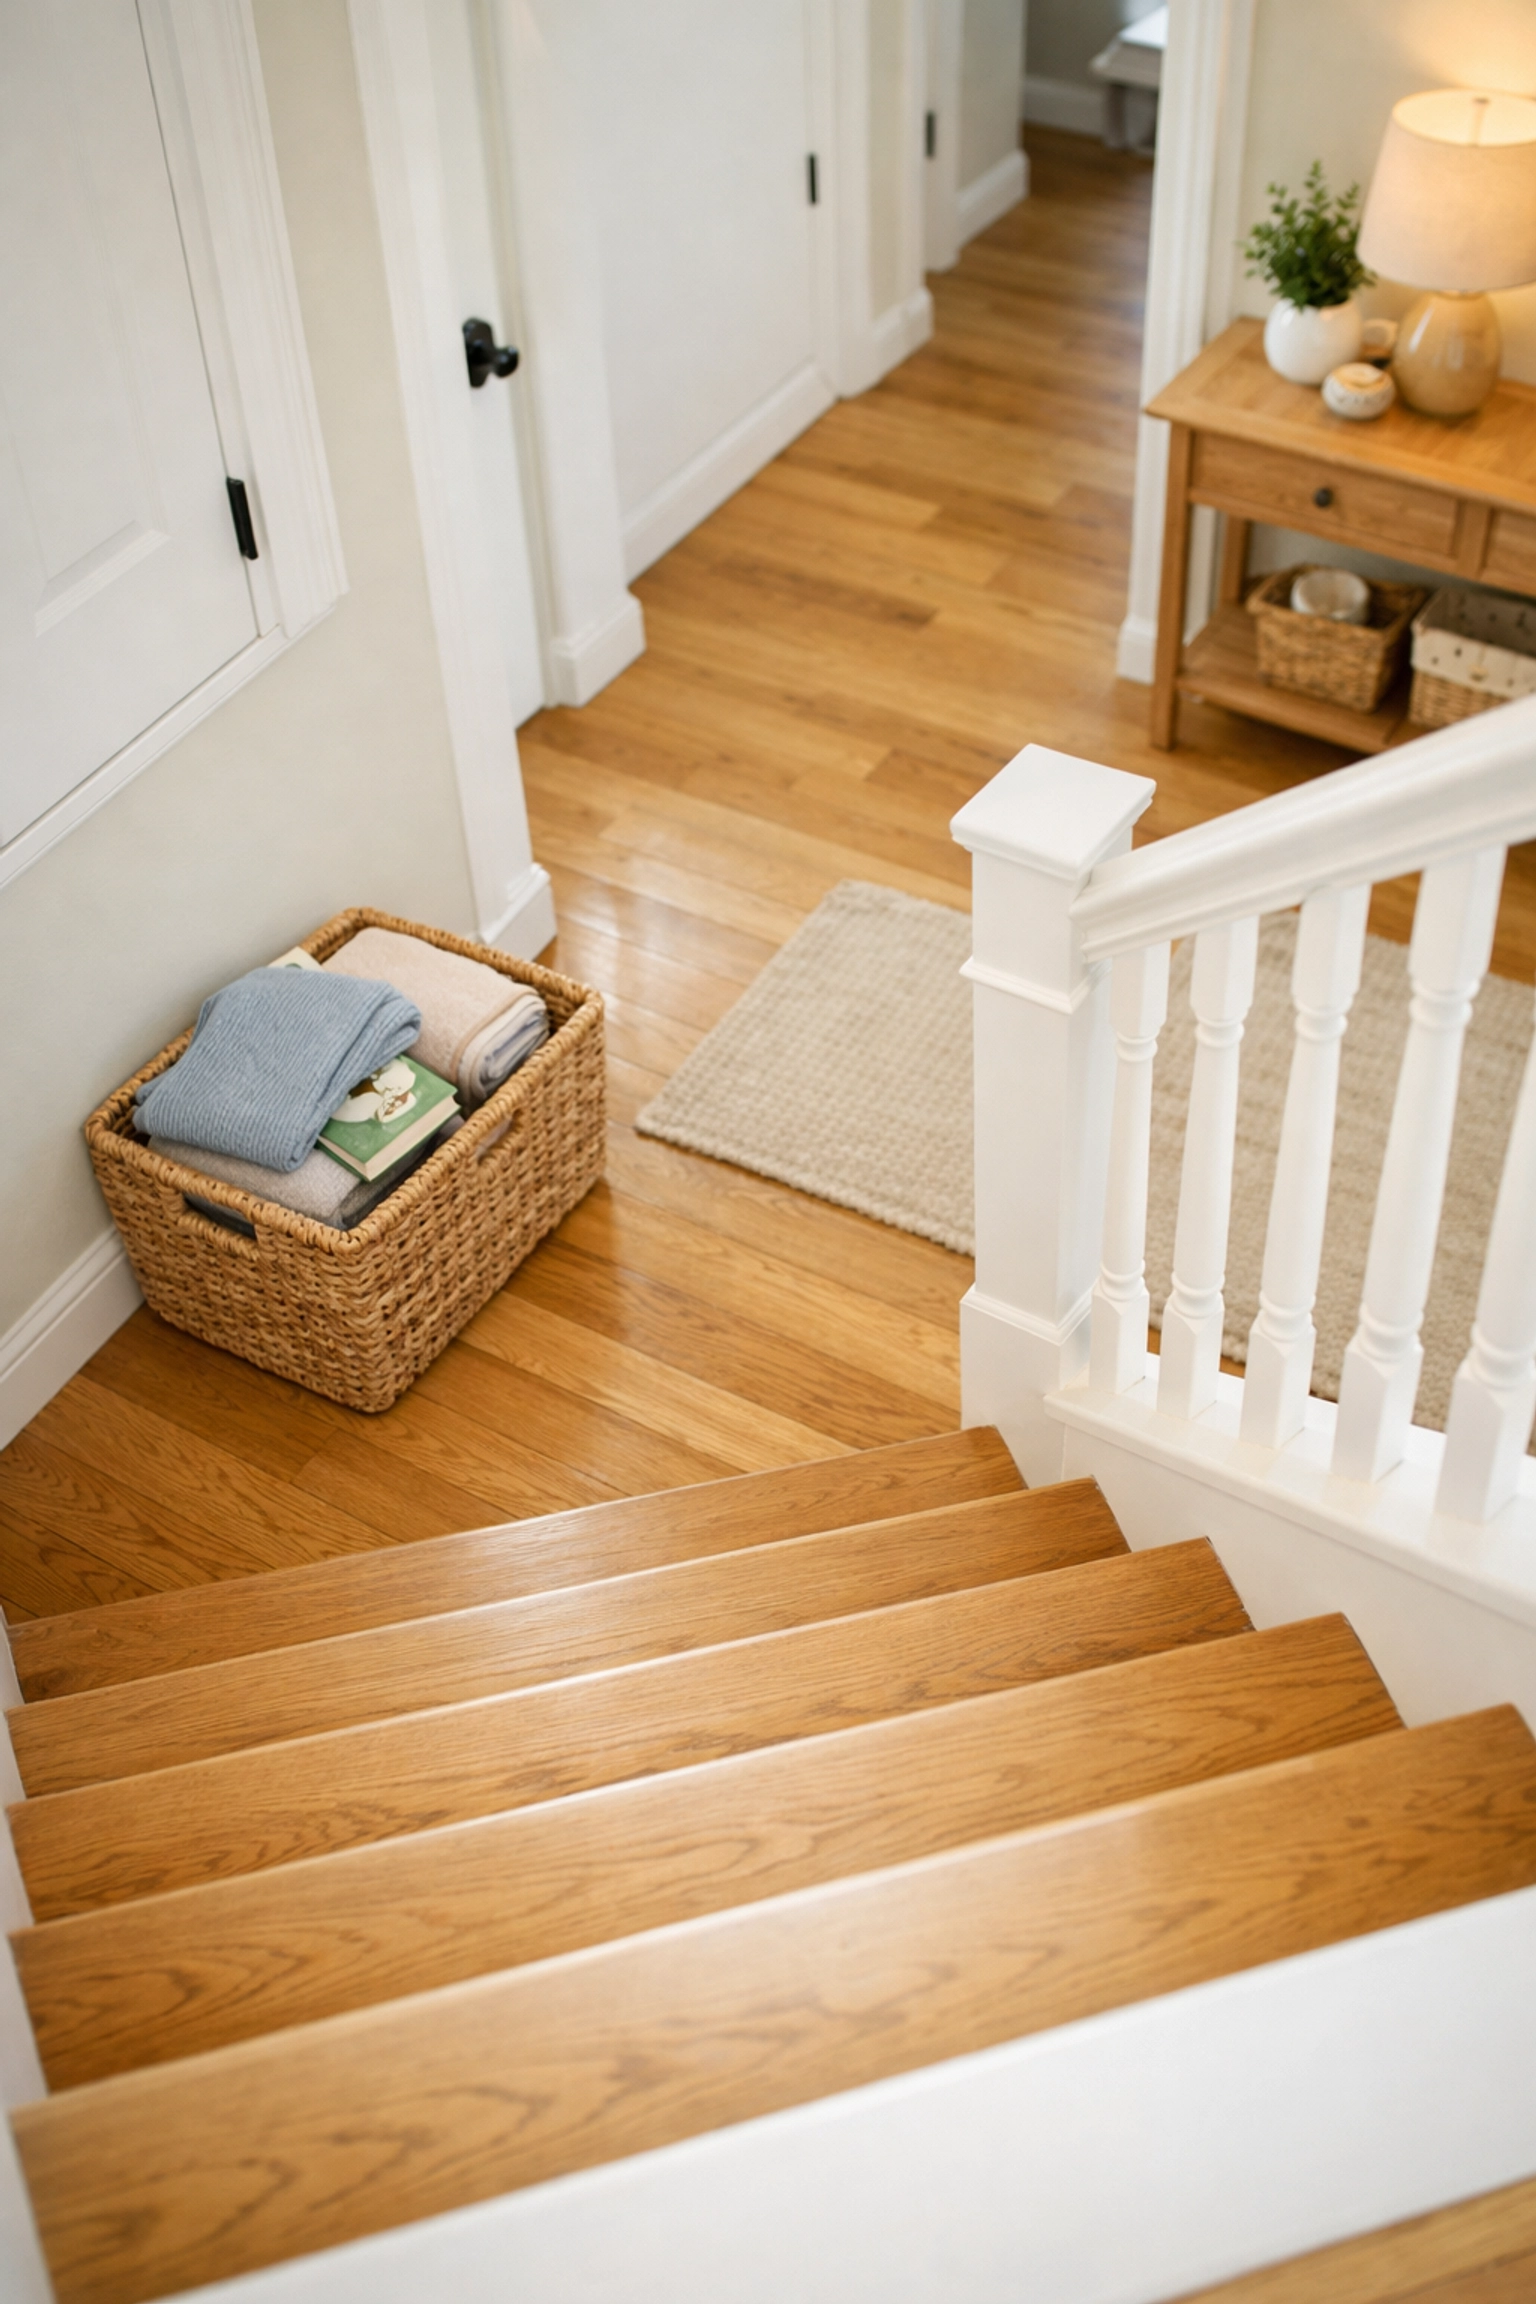
Step 4: Remove Clutter and Tripping Hazards
This might seem like the most obvious step, but it is often the one that gets neglected over time. Stairs should never be used as a temporary storage spot.
The Psychology of "Just for a Second"
We've all done it: we place a book, a pair of shoes, or a basket at the bottom of the stairs, intending to take it up on our next trip. The problem is that we habituate to these objects. We stop "seeing" them, and when we are tired or distracted, they become the perfect recipe for a trip.
Practical Tips for a Clear Path:
- The "No-Object" Rule: Make it a strict household rule that nothing: absolutely nothing: ever sits on the steps.
- Cord Management: Check for any electrical cords or phone chargers that might be running near the top or bottom landings. These should be taped down or, better yet, rerouted along the baseboards using cord clips.
- Check for Damage: Maintenance is part of clutter-clearing. Check for protruding nail heads, loose floorboards, or frayed carpet edges. These small physical defects are just as dangerous as a stray shoe.
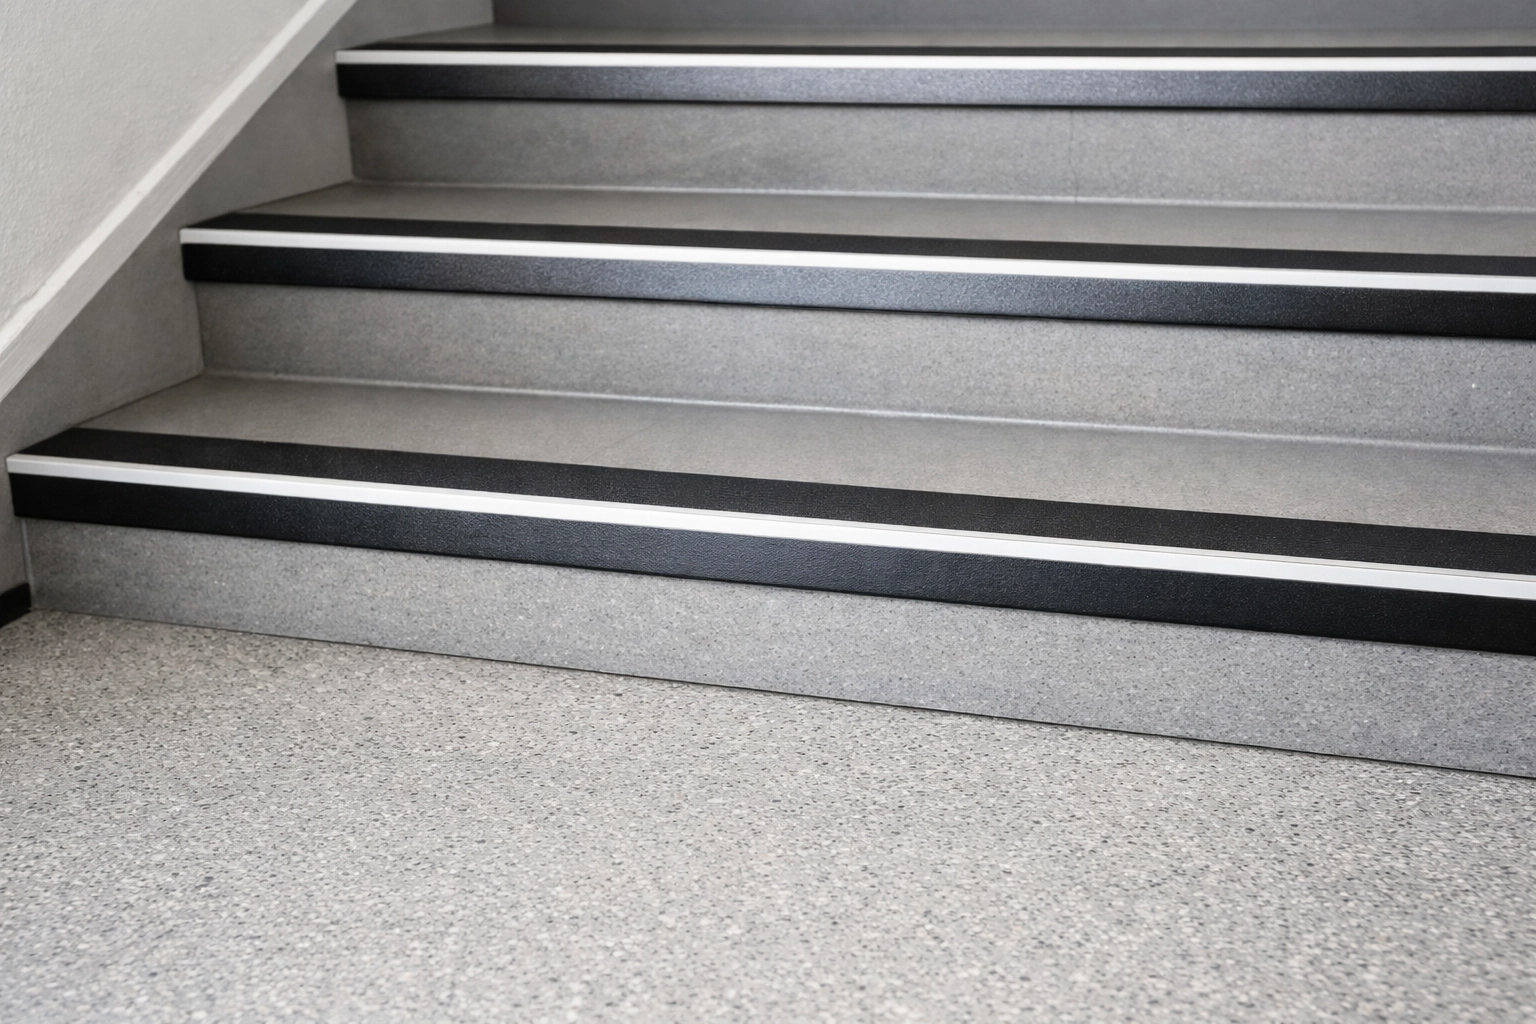
Step 5: Ensure Consistent Step Height and Visual Contrast
Human beings walk with a specific rhythm. Once we take the first two steps on a staircase, our brain "programs" the distance our legs need to move for the rest of the flight. If one step is even half an inch taller or shorter than the others, it breaks that rhythm and can cause a stumble.
The "Ghost Step" Phenomenon
Have you ever reached the top of the stairs and tried to take one more step even though you were already on the landing? Or have you missed the last step because you thought you were already at the bottom? This happens because the stairs blend into the floor.
Creating Contrast
You can use visual cues to help your brain distinguish where one step ends and the next begins.
- Contrasting Tape: Apply a strip of high-contrast tape (like white tape on dark wood) to the edge or "nose" of each step. This clearly defines the boundary of the step.
- The Bottom Step Highlight: The very first and very last steps are the most dangerous. Marking these with a slightly different color or a brighter piece of tape can signal to your brain that the transition is coming.
Uniformity Check
If you live in an older home, the stairs may have "settled" unevenly. If you notice that you always seem to trip on the same specific step, it might be worth having a contractor measure the "rise" (height) of each step. If they are inconsistent, structural repairs might be necessary to ensure long-term safety.
Bonus Considerations: Habits for Stair Safety
While the physical environment is the foundation of safety, how we use the stairs also matters. Here are a few "best practices" to keep in mind:
- Proper Footwear: Avoid walking on stairs in loose slippers, flip-flops, or just socks. Sturdy shoes with a rubber sole or "grip socks" with rubberized bottoms are much safer.
- Take Your Time: It sounds simple, but many falls happen when someone rushes to answer the door or a phone. Let the person wait or the call go to voicemail: your safety is more important.
- One Hand Free: Always try to keep at least one hand free to hold the railing. If you have to carry something, try to keep it small enough that it doesn't block your view of your feet.
- Physical Awareness: If you feel dizzy or lightheaded, wait a moment before attempting the stairs. Exercises that improve balance and leg strength (like Tai Chi or simple leg lifts) can also make navigating stairs feel much easier.
Final Thoughts
Making your home "fall-safe" doesn't have to happen all at once. If you're feeling overwhelmed, start with the easiest task: perhaps clearing the clutter or adding a few motion-sensing lights.
Securing your stairs is an investment in your independence. By taking these five steps, you’re not just preventing an accident; you’re giving yourself the confidence to move freely and safely throughout your home for years to come. Remember, the goal isn't just to stay on your feet: it's to feel secure in every step you take.

